Avis Licht

I received my B.S. in Conservation of Natural Resources, from the University of California, Berkeley. After that I studied with the great horticulturist, Alan Chadwick for 2 years. He brought French Intensive organic gardening to its height in Santa Cruz, California and many of his students have gone on to start farms, seed companies, and teach organic gardening. In 1978 I co founded the Commonweal Garden in Bolinas It was an organic farm and teaching center. Since 1983 I've been designing and installing landscapes in California. Edible landscaping is my specialty, but sustainable, native plant, and ALWAYS BEAUTIFUL gardens are what I love to do. After 35 years of gardening and designing gardens, I've decided to share my experience using the internet to reach more people. I hope you find what I have to say, useful, interesting and inspiring. Please let me know what areas you're interested in. Thanks for stopping by.

Apr 102015
 

Get the right tools for pruning your roses

by A. Non Y. Mous

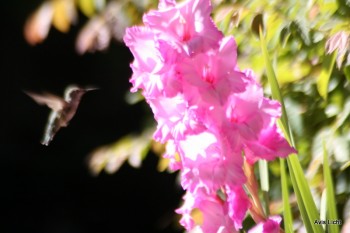
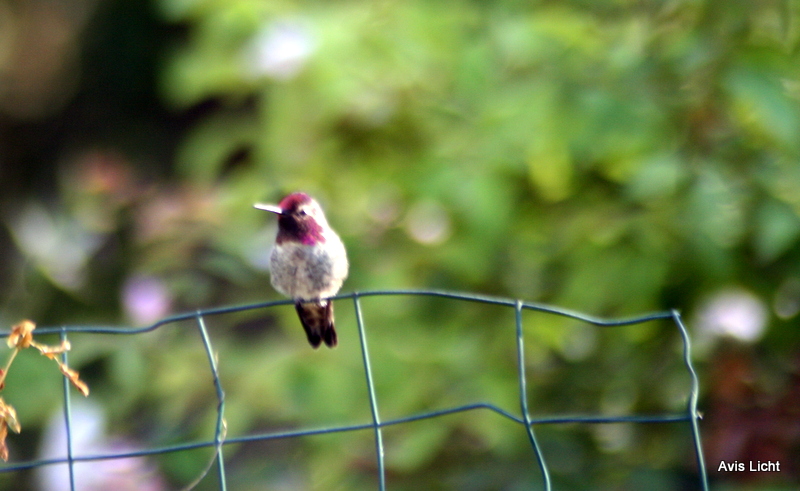
A good friend sent this little gem to me.  I wanted to share it. Especially now that our governor, Jerry Brown, has declared war on lawns due to the extreme drought in California. I hope you enjoy it as much as I did.

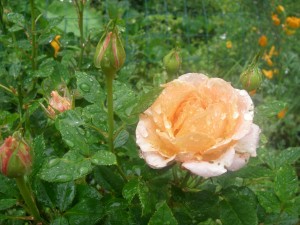
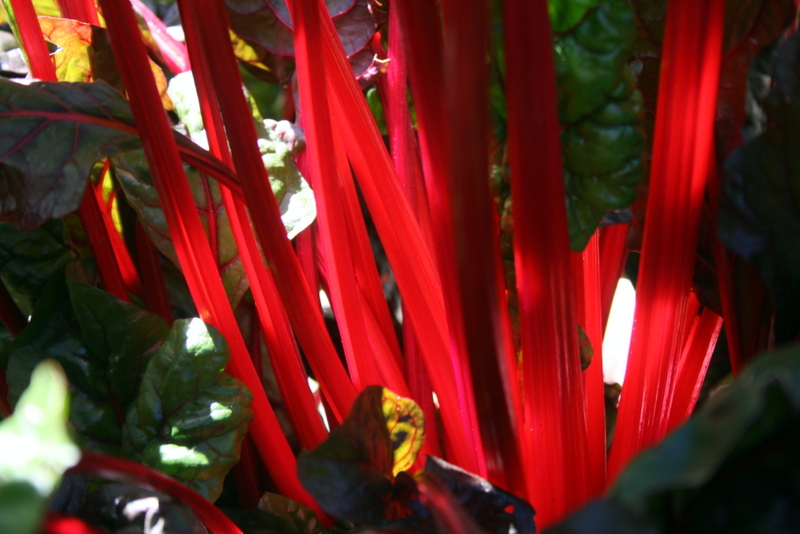
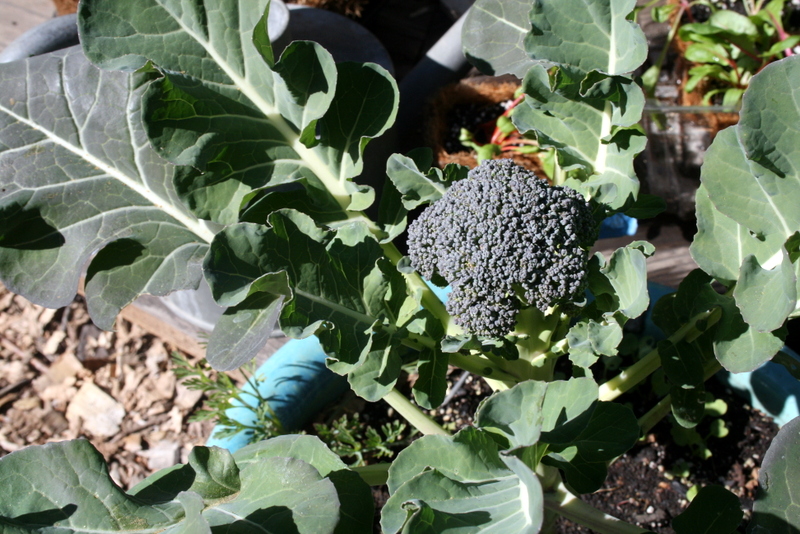
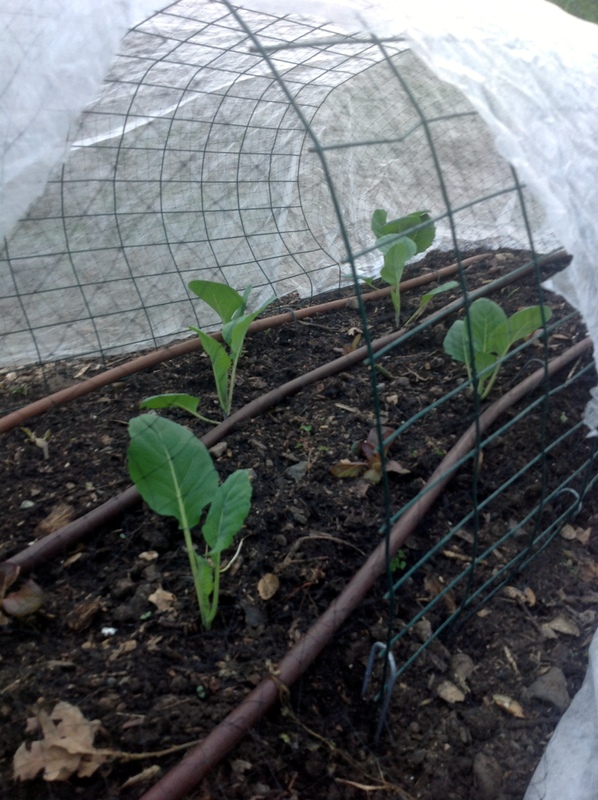
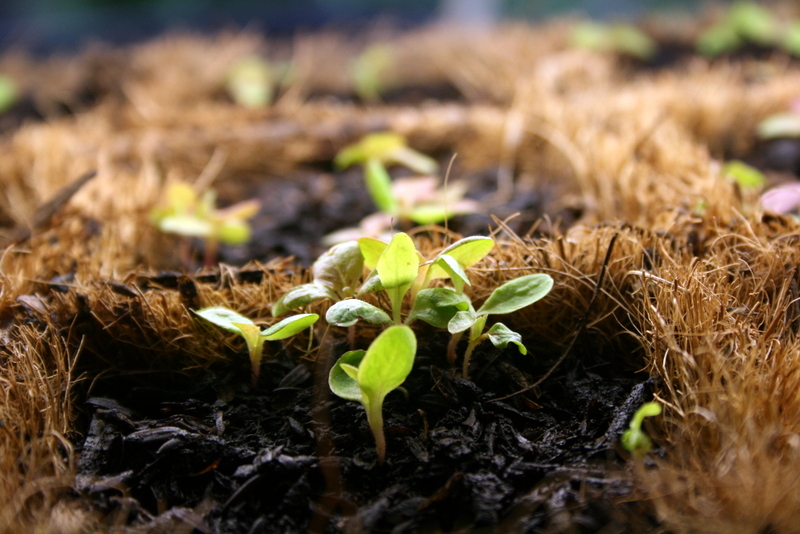
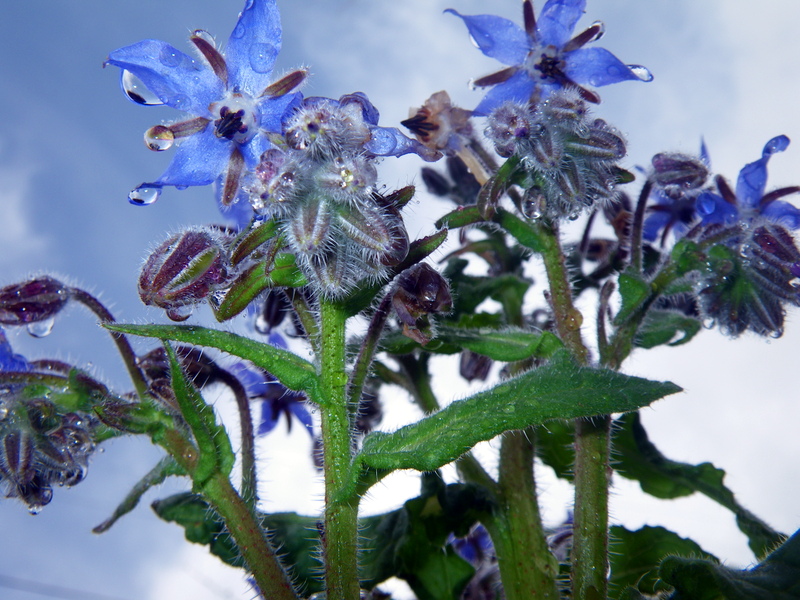
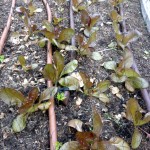
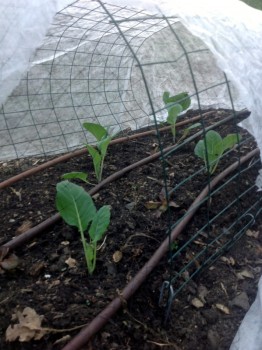
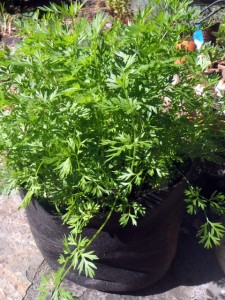
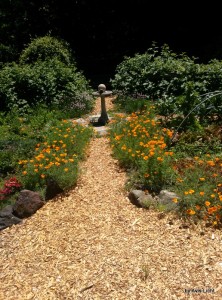
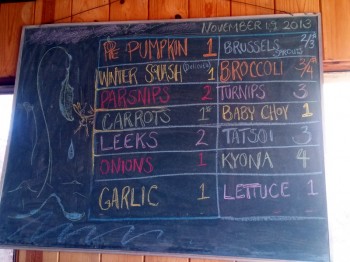
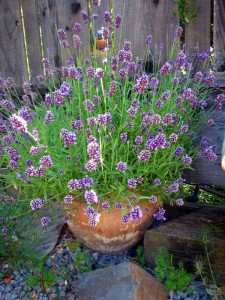
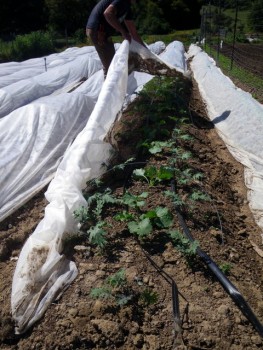
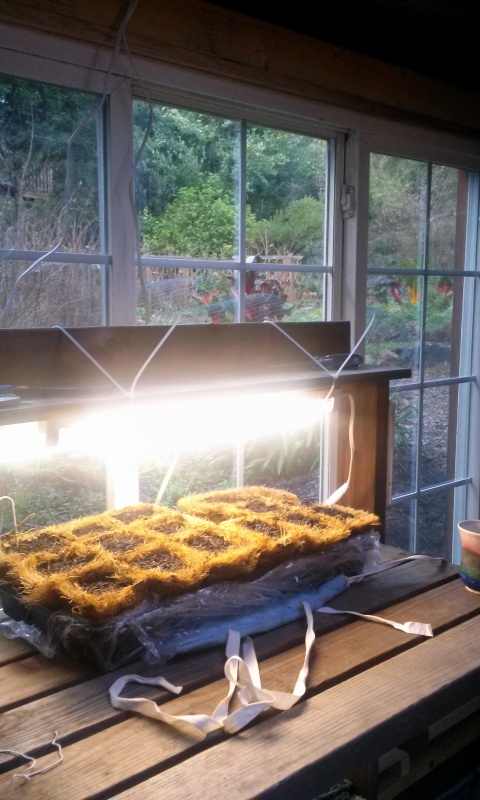
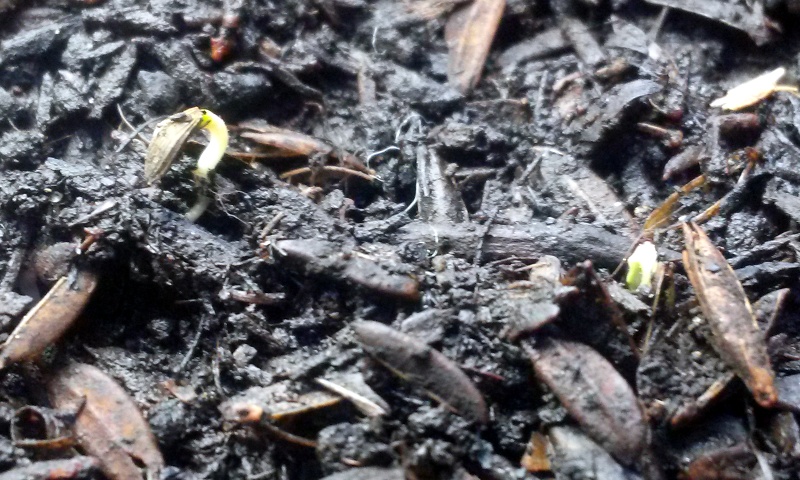
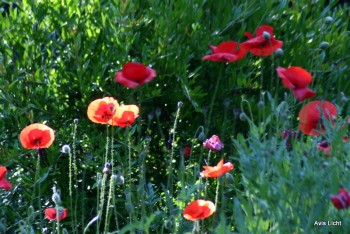
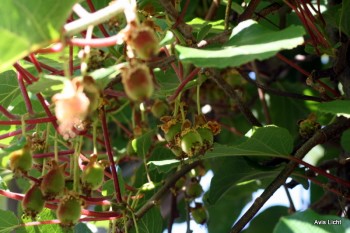
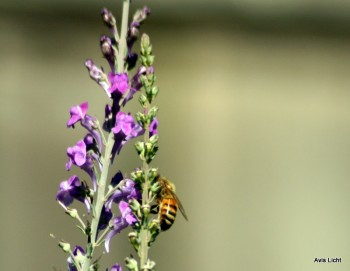
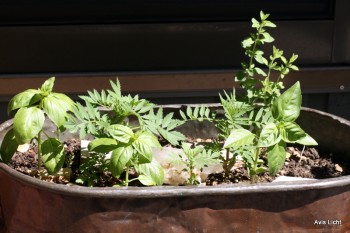
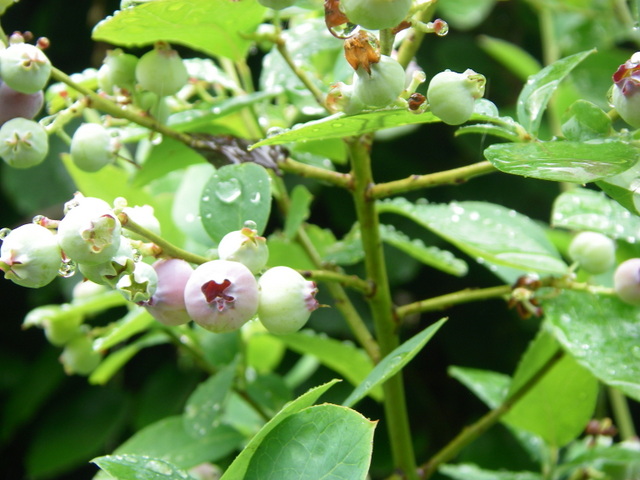
Then if you want to get rid of your lawn, we can talk about replacing it will low water use flowers and shrubs and some delicious edibles. I consult by skype and photos.

Of Lawns and God

GOD: St. Francis, you know all about gardens and nature. What in the world is going on down there in the USA? What happened to the dandelions, violets, thistles and stuff I started eons ago? I had a perfect, no-maintenance garden plan. Those plants grow in any type of soil, withstand drought and multiply with abandon. The nectar from the long lasting blossoms attracts butterflies, honeybees and flocks of songbirds. I expected to see a vast garden of colors by now. But all I see are these green rectangles.

ST. FRANCIS: It’s the tribes that settled there, Lord. The Suburbanites. They started calling your flowers “weeds” and went to great lengths to kill them and replace them with grass.

GOD: Grass? But it’s so boring. It’s not colorful. It doesn’t attract butterflies, birds and bees, only grubs and sod worms. It’s temperamental! Do these Suburbanites really want all that grass growing there?

ST. FRANCIS: Apparently so, Lord. They go to great pains to grow it and keep it green. They begin each spring by fertilizing grass and poisoning any other plant that crops up in the lawn.

GOD: The spring rains and warm weather probably make grass grow really fast. That must make the Suburbanites happy.

ST. FRANCIS: Apparently not, Lord. As soon as it grows a little, they cut it, sometimes twice a week.

GOD: They cut it? Do they then bale it like hay?

ST. FRANCIS: Not exactly Lord. Most of them rake it up and put it in bags.

GOD: They bag it? Why? Is it a cash crop? Do they sell it?

ST. FRANCIS: No, sir — just the opposite. They pay to throw it away!

GOD: Now, let me get this straight. They fertilize grass so it will grow. And when it does grow, they cut it off and pay to throw it away?

ST. FRANCIS: Yes, sir.

GOD: These Suburbanites must be relieved in the summer when we cut back on the rain and turn up the heat. That surely slows the growth and saves them a lot of work.

ST. FRANCIS: You aren’t going to believe this, Lord. When the grass stops growing so fast, they drag out hoses and pay more money to water it so they can continue to mow it and pay to get rid of it.

GOD: What nonsense. At least they kept some of the trees. That was a sheer stroke of genius, if I do say so myself. The trees grow leaves in the spring to provide beauty and shade in the summer. In the autumn they fall to the ground and form a natural blanket to keep moisture in the soil and protect the trees and bushes. Plus, as they rot, the leaves form compost to enhance the soil. It’s a natural circle of life.

ST. FRANCIS: You’d better sit down, Lord. The Suburbanites have drawn a new circle. As soon as the leaves fall, they rake them into great piles and pay to have them hauled away.

GOD: No. What do they do to protect the shrub and tree roots in the winter and to keep the soil moist and loose?

ST. FRANCIS: After throwing away the leaves, they go out and buy something which they call mulch. They haul it home and spread it around in place of the leaves.

GOD: And where do they get this mulch?

ST. FRANCIS: They cut down trees and grind them up to make the mulch.

GOD: Enough! I don’t want to think about this anymore. St. Catherine, you’re in charge of the arts. What movie have you scheduled for us tonight?

ST. CATHERINE: “Dumb and Dumber,” Lord. It’s a real stupid movie about . . .

GOD: Never mind, I think I just heard the whole story from St. Francis.  Source: Unknown

Edible landscaping

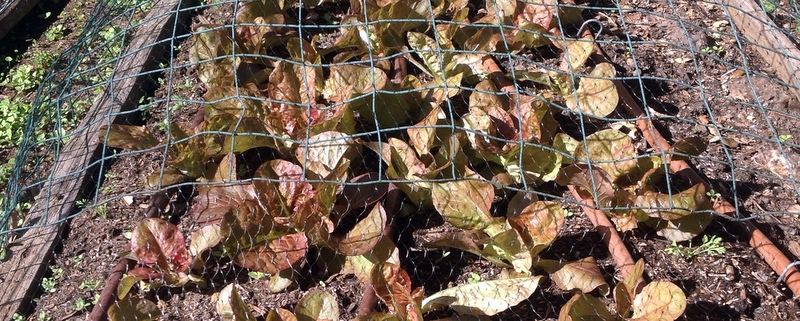
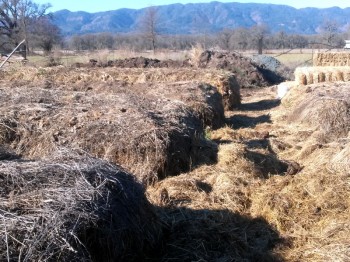
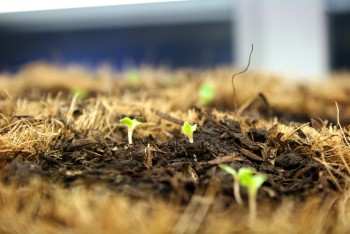
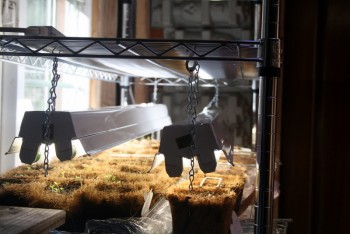
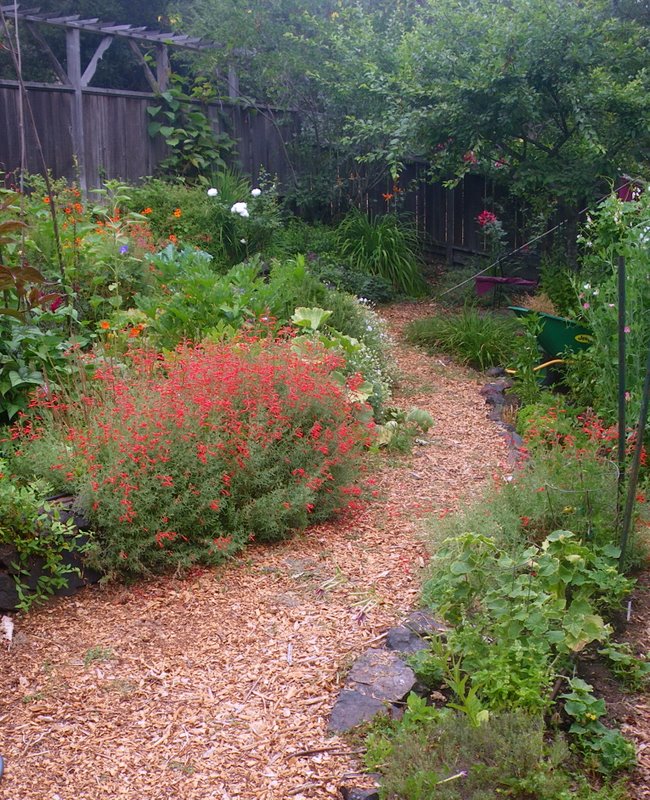
This was a lawn and now it’s not.

Mar 202015
 

Rose in the Rain

by Avis Licht

I have many favorite times of the year in the garden. What’s looking beautiful, (Roses in late Spring) what smells great, (Lilacs and Jasmine in early Spring), what’s ripe (everything in every season!), how the ground smells after a rain. Almost every day brings something new to enjoy in the garden. BUT, I have to say the Spring Equinox holds the most promise and excitement for me.

After the dark and cold of winter, (which was not very dark or cold this year), the excitement of Spring, with its promise of buds, new leaves, green hills, even the weeds jumping for joy out of the earth, holds a special place in my heart.  If ever there was a time for Hope, this is it. The sun rises a little earlier each day and sets a little later. There is more light, more growth, more Potential – for the garden and for us. Change happens in spite of us, and sometimes hopefully, because of us.

Here are a few photos from my Equinoxial Garden. HAPPY SPRING.  Let’s get growing!

Douglas Iris

This Douglas Iris is native to the California Coast. I love it.

Lettuce

Marvel of Four Seasons Lettuce – under protection from the birds.

Chard Stalks

Rays of red light are rainbow chard stalks

Broccoli

Broccoli in a pot. Even the smallest patio can have beautiful vegetables.


row cover and drip irrigation

My broccoli babies. In warm weather you can cover your beds with row covers, and irrigate with drip irrigation

Lettuce seedlings under grow lights

Seedlings get started early under grow lights.


Borage in the rain

Borage in the rain


Mar 172015
 
Lettuce and drip irrigation

by Avis Licht

row cover and drip irrigation

In warm weather you can cover your beds with row covers, and irrigate with drip irrigation

California is in its fourth year of devastating drought. All of us need to pay attention to our water use. But this does not mean that we have to give up growing some of our own food. Quite to the contrary, we can grow fruit and vegetables with much less water at home than large scale agriculture.

I have just come back from a road trip that took me to the east side of the Sierra Nevada mountains and then south to the Kern River and across the San Joaquin Valley, the agricultural center of California. It was an eye opener for many reasons.  Owens Lake held significant water until 1924, when much of the Owens River was diverted into the Los Angeles Aqueduct, causing Owens Lake to dry up.[2] Today, some of the flow of the river has been restored, and the lake now contains a little bit of water. Nevertheless, as of 2013, it is the largest single source of dust pollution in the United States.[3] 

To learn more about this read Cadillac Desert by Marc Reisner. Each action we take to conserve water, DOES make a difference.

We saw large reservoirs that were at 5 percent of capacity. Nearly empty. We saw farmers using huge machinery to take out fully grown orange trees and throw them on the ground to die because they don’t have enough water for irrigation. It was unbelievably sad to see.

But there are ways for you to grow food, that are water conserving and healthy for the environment and for you.

Here are 5 easy ways to conserve water for your garden and grow delicious food. Good for you and good for the earth.

1.Prepare the ground by loosening the soil and adding humus, in the form of compost and/or manure. The quality and health of the soil is vitally import to the health of your plants. Compacted soil will not absorb or retain water very well. This is a very underrated activity for water conservation. Building raised beds with wood or stone and then filling with organic topsoil is one way to do this. Another way is to dig the soil and add humus.

Small vegetable garden

Raised beds make for a healthy soil

2. Create paths and walkways through your garden. DO NOT WALK ON YOUR BEDS! I mean it. The fastest way to ruin your soil is to walk on it and compress it. You remove the air pockets and prevent air and water percolation. Try it. Step on the ground and water it. It will puddle and then most of the water will evaporate. Trust me on this.

3. Mulch, mulch, mulch.  Oh, and did I say mulch? Yes, this makes a huge difference in the evaporation rate of water through the soil surface. There are many kinds of mulch. Read about them here.

4. Plant some of your smaller herbs and veggies in pots and containers. When a pot is close to the house, it is easy to remember to water and you can use the left over water from the sink, or the shower.  I have had great success with herbs, carrots, lettuce, and peppers in containers. You can use self watering containers that let you go away for weeks at a time without worrying about your plants drying out.

A good harvest in a small place, with very little water.

A good harvest in a small place, with very little water.

5. Drip irrigation is the easiest and uses the least water of any method of irrigation. Done well, it puts the right amount of water directly to the roots of the plants and has the least evaporation rates. Check out the book by Robert Kourik on Drip Irrigation. It’s great. Combine drip with a water controller and weather station and you will be golden for putting the right amount of water on at the right time. Many water districts give rebates on these controllers.

There are other ways to gather, store and conserve water in the garden. These are five easy ways to start. Don’t worry, I’ll talk about more ways to save water in future blogs. Right now, it’s important to get started from the ground up, so to speak.

the water at the top drips down to the plants at the bottom.  Great use of space and water.

The water at the top drips down to the plants at the bottom. Great use of space and water.

Edible landscaping

Enter the Edible Landscape using a PATH.

Feb 252015
 

by Avis Licht

All the good food in a week's box in Live Power Farm's CSA

All the good food in a week’s box in Live Power Farm’s CSA

Last winter I went to visit Live Power Community Farm, in Covelo, California. This farm is part of a movement called Community Supported Agriculture, or CSA, for short. The idea for this model, is that the people who eat the food support the farmers by guaranteeing them a fee for the food every week, so that the farmer is not left out on a limb of growing and then not knowing who will buy their food.  This model shares the risk involved with farming and allows the farmers to get on with their job of growing the best food possible.

Live Power Community Farm, the first CSA in California, is a unique model of how to sustain a farm through the power of relationship, community and a transformative economic model.  In effect, the community of people eating from the farm are not simply buying food, but also partnering with the farmers to sustain the farm. They deliver to the San Francisco Bay Area from May to November.

  They write: 
If you would like to be a part of this vibrant community farm, there are harvest shares available for the coming season.  The CSA season begins May 9th, 2015 and continues everySaturday till November 21, 2015.  Live Power’s vegetables are biodynamically grown on carefully husbanded soil kept healthy and fertile with compost generated on farm from the farm’s own livestock and crop residue. Water is pumped with a 30kw PV system and soil tillage is done with Belgian draft horses. This results in high quality food and a very low carbon footprint for our earth. Where else can you get vegetables that have been grown without a tractor?  Keep Live Power’s horses employed, join the community! 
 
Horse drawn plows

Using draft horses and old fashioned plows, the Decaters, gently work the soil.

And did I mention: all of the vegetables taste fantastic!  They’ve been picked usually less than a day before they arrive in your basket.  You get to try new foods and always eat what’s in season.  Particularly rewarding, you and your children can get to know the farmers and can even visit the farm (located in Covelo, Mendocino County).

Gorgeous, beautiful broccoli, fresh from the farm to you

Gorgeous, beautiful broccoli, fresh from the farm to you

How does it work? You sign up for a share. You will then be grouped into a cluster with others that live near you.  Each cluster sends one person per week to the sort, which will take place at the Waldorf High  School in San Francisco this year.  From 8:00 – 9:00 a.m. on Saturday mornings, the sort group joins together to distribute the vegetables and fruit for all members. The sort is a fun, community-building event. After the sort, each sorter delivers the baskets to the other families in their neighborhood, and most of the rest of the 29 weeks their basket will be delivered to them by the rest of the members in their cluster  
 
Each share is responsible for doing the sort about 5 – 6 times per year.  Some families split a share, meaning picking up baskets filled with veggies from our porch every other week and going into the City to sort 2 – 3 times per year.

For a list of the projected and actual quantities and varieties of vegetables received last year, please go to http://www.livepower.org/csa-overview/bay-area/ and look under the Live Power Offerings.  Also, attached is a list of prices.

If you have any questions, please feel free to call one of the delightful farmers, Gloria Decater, at (707) 983-8196 or livepower@livepower.org or one of the SF Bay area members, Amy Belkora at 415-596-2866 or abelkora@gmail.com  
Row after row of compost, from their farm, feeds the soil and powers their food.

Row after row of compost, from their farm, feeds the soil and powers their food.


Feb 172015
 

by Avis Licht

An organic gardener’s success is based on a few basic necessities. I think the health and quality of one’s soil is right at the top of the list. After that comes sufficient sunlight, appropriate water and healthy plants.  Today I want to talk about some simple ways to fertilize your garden and improve your soil’s growing  capabilities.

Compost and mulch make a beautiful cover for the sil

A beautiful garden grown with compost, manure and mulch

An organic fertilizer refers to a soil amendment derived from natural sources that guarantees the minimum percentages of nitrogen, phosphate, and potash. These include plant and animal by-products, rock powders, seaweed, inoculants, and conditioners.  These minimum amounts can be very small. For example, horse and cow manure  often have less than 1% nitrogen by weight. This is not to say it’s not a good fertilizer, it is. But depending on your plant’s needs, you may need to add other sources of nitrogen.

One word of caution. An organic fertilizer means it comes from natural materials, BUT it doesn’t mean it’s organic.  Cottonseed meal comes from a plant, but cotton is one of the most heavily sprayed crops.  There will be pesticide residues in cottonseed meal unless it specifically says it comes from organic cotton.  Bloodmeal and bone meal take a great deal of production and energy to produce these fertilizers. Plus you don’t know how the animals were raised. It can seem very complicated to stay fully organic. When possible ask for the source of your fertilizer.

Different manures have different nutrient values based on the animal, what it ate, how much bedding is in the manure and so on. In another post I’ll talk about the relative merits of different manures. For now, let’s just agree that manure from herbivores that is composted, is a good organic fertilizer. I say herbivores, because we don’t want to use poop from meat eating animals like dogs, cats or humans.  There is risk of parasites or disease organisms that can be transmitted to humans from meat eating animals. For ease of listing, here are Vegetable fertilizers: alfalfa meal, cotton seed meal, green manure, sea weed, wood ash. Animal by-products include: manure, blood meal, bone meal, fish meal, feather meal and bat guano. Mined minerals include: rock phosphate, green sand, gypsum.

compost bin

Compost bin for a family of 4 – 6 people

The easiest fertilizer is compost that you make at home from material in your yard.  But it takes a LOT of material to make a little compost. You’ll probably have to bring in compost or topsoil when you first start your garden. This is not terrible, it just costs money and uses outside resources.  Sometimes we have to do that.

Soil amendments are materials that don’t have a minimum amount of nutrient, like compost.  They can be worked into the soil or laid on top. Amendments are important for the humus they add, the tilth, and aeration of the soil. Without proper soil aconditions, it doesn’t matter how much nutrient you put in.  Roots need air, water and microbial activity, which all comes from adding organic amendments.

Mulch is material laid on the surface and does not add nutrient to the soil until it breaks down over time. Mulch protects the soil from compaction, erosion and keeps the weeds down.  It also conserves water. Even though we don’t call it a fertilizer, it’s a very important part of the garden and soil and plant health.

The Four Major Elements to Fertilize Your Garden:

1. Nitrogen: For Vegetative Growth:  Bloodmeal, Cottonseed Meal, Liquid Fish, Fish Meal, Pelleted Fertilizers, Feather Meal

2. Phosphorus: For Flowering and Fruiting: For fruit, flower, and root development. Use Soft Rock Phosphate. You can also use Bone Meal.

3. Potassium: For Vigor and health. Use Sulfate of Potash or Greensand.

4. Calcium and Trace Minerals: For Health and Resilience: Almost all soils test low in Trace Minerals. Add Compost, Kelp Meal

In previous posts I wrote about legumes, which fix nitrogen and wood ash.  Keep coming back, as I’ll go through the whole list of fertilizers. In the mean time, dig up your beds, or sheet mulch them, and then add compost and/or composted manure.  You’ll be off to a good start.

Feb 062015
 

by Avis Licht

I was going to write about rose pruning, since it’s that time of year in many places. Coming out of winter dormancy and going into Spring is a good time to prune roses and many other deciduous trees and shrubs.  But then I realized that before the pruning comes the tools. Right tools make a HUGE difference in the results of your work. Find great tools in my store: Avis’ Store

Pruning saw

You can make delicate cuts with this saw

When you’re working in the garden, it is so satisfying to have a good tool. Whether it’s for pruning, raking or digging, you want your tool to feel strong and make the work easier. It makes no sense to get a cheap tool that doesn’t last and doesn’t do the work

Since there are myriads of tools out there, I’d like to share with you my favorites. It’s also nice at this time of year to give a well made tool as a present.

Fiskar pruning shears

A well made tool is a great delight

Pruning tools include, hand pruners like this Fiskar:

When looking for a hand tool, you want it to fit into your hand comfortably, be easy on the wrist, and be adjustable at the blade, so that you can loosen or tighten it.

And don’t forget your hands. The best gloves for pruning roses and other dangerous plants with thorns are long sleeved rose pruning gloves.

Thick gloves with long sleeves really protect your hands and arms.

Thick gloves with long sleeves really protect your hands and arms.

Protect yourself. Wear gloves.

Protect yourself. Wear gloves.

Hand saws are important for pruning branches larger than an inch in diameter.  You need to make clean cuts. And you don’t want the blade to start getting loose.

For Fall pruning, loppers are also an important tool. You want the handle long enough to create leverage but not so heavy that you can’t use it for extended periods of time.

Loppers

Strong enough and not too heavy. Excellent for Fall and Winter pruning chores.


And finally for those hard to reach places you need a long handles pruner. You can extend the handle, prune or saw with the attached blade. This is helpful for branches where you don’t actually want to climb the tree.

The hardest part of pruning overhead, is looking up. By this, I mean that you can get a serious crick in your neck when working overhead. Be sure to take plenty of breaks and stretch.


Pruners for edible landscaping

Jan 312015
 
Seed sowing medium

by Avis Licht

1. Prepare your table for sowing: Potting mix, containers for sowing, seeds and labels.

I use organic potting mix from my local nursery. I try to use either bioegradable pots, like these coconut fiber pots, or reuse the plastic ones over and over. I save my cans and plastic containers from the grocery store to use for either sowing or transplanting.


IMG_0758

2. Choose your favorite seeds that will grow in your climate, and make sure you are sowing at the right time:

It’s late January, and I live in Northern California, where we can grow many vegetables year round.  It’s a good time to start Broccoli, Cabbage, Cauliflower, Chard, Kale, Kohlrabi, Leek, Onion, Spinach and Peas. In my hand you can see Chard seed. As seed goes, they’re pretty big and easy to handle. To get an early start, I sow them indoors in pots for transplanting in late February. You can also sow Chard directly in the ground when your soil warms up a bit.

IMG_0759


3. Fill your pots to the top, then place a few seeds on the surface. My finger is pointing to the seed. For chard, which is fairly large, I will push the seed into the soil so that it gets a firm seating into the soil. Then cover lightly.


IMG_0761

4. Label your pots with the name and date of sowing. Believe me, this is an important step, as you will probably not remember what you sowed or when you sowed it.

IMG_0763

IMG_0764

IMG_0765

Push large seeds firmly into the soil. Peas can go half an inch deep.

IMG_0766

Leeks are small seed and hard to handle.  I use this seed sower which gently lets out seeds a few at a time.  Because leeks are small seedlings, you can sow many in a small pot. When they are ready to be transplanted you can easily pull them apart. More on transplanting later.

IMG_0768

Here’s Broccoli. It’s a favorite in our household and I like to grow a lot of it. It’s a small seed. I put 5 seeds in a 4 inch pot.  When they’re about 3 inches tall I take them out of the pot carefully and transplant them.

IMG_0771

Basil seed looks a lot like broccoli only smaller. If you are using small pots for sowing, then sow 2 seeds per pot. That way you can figure that every pot will have at least one plant.

IMG_0772

Here’s kale. It’s become very popular lately. There are many kinds of kale. Personally, I like it cooked.  It’s a little tough raw.  I really had a good laugh the first time someone told me I had to massage my kale for salad making! But it’s true.  If you rub your kale with a little salt and olive oil it gets more tender.

IMG_0773


5. Gently water in your seeds. You want the soil moist, but not soaking wet. Keep the surface moist so that the seeds don’t dry out.  As soon as they germinate you can cut back on the water a little.

6. Make sure your plants get plenty of light. I use flourescent lights in a shed to make sure they’re strong and sturdy.

Be sure to read more about lights and seedlings in this article to find out which lights and how long to leave them on.

Seeds

As soon as your seed germinates it needs plenty of light


Well, that just about takes care of the steps to successful seed sowing.  Don’t be afraid. Growing your own plants from seed is one of the most satisfying and magical parts of gardening. If you’re having troubles or need advice, just go to the Ask Avis page and let me know what’s up. Or leave a comment or suggestion at the bottom of the page.  I look forward to hearing from you.


IMG_0774

Jan 292015
 

Red Poppies

by Avis Licht

The historic drought we are having in California has us thinking deeply about how to use less water in our daily lives, including, or maybe, especially in our gardens.  My passion in the garden is growing food beautifully.  Many of my clients and friends have said they won’t be putting in a vegetable garden due to the drought.  But this is not necessarily the best or only way to reduce our water uses.  Last summer, I was tempted to reduce the size of my veggie garden, but couldn’t bring myself not to plant it.  By careful observation of weather and soil conditions, and excellent use of drip irrigation, I managed to reduce my water use by 30 percent and INCREASE my yield. It’s all about paying attention.

Here are five easy to follow and powerful methods for reducing water use:

1. Soil: Incorporate compost and or manure into your soil and then mulch it.

The more humus you have in your soil, the better water and air retention you have – the healthier your plants will be and you will use LESS water! Read this post to learn more about compost. Here’s information on mulching.

Worms make beautiful, healthy soil

A little kitchen leftovers, a few worms, a small box, and voila – beautiful soil.

2. Sun: Put the right plant in the right place.

This may sound obvious, but many people do not actually notice the path of the sun in different seasons. Put sun loving plants in full sun, and partial sun plants in protected areas.  By watching where the sun is and where shadows fall in different seasons you will find that you are much better prepared in properly plant placement.  In the winter the sun is much lower in the sky than in summer and will cast different shadows.

lavender in the Edible landscape

Lavender

3. Wind: Wind causes plants to transpire more water.

The windier the day, the more water the plants use.  Consider different methods of wind protection including: fences, hedges, buildings, and row covers.

row covers

Row covers protect from wind, frost, sunburn and even insect damage

4.Drip Irrigation: The right irrigation system will make a huge difference in the amount of water used.

Drip irrigation needs to be done correctly to keep the plants healthy.  You need to divide your garden into different zones, so that plants with similar needs are together. Of course, you will then have to set the timer for the right amount of time for the water you need. And yes, this will take some time to figure out.  There seems to be no end to the information necessary to make good choices. Robert Kourik has written a wonderful book on best drip irrigation practices. You can buy it straight from the author.

Drip irrigation, raised beds and intensive planting

Growing food in well prepared beds, with drip irrigation and intensive planting use water wisely

5. Smart Controllers: Weather controlled irrigation timers automatically adjust for temperature and rain.

Not everyone can get a smart controller, but if you live in drought areas, you might really want to think about getting one of these. Some controllers operate from a site based weather station that comes with the timer or from a satellite feed. They read the temperature, the rain fall and automatically adjust the watering amounts.  You need to program your controller by hand for the optimum water needs of each station, then the timer can adjust the times.

This Hunter is what I use most often for my clients.  It is easy to set up and very reliable:

These are the easiest and most effective ways to start saving water and keep your garden healthy and strong.  Of course, there are many more parts to keeping the garden growing sustainably that I’ll talk about in future articles, including the pros and cons of rain water catchment, grey water and container planting.

Stay tuned and keep coming back for more.

Jan 272015
 

by Avis Licht

sowing seeds

Sowing seeds and germinating in the kitchen window

Seeds, though small in size are a force of nature.  They carry the future in their tiny form. All the information to grow a might oak is in that tiny acorn.  In nature, every seed is slightly different and allows for the possibility of change:  sometimes better, sometimes worse than it’s parent.  Depending on the conditions after sprouting, a seed can grow strong and healthy or be weak. Like a person with a strong immune system, a healthy plant can withstand disease and attack by pests.

Seed packets

Get seed from organic, reputable seed companies


I’m not going to get into a discussion here about hybrid seeds or GMO, but allow me the premise that healthy plants produce healthy seed and it is to your benefit to choose seed from reputable companies that sell healthy, organic seeds.

It is then up to you to make sure you give those seeds the right growing conditions: from the soil you use to plant them, to the sun and warmth for sprouting. In this post you’ll learn how to mix your soil, sow seed, cover it and water it. It sounds simple, and is, but there are a few basic things you can do to assure success.

earthworm castings

Earthworm castings are a wonderful medium for starting seeds

Soilless seed starter medium

Clean, light medium for starting seed is a good idea


1. Choose your seeds: Pick the right plant for your climate it and sow it at the right time. Pick your favorite veggies and see if they are appropriate for your climate and the size of your garden. You can do this by googling your plant, reading seed packets, or talking to your gardening neighbors.  They often have the best information. In the U.S. you can get a lot of information at this site, SmartGardener.com by typing in your zip code.

2.Mix your seed starting medium: Seeds have enough energy in them to germinate and grow their first true leaves.  After that they need some, but not a lot of nutrition in their sprouting medium.  We can call this needing breakfast.  I mix my own compost or earthworm castings in with a medium like the Seed Starter from E.B. Organics. This starter is sphagnum moss, perlite, and gypsum.  It is clean, light and has no real nutrient.  Seeds will germinate and send roots quickly into the medium.  By mixing it with a little compost or earthworm castings you will add “breakfast”.

filled seed containers

Put the seed medium into container and tamp it down.

Seed starting medium - mix it up a little

Mix different materials in a container


3. Sow your seeds on the surface.  In the small six packs (recycled, of course from previous use), I put 2 seeds per section.  In the larger 2 inch pots I put 4 seeds per pot, and in the 4 inch container I put 6 – 8 seeds.  I use the larger pots for quick germinating larger plants, like chard and broccoli. I use the smaller pots for lettuce, spinach, bok choy and smaller plants. Lightly cover the seeds.  The smaller the seed, the less soil on top.  Your seed packet will tell you how deep to cover your seed.

Seed sowing under lights

Using flourecent lights and a heating pad, seeds get an early start

4. Lightly water your seeds.  A heavy  flow of water will displace your seeds. Use the lightest setting on your watering wand, a light sprinkling can or a spray bottle.  Be sure that your medium is moist before you put the seed in it.  You want it moist, but not soaking wet. Seeds need to be kept moist until germination.  If they are in the sun, be sure to water them a few times a day.

Lettuce seed

Tiny seeds need to be on the surface of the soil, and watered gently.

Broccoli seedlings

Seedlings this size are ready for planting outside

Next step will be how to prepare your garden beds.  We’ll talk about that tomorrow.

You’re ready to grow wonderful, delicious food in your edible landscape. Whether you have pots on the deck, a few square feet, or an entire yard for growing, only do as much as you can happily take care of. Remember, you’re trying to enjoy this project.

the ornamental vegetable garden

A vegetable garden doesn’t have to be square


Jan 222015
 

by Avis Licht

I never get tired of talking about compost. Those around me might become a little weary of my composting enthusiasm, but when it comes to alchemy and transformation, compost is right at the top of the chart. To the list of amazing contributions composting makes to the soil and plants, you can add that it is a mighty weapon against climate change. I am not making this up.

Worms make beautiful, healthy soil

A little kitchen leftovers, a few worms, a small box, and voila – beautiful soil.

An experiment in Marin County has uncovered a disarmingly simple and benign way to remove carbon dioxide from the air and potentially turn the vast rangeland of California and elsewhere into a means of sequestering carbon into the soil and mitigating the effects of global warming.

According to an article in the San Francisco Chronicle in October 2014, if compost from green waste were applied to just 5 percent of the state’s grazing lands, the soil could capture a year’s worth of greenhouse gas emissions from California’s farm and forestry industries.

The effect is cumulative, meaning the soil keeps absorbing carbon dioxide even after just one application of compost. Plants pull carbon dioxide from the air through photosynthesis and transfer a portion of the carbon to the soil through their roots. Soil microorganisms then turn the carbon into into a stable form commonly known as humus.

This not only sequesters the carbon but improves the soil’s fertility, boosting plant growth and capturing more carbon while also improving the soil’s ability to absorb and retain water.

To find out more about sequestering carbon through rangeland composting, read the full article here.

This illustration comes from the Marin Carbon Project website. Find out much more about carbon farming  and it’s immense possibilities for doing good.

And don’t forget to compost your own green wastes at home!

Need some suggestions? Read about them in my blog: Easy composting.

Need a compost bin? Get one right here: Composting Resources.

Jan 192015
 

by Avis Licht

If you’re in the winter doldrums, then now is a great time to start planning your Spring garden. From sowing seeds, to picking the right spot for each plant, composting, and getting your soil ready  for planting, I’ve got it covered in this easy to read booklet, The Spring Garden Made Easy.

Vegetable Garden

Zauschneria, edges an inviting path into the edible garden.

Get my book  and  be ready for Spring!


It’s that time of year – time to start the Spring Garden.  If you want to know what to grow in your own climate, how to start seed and how to make compost, be sure to get my e book.  Under $5 and you get all the information I learned in 40 years of gardening.  Well, maybe not all, but probably the best parts.

Robert Kourik, author of Your Edible Landscape – Naturally writes:
“Avis has condensed over four decades of gardening skill into one information-packed handbook. This is important reading for the beginning gardener. You will skip making many mistakes by reading this attractive handbook first.”

If you would like a simple, easy to follow handbook on starting your Spring Garden, then you’re in luck. I’ve written a concise, 20 page manual for the novice gardener. Based on 40 years of gardening experience I’ve winnowed down the information to make it a straight forward process.Only $4.99.  You can’t afford not to have this helpful guide to start your Spring Garden!

Spring Garden Table of Contents

Table of Contents

Spring Garden Made Easy

The first book, The Spring Garden Made Easy, is aimed at helping you start out, one step at a time to be successful and inspire you to keep going. Yes, there may be set backs – snails, earwigs, gophers, deer, they all want a part of your garden. Learn to how to keep them from getting too much and even how to share. Click on the Buy Now button above  and you can download it immediately. My hourly consultation is definitely more than $5, which is the cost of the book.  Since I can’t be with all of you in your garden, take this opportunity to pick my brain by buying the book.  Be sure to sign up for the blog as well, it’s free and it’s got lots of information.  I always love to hear from my readers.  Leave me a comment and let me know how your garden grows. In the joy of gardening, Avis

lettuce

Mixed lettuce varieties

Jan 152015
 

by Avis Licht

Help your seeds with grow lights

If you don’t have enough light in your house you can use these simple grow lights


When starting seeds early in the season, it is usually too cold to start them outside.  That means, they are either in the house, cold frame or greenhouse.  It’s a rare house that has enough sunlight to start seedlings indoors and not have them get leggy.  It’s an even rarer house that has a greenhouse or cold frame.

Light for starting seeds:

Most seedlings require 14 to 16 hours of direct light to manufacture enough food to produce healthy stems and leaves.  The characteristic legginess that often occurs when seedlings are grown on a windowsill indicates that the plants are not receiving enough light intensity, or enough hours of light.

1. Set up a stand with fluorescent lights over your seed trays. 2 – 4 inches is the optimum amount of room. As they grow you will need to lift them up. 

When growing seedlings under lights, you can use a combination of cool and warm fluorescents, or full-spectrum fluorescent bulbs. Incandescent bulbs produce too much heat in relation to the light given off. They also lack the blue-spectrum light that keeps seedlings stocky and dark green. The most efficient light is a T – 5 or T – 8 bulb that comes in 2 and 4 ft lengths.

2. Get a timer for your lights and set it for 12 – 14 hours. That sounds like a lot, but that’s what it takes to keep your plants strong and sturdy.


To get excellent pots, potting soil, greenhouses and more, go to my store and you can find what you need easily.

3.Temperature for starting seeds:

The temperatures for optimum germination listed on seed packets refer to soil temperature, not air temperature. Although seeds can vary drastically, most vegetable seeds need a warm soil temperature around 78 deg. F.

If the soil is too cold, seeds may take much longer to germinate, or they may not germinate at all. To provide additional warmth, you can use a heat mat or keep them in a warm room until the seeds germinate. Just be sure to get your seedlings to a sunny window or under lights within 24 hours of seeing little sprouts emerging through the soil surface

.

After germination, most seedlings grow best if the air temperature is below 70 degrees F. If temperatures are too warm (over 75), the seedlings will grow too fast and get weak and leggy. Most seedlings grow fine in air temperatures as low as 50 degrees, as long as soil temperature is maintained at about 65 to 70.

 Give them light and warmth and keep them moist, and your seeds will work hard on your behalf. At the risk of repeating myself, the best thing you can do in the garden is to observe your plants.  Keep an eye on them and they’ll let you know if they’re happy.

sowing seeds

Direct sow into the ground for best results

Plants with taproots like beet and carrot need to be sown directly into the ground

Jan 142015
 

by Avis Licht

seeds

Seed sizes

It’s January, and still feels like the middle of winter.  Of course, it is the middle of winter in many places.  But in Northern California, where I live,  Spring is right around the corner, and it’s time to start not only thinking about what to plant, but to start sowing seeds now.  I start most seeds indoors at this time of year.  Plants like Broccoli, Cauliflower, Cabbage, Kale, Chard and others like cool weather, but not the damp cold to germinate.  So January is a good time to get them started indoors and when they’re ready to transplant into the garden beds in Feb, they’ll be large enough to deal with the weather that early Spring brings.


If you’re thinking about your Spring garden and what to sow, you’re probably wondering if last year’s leftover seeds are good to sow this year.  Don’t waste money buying new seed if what you have is good. To be sure, you don’t want to waste time by sowing bad seed. Here is a simple method to see if your seed is still viable.

chard

Chard, one of the easiest and best vegetables to grow from seed in the early Spring.


1. Moisten a paper towel and place 10 to 20 seeds of one variety on it. Roll up the towel and place it in a plastic bag labeled with the seed variety. You can keep it on the kitchen counter at room temperature while you are testing. Check the seeds after 2 or 3 days, then every day for a week or two if needed; different varieties have different timing for germination. Be sure to make sure the towel stays moist. Count the number of germinated seeds and divide them by the number of seeds tested. This will give you the germination percentage. If 8 seeds out of 10 have germinated – you have 80% germination. Less than 80% germination means your seeds still have some viability but that you will need to sow them more thickly in order to get a good crop. Seeds with less than 50% germination may not be worth the trouble and you can go seed shopping!

If you do need to buy seeds try Seeds of Change. They are a great organization and provide organic, non – GMO seed. I definitely recommend buying their seed. You can do that by clicking here: Seeds of Change

2. Store unused seeds in a cool, dry place to ensure their maximum germination rates. I use empty herb and seasoning bottles to store my seed.  I try to collect as much of my own seeds as possible. The glass bottles are labeled and I can also see the seed inside to remind me what I have.

Here are some good Seed Catalogs – Resources.

Here’s a great chart that Roger Doiron from Kitchen Gardeners International posted, which came from Colorado State University. It covers many common vegetables for your home garden. Of course, viability also depends on the conditions that the seed has been stored in. Too wet, too cold, too hot, too dry – all these can affect your seed germination, BUT, generally you can follow the chart.

Tomorrow I’ll talk about starting plants with grow lights.

Help your seeds with grow lights

Jul 282014
 

by Avis Licht Hummingbird I love watching hummingbirds zoom, dive, drink and zip around my garden. Not only are they beautiful and fanciful, they are an integral part of the health of our gardens.  While researching information on hummingbirds I came across a great article on the Las Pilitas website, which is a source of California Native Plants. “Hummingbirds prefer the native species (commonly Sambucus,Ceanothus and Arctostaphylos) for nesting. They prefer a mixed diet of nectar from multiple sources for their daily diet. I read an article that showed a correlation between nectar (pollen) proteins and hummingbirds’ immune systems. “So, although they can live on bird feeders they probably can not survive on bird feeders (sugar diet) as you’re messing with their immune system and, since there is no pollen in sugar water, their reproductive ability. Basically, the bird feeders are making winos out of proud birds. If they attack you, give them a break, it’s the ‘Twinkie’ syndrome.

Hummingbird going for the nectar from Zauschneria californica, the California Fuschia

Hummingbird going for the nectar from Zauschneria californica, the California Fuschia

If you’re tempted to go out and buy a bird feeder for these lovelies, think twice.  I personally feel that it’s more work to keep a feeder full, clean and safe, than planting some easy care flowers like the Zauschneria, above. From the Las Pilitas website: “Just plant, Zauschneria species, California fuchsia everywhere (well maybe not everywhere, but in a lot of places. avis.) in your garden. The California fuchsias can flower from July through December. They flower and flower, trim off the old flowers, and they flower more. They are excellent in rock walls. California fuchsias can tolerate garden water as well as being very drought tolerant. These flowers come in white, pink, and red with gray or green foliage. The vary in with from a couple of inches tall to a couple of feet.”

this is Salvia greggii, Variety, San Antonia.

This is Salvia greggii, Variety, San Antonio.

The Salvias are easy to grow, have low water requirements and are long blooming. Hummingbirds love them. To find out lots more about their life cycle and plants they enjoy, read this article from Las Pilitas.

the high wire act

Resting is important to hummingbirds as they have such a high metabolism.

Shady resting spot

Shaded branches in nearby trees are perfect for hiding from predators and resting between dive bombs on the flowers.

Vegetable Garden

Zauschneria, edges an inviting path into the edible garden.

Hummingbirds need fresh water, shelter and safe nesting sites in order to thrive, in addition to flowering plants. The greatest diversity of hummingbird species is found in areas where plant life is more diverse, which in turn leads to more diverse insect life – both plants and insects are critical food sources for hummingbirds. As you can see in the photo above, of my garden, diversity is paramount. Trees, vines, shrubs, flowers, annuals, vegetables, are all designed into a small area. A well thought out form is important for the visual enjoyment of the garden. Read this article for design elements in the edible garden.

IMG_0339

Resting hummingbird on a tomato cage

Habitat conservation is critical for protecting all hummingbird species. Creating a backyard habitat can nurture local hummingbirds as well as provide a rest stop for migrating hummingbirds, but if those migrants have nowhere safe to go, your efforts could be useless. Supporting conservation programs in tropical regions where hummingbirds are most diverse is critical for preserving these beautiful birds, and many birding organizations such as the American Bird Conservancy, The Nature Conservancy and the National Audubon Society work to preserve habitat in many areas where hummingbirds thrive. By understanding hummingbirds’ habitat needs and knowing what makes a good hummingbird habitat, it is possible not only to enjoy these birds close by, but also to ensure their survival throughout their widespread ranges.

Jun 112014
 

by Avis Licht

In California June is a busy time in the garden.  Some plants are already in and growing, some need to be planted and some need to be sown.

All the highlighted links will lead you to more information on that topic.  There is lots of information here. So come back often.

My broccoli has been setting beautiful heads for the last month and now the side shoots are ready to be harvested.  Chard, carrots, kale, lettuce, strawberries, blueberries and raspberries are all making their colorful entrance to the table. Freshly harvested food makes even the simplest meal a taste treat.

Herbs are the piece de resistance of the garden.  Easy to grow, beautiful, healthy and tasty, they make every meal more flavorful and healthier.  If you only have time or space for one plant, make it an herb. Rosemary, basil, cilantro, parsley, chives, tarragon, oregano, mint – they are easy to grow and add vibrancy and health to your food and to you and to your garden.

In June we really have beauty and bounty - Raspberries by the bowl and lillies.

In June we really have beauty and bounty – Raspberries by the bowl and lillies.

In June, I go out every morning to harvest berries of all sorts for breakfast.  It’s a great way to start the day.

Red poppies in the morning sun.

Red poppies in the morning sun.

I grow flowers not only for their beauty, but because they provide food for bees, hummingbirds, butterflies and other important pollinators in the garden.  The more diverse your garden, the healthier it will be.

Rhodohypoxis

Rhodohypoxis

Be sure to visit my online store if you want tools, seeds, compost bins, gardening gloves and much more.  Whatever you find in my store, I personally recommend.


This hummingbird is going after the nicotiana

This hummingbird is going after the nicotiana

IMG_0079

Chard stalks are beautiful, too.

IMG_0127

I grow many kinds of bee friendly plants.

Red Poppies

Growing herbs in a container near the house is easy and convenient.

Growing herbs in a container near the house is easy and convenient. This planter has basil, oregano, tarragon and marigolds.


© 2011-2024 Edible Landscaping Made Easy With Avis Licht All Rights Reserved