Mar 202015
 

Rose in the Rain

by Avis Licht

I have many favorite times of the year in the garden. What’s looking beautiful, (Roses in late Spring) what smells great, (Lilacs and Jasmine in early Spring), what’s ripe (everything in every season!), how the ground smells after a rain. Almost every day brings something new to enjoy in the garden. BUT, I have to say the Spring Equinox holds the most promise and excitement for me.

After the dark and cold of winter, (which was not very dark or cold this year), the excitement of Spring, with its promise of buds, new leaves, green hills, even the weeds jumping for joy out of the earth, holds a special place in my heart.  If ever there was a time for Hope, this is it. The sun rises a little earlier each day and sets a little later. There is more light, more growth, more Potential – for the garden and for us. Change happens in spite of us, and sometimes hopefully, because of us.

Here are a few photos from my Equinoxial Garden. HAPPY SPRING.  Let’s get growing!

Douglas Iris

This Douglas Iris is native to the California Coast. I love it.

Lettuce

Marvel of Four Seasons Lettuce – under protection from the birds.

Chard Stalks

Rays of red light are rainbow chard stalks

Broccoli

Broccoli in a pot. Even the smallest patio can have beautiful vegetables.


row cover and drip irrigation

My broccoli babies. In warm weather you can cover your beds with row covers, and irrigate with drip irrigation

Lettuce seedlings under grow lights

Seedlings get started early under grow lights.


Borage in the rain

Borage in the rain


Mar 172015
 
Lettuce and drip irrigation

by Avis Licht

row cover and drip irrigation

In warm weather you can cover your beds with row covers, and irrigate with drip irrigation

California is in its fourth year of devastating drought. All of us need to pay attention to our water use. But this does not mean that we have to give up growing some of our own food. Quite to the contrary, we can grow fruit and vegetables with much less water at home than large scale agriculture.

I have just come back from a road trip that took me to the east side of the Sierra Nevada mountains and then south to the Kern River and across the San Joaquin Valley, the agricultural center of California. It was an eye opener for many reasons.  Owens Lake held significant water until 1924, when much of the Owens River was diverted into the Los Angeles Aqueduct, causing Owens Lake to dry up.[2] Today, some of the flow of the river has been restored, and the lake now contains a little bit of water. Nevertheless, as of 2013, it is the largest single source of dust pollution in the United States.[3] 

To learn more about this read Cadillac Desert by Marc Reisner. Each action we take to conserve water, DOES make a difference.

We saw large reservoirs that were at 5 percent of capacity. Nearly empty. We saw farmers using huge machinery to take out fully grown orange trees and throw them on the ground to die because they don’t have enough water for irrigation. It was unbelievably sad to see.

But there are ways for you to grow food, that are water conserving and healthy for the environment and for you.

Here are 5 easy ways to conserve water for your garden and grow delicious food. Good for you and good for the earth.

1.Prepare the ground by loosening the soil and adding humus, in the form of compost and/or manure. The quality and health of the soil is vitally import to the health of your plants. Compacted soil will not absorb or retain water very well. This is a very underrated activity for water conservation. Building raised beds with wood or stone and then filling with organic topsoil is one way to do this. Another way is to dig the soil and add humus.

Small vegetable garden

Raised beds make for a healthy soil

2. Create paths and walkways through your garden. DO NOT WALK ON YOUR BEDS! I mean it. The fastest way to ruin your soil is to walk on it and compress it. You remove the air pockets and prevent air and water percolation. Try it. Step on the ground and water it. It will puddle and then most of the water will evaporate. Trust me on this.

3. Mulch, mulch, mulch.  Oh, and did I say mulch? Yes, this makes a huge difference in the evaporation rate of water through the soil surface. There are many kinds of mulch. Read about them here.

4. Plant some of your smaller herbs and veggies in pots and containers. When a pot is close to the house, it is easy to remember to water and you can use the left over water from the sink, or the shower.  I have had great success with herbs, carrots, lettuce, and peppers in containers. You can use self watering containers that let you go away for weeks at a time without worrying about your plants drying out.

A good harvest in a small place, with very little water.

A good harvest in a small place, with very little water.

5. Drip irrigation is the easiest and uses the least water of any method of irrigation. Done well, it puts the right amount of water directly to the roots of the plants and has the least evaporation rates. Check out the book by Robert Kourik on Drip Irrigation. It’s great. Combine drip with a water controller and weather station and you will be golden for putting the right amount of water on at the right time. Many water districts give rebates on these controllers.

There are other ways to gather, store and conserve water in the garden. These are five easy ways to start. Don’t worry, I’ll talk about more ways to save water in future blogs. Right now, it’s important to get started from the ground up, so to speak.

the water at the top drips down to the plants at the bottom.  Great use of space and water.

The water at the top drips down to the plants at the bottom. Great use of space and water.

Edible landscaping

Enter the Edible Landscape using a PATH.

Feb 172015
 

by Avis Licht

An organic gardener’s success is based on a few basic necessities. I think the health and quality of one’s soil is right at the top of the list. After that comes sufficient sunlight, appropriate water and healthy plants.  Today I want to talk about some simple ways to fertilize your garden and improve your soil’s growing  capabilities.

Compost and mulch make a beautiful cover for the sil

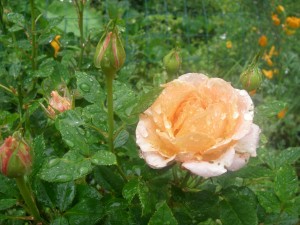
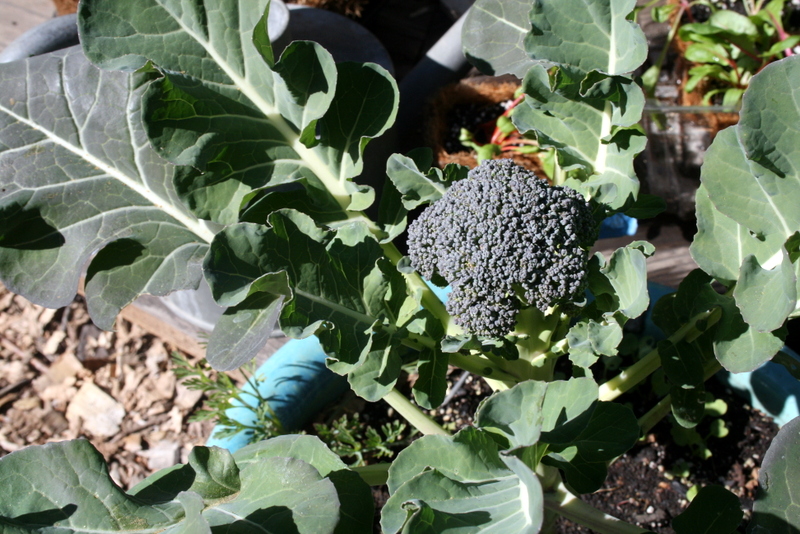
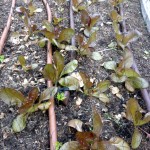
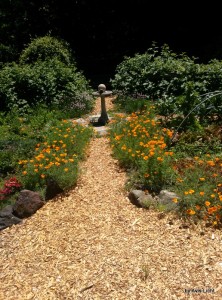
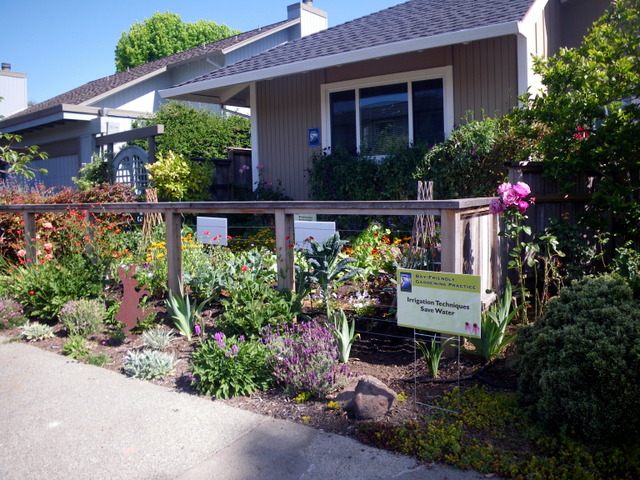
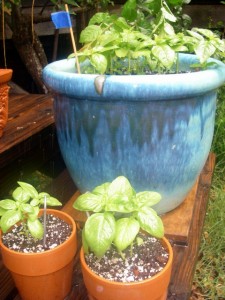
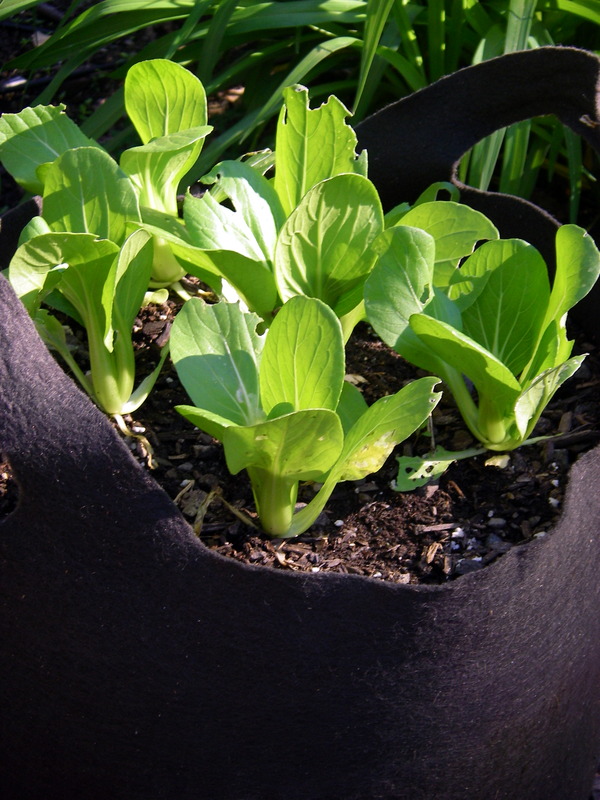
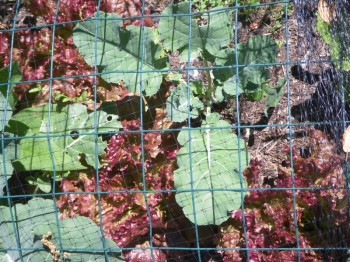
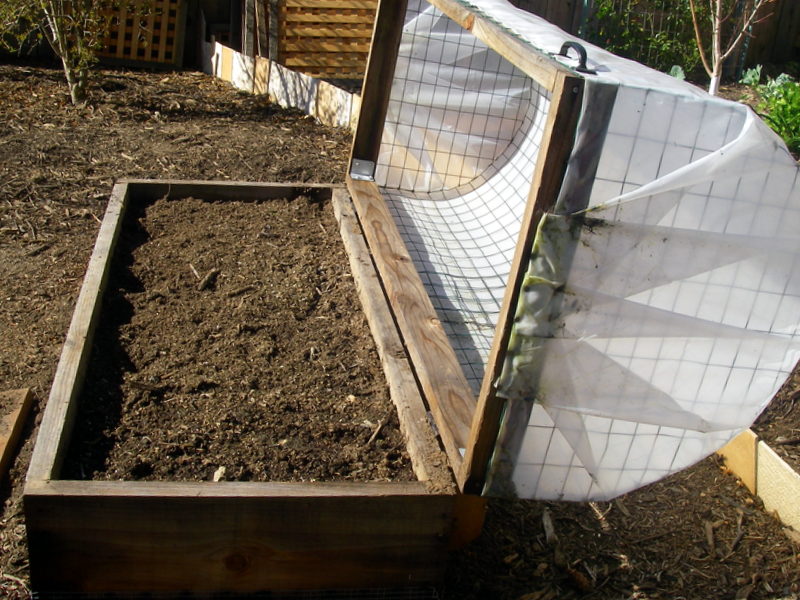
A beautiful garden grown with compost, manure and mulch

An organic fertilizer refers to a soil amendment derived from natural sources that guarantees the minimum percentages of nitrogen, phosphate, and potash. These include plant and animal by-products, rock powders, seaweed, inoculants, and conditioners.  These minimum amounts can be very small. For example, horse and cow manure  often have less than 1% nitrogen by weight. This is not to say it’s not a good fertilizer, it is. But depending on your plant’s needs, you may need to add other sources of nitrogen.

One word of caution. An organic fertilizer means it comes from natural materials, BUT it doesn’t mean it’s organic.  Cottonseed meal comes from a plant, but cotton is one of the most heavily sprayed crops.  There will be pesticide residues in cottonseed meal unless it specifically says it comes from organic cotton.  Bloodmeal and bone meal take a great deal of production and energy to produce these fertilizers. Plus you don’t know how the animals were raised. It can seem very complicated to stay fully organic. When possible ask for the source of your fertilizer.

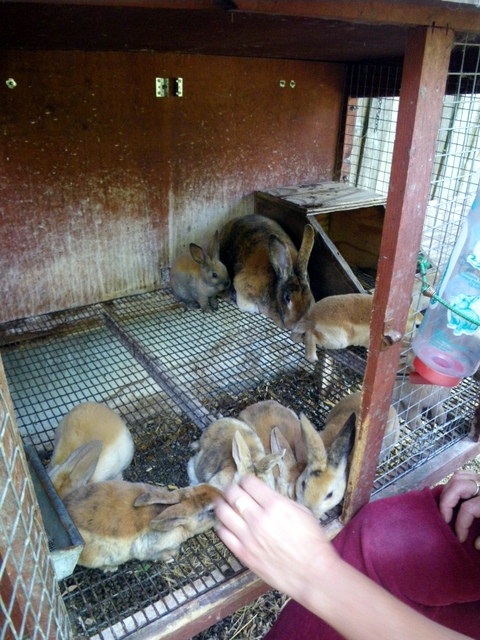
Different manures have different nutrient values based on the animal, what it ate, how much bedding is in the manure and so on. In another post I’ll talk about the relative merits of different manures. For now, let’s just agree that manure from herbivores that is composted, is a good organic fertilizer. I say herbivores, because we don’t want to use poop from meat eating animals like dogs, cats or humans.  There is risk of parasites or disease organisms that can be transmitted to humans from meat eating animals. For ease of listing, here are Vegetable fertilizers: alfalfa meal, cotton seed meal, green manure, sea weed, wood ash. Animal by-products include: manure, blood meal, bone meal, fish meal, feather meal and bat guano. Mined minerals include: rock phosphate, green sand, gypsum.

compost bin

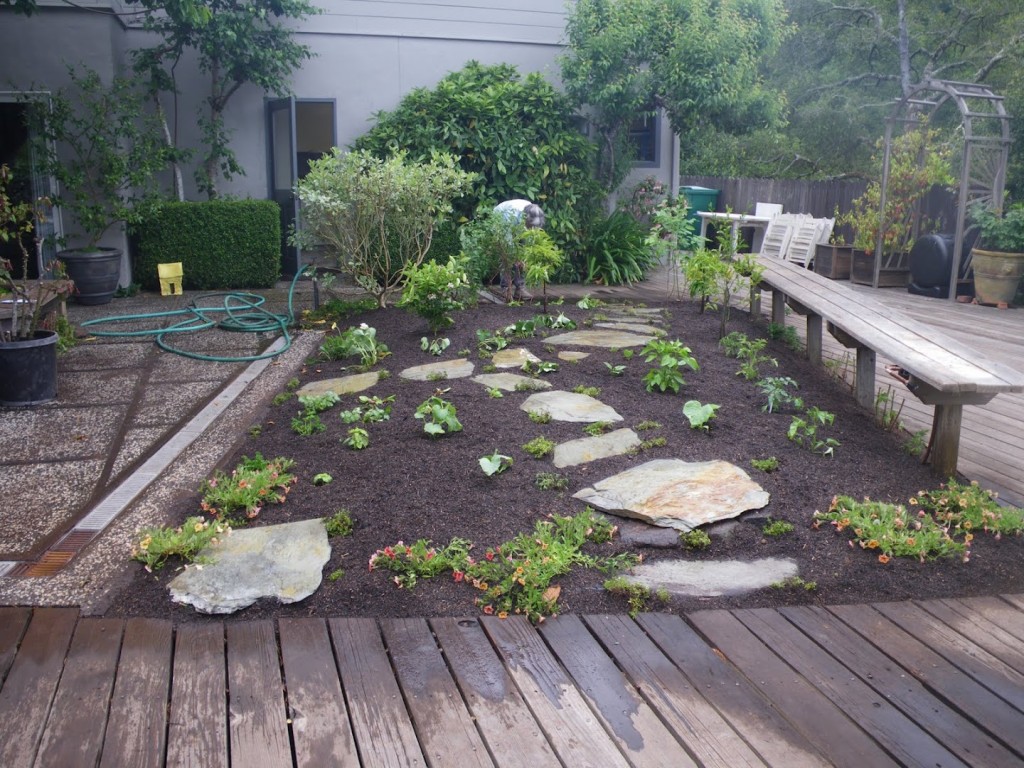
Compost bin for a family of 4 – 6 people

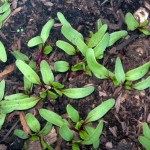
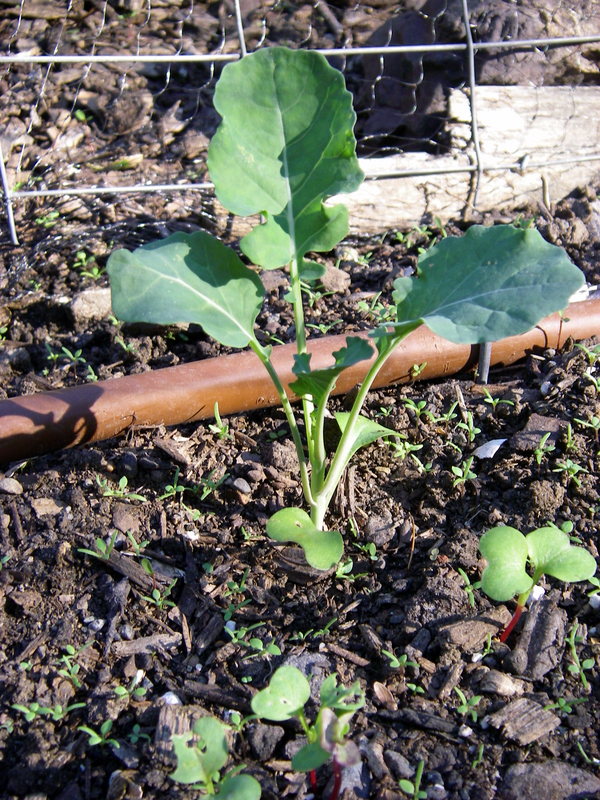
The easiest fertilizer is compost that you make at home from material in your yard.  But it takes a LOT of material to make a little compost. You’ll probably have to bring in compost or topsoil when you first start your garden. This is not terrible, it just costs money and uses outside resources.  Sometimes we have to do that.

Soil amendments are materials that don’t have a minimum amount of nutrient, like compost.  They can be worked into the soil or laid on top. Amendments are important for the humus they add, the tilth, and aeration of the soil. Without proper soil aconditions, it doesn’t matter how much nutrient you put in.  Roots need air, water and microbial activity, which all comes from adding organic amendments.

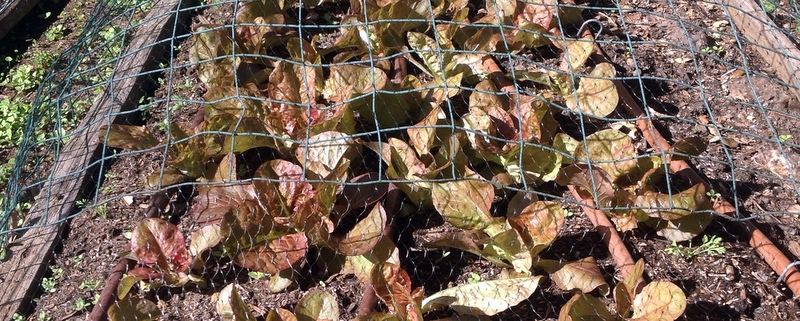
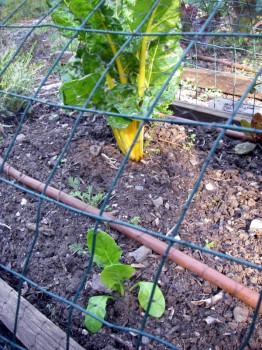
Mulch is material laid on the surface and does not add nutrient to the soil until it breaks down over time. Mulch protects the soil from compaction, erosion and keeps the weeds down.  It also conserves water. Even though we don’t call it a fertilizer, it’s a very important part of the garden and soil and plant health.

The Four Major Elements to Fertilize Your Garden:

1. Nitrogen: For Vegetative Growth:  Bloodmeal, Cottonseed Meal, Liquid Fish, Fish Meal, Pelleted Fertilizers, Feather Meal

2. Phosphorus: For Flowering and Fruiting: For fruit, flower, and root development. Use Soft Rock Phosphate. You can also use Bone Meal.

3. Potassium: For Vigor and health. Use Sulfate of Potash or Greensand.

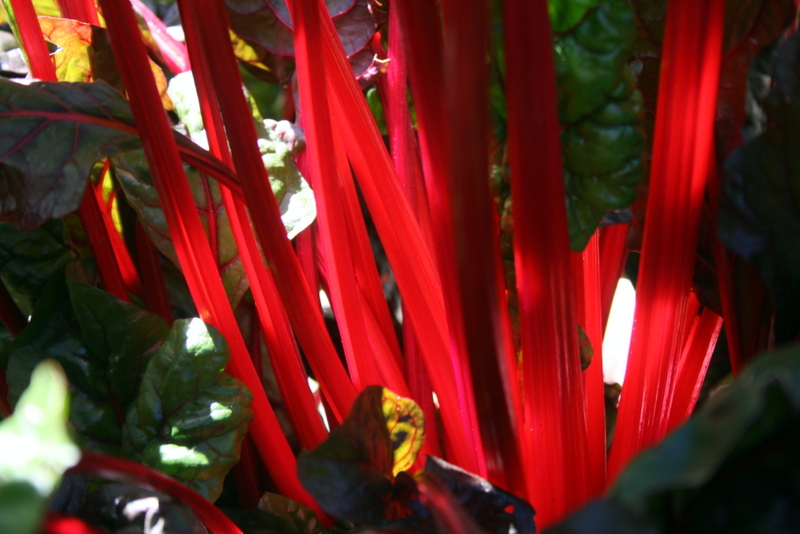
4. Calcium and Trace Minerals: For Health and Resilience: Almost all soils test low in Trace Minerals. Add Compost, Kelp Meal

In previous posts I wrote about legumes, which fix nitrogen and wood ash.  Keep coming back, as I’ll go through the whole list of fertilizers. In the mean time, dig up your beds, or sheet mulch them, and then add compost and/or composted manure.  You’ll be off to a good start.

Jan 312015
 
Seed sowing medium

by Avis Licht

1. Prepare your table for sowing: Potting mix, containers for sowing, seeds and labels.

I use organic potting mix from my local nursery. I try to use either bioegradable pots, like these coconut fiber pots, or reuse the plastic ones over and over. I save my cans and plastic containers from the grocery store to use for either sowing or transplanting.


IMG_0758

2. Choose your favorite seeds that will grow in your climate, and make sure you are sowing at the right time:

It’s late January, and I live in Northern California, where we can grow many vegetables year round.  It’s a good time to start Broccoli, Cabbage, Cauliflower, Chard, Kale, Kohlrabi, Leek, Onion, Spinach and Peas. In my hand you can see Chard seed. As seed goes, they’re pretty big and easy to handle. To get an early start, I sow them indoors in pots for transplanting in late February. You can also sow Chard directly in the ground when your soil warms up a bit.

IMG_0759


3. Fill your pots to the top, then place a few seeds on the surface. My finger is pointing to the seed. For chard, which is fairly large, I will push the seed into the soil so that it gets a firm seating into the soil. Then cover lightly.


IMG_0761

4. Label your pots with the name and date of sowing. Believe me, this is an important step, as you will probably not remember what you sowed or when you sowed it.

IMG_0763

IMG_0764

IMG_0765

Push large seeds firmly into the soil. Peas can go half an inch deep.

IMG_0766

Leeks are small seed and hard to handle.  I use this seed sower which gently lets out seeds a few at a time.  Because leeks are small seedlings, you can sow many in a small pot. When they are ready to be transplanted you can easily pull them apart. More on transplanting later.

IMG_0768

Here’s Broccoli. It’s a favorite in our household and I like to grow a lot of it. It’s a small seed. I put 5 seeds in a 4 inch pot.  When they’re about 3 inches tall I take them out of the pot carefully and transplant them.

IMG_0771

Basil seed looks a lot like broccoli only smaller. If you are using small pots for sowing, then sow 2 seeds per pot. That way you can figure that every pot will have at least one plant.

IMG_0772

Here’s kale. It’s become very popular lately. There are many kinds of kale. Personally, I like it cooked.  It’s a little tough raw.  I really had a good laugh the first time someone told me I had to massage my kale for salad making! But it’s true.  If you rub your kale with a little salt and olive oil it gets more tender.

IMG_0773


5. Gently water in your seeds. You want the soil moist, but not soaking wet. Keep the surface moist so that the seeds don’t dry out.  As soon as they germinate you can cut back on the water a little.

6. Make sure your plants get plenty of light. I use flourescent lights in a shed to make sure they’re strong and sturdy.

Be sure to read more about lights and seedlings in this article to find out which lights and how long to leave them on.

Seeds

As soon as your seed germinates it needs plenty of light


Well, that just about takes care of the steps to successful seed sowing.  Don’t be afraid. Growing your own plants from seed is one of the most satisfying and magical parts of gardening. If you’re having troubles or need advice, just go to the Ask Avis page and let me know what’s up. Or leave a comment or suggestion at the bottom of the page.  I look forward to hearing from you.


IMG_0774

Jan 272015
 

by Avis Licht

sowing seeds

Sowing seeds and germinating in the kitchen window

Seeds, though small in size are a force of nature.  They carry the future in their tiny form. All the information to grow a might oak is in that tiny acorn.  In nature, every seed is slightly different and allows for the possibility of change:  sometimes better, sometimes worse than it’s parent.  Depending on the conditions after sprouting, a seed can grow strong and healthy or be weak. Like a person with a strong immune system, a healthy plant can withstand disease and attack by pests.

Seed packets

Get seed from organic, reputable seed companies


I’m not going to get into a discussion here about hybrid seeds or GMO, but allow me the premise that healthy plants produce healthy seed and it is to your benefit to choose seed from reputable companies that sell healthy, organic seeds.

It is then up to you to make sure you give those seeds the right growing conditions: from the soil you use to plant them, to the sun and warmth for sprouting. In this post you’ll learn how to mix your soil, sow seed, cover it and water it. It sounds simple, and is, but there are a few basic things you can do to assure success.

earthworm castings

Earthworm castings are a wonderful medium for starting seeds

Soilless seed starter medium

Clean, light medium for starting seed is a good idea


1. Choose your seeds: Pick the right plant for your climate it and sow it at the right time. Pick your favorite veggies and see if they are appropriate for your climate and the size of your garden. You can do this by googling your plant, reading seed packets, or talking to your gardening neighbors.  They often have the best information. In the U.S. you can get a lot of information at this site, SmartGardener.com by typing in your zip code.

2.Mix your seed starting medium: Seeds have enough energy in them to germinate and grow their first true leaves.  After that they need some, but not a lot of nutrition in their sprouting medium.  We can call this needing breakfast.  I mix my own compost or earthworm castings in with a medium like the Seed Starter from E.B. Organics. This starter is sphagnum moss, perlite, and gypsum.  It is clean, light and has no real nutrient.  Seeds will germinate and send roots quickly into the medium.  By mixing it with a little compost or earthworm castings you will add “breakfast”.

filled seed containers

Put the seed medium into container and tamp it down.

Seed starting medium - mix it up a little

Mix different materials in a container


3. Sow your seeds on the surface.  In the small six packs (recycled, of course from previous use), I put 2 seeds per section.  In the larger 2 inch pots I put 4 seeds per pot, and in the 4 inch container I put 6 – 8 seeds.  I use the larger pots for quick germinating larger plants, like chard and broccoli. I use the smaller pots for lettuce, spinach, bok choy and smaller plants. Lightly cover the seeds.  The smaller the seed, the less soil on top.  Your seed packet will tell you how deep to cover your seed.

Seed sowing under lights

Using flourecent lights and a heating pad, seeds get an early start

4. Lightly water your seeds.  A heavy  flow of water will displace your seeds. Use the lightest setting on your watering wand, a light sprinkling can or a spray bottle.  Be sure that your medium is moist before you put the seed in it.  You want it moist, but not soaking wet. Seeds need to be kept moist until germination.  If they are in the sun, be sure to water them a few times a day.

Lettuce seed

Tiny seeds need to be on the surface of the soil, and watered gently.

Broccoli seedlings

Seedlings this size are ready for planting outside

Next step will be how to prepare your garden beds.  We’ll talk about that tomorrow.

You’re ready to grow wonderful, delicious food in your edible landscape. Whether you have pots on the deck, a few square feet, or an entire yard for growing, only do as much as you can happily take care of. Remember, you’re trying to enjoy this project.

the ornamental vegetable garden

A vegetable garden doesn’t have to be square


Jan 152015
 

by Avis Licht

Help your seeds with grow lights

If you don’t have enough light in your house you can use these simple grow lights


When starting seeds early in the season, it is usually too cold to start them outside.  That means, they are either in the house, cold frame or greenhouse.  It’s a rare house that has enough sunlight to start seedlings indoors and not have them get leggy.  It’s an even rarer house that has a greenhouse or cold frame.

Light for starting seeds:

Most seedlings require 14 to 16 hours of direct light to manufacture enough food to produce healthy stems and leaves.  The characteristic legginess that often occurs when seedlings are grown on a windowsill indicates that the plants are not receiving enough light intensity, or enough hours of light.

1. Set up a stand with fluorescent lights over your seed trays. 2 – 4 inches is the optimum amount of room. As they grow you will need to lift them up. 

When growing seedlings under lights, you can use a combination of cool and warm fluorescents, or full-spectrum fluorescent bulbs. Incandescent bulbs produce too much heat in relation to the light given off. They also lack the blue-spectrum light that keeps seedlings stocky and dark green. The most efficient light is a T – 5 or T – 8 bulb that comes in 2 and 4 ft lengths.

2. Get a timer for your lights and set it for 12 – 14 hours. That sounds like a lot, but that’s what it takes to keep your plants strong and sturdy.


To get excellent pots, potting soil, greenhouses and more, go to my store and you can find what you need easily.

3.Temperature for starting seeds:

The temperatures for optimum germination listed on seed packets refer to soil temperature, not air temperature. Although seeds can vary drastically, most vegetable seeds need a warm soil temperature around 78 deg. F.

If the soil is too cold, seeds may take much longer to germinate, or they may not germinate at all. To provide additional warmth, you can use a heat mat or keep them in a warm room until the seeds germinate. Just be sure to get your seedlings to a sunny window or under lights within 24 hours of seeing little sprouts emerging through the soil surface

.

After germination, most seedlings grow best if the air temperature is below 70 degrees F. If temperatures are too warm (over 75), the seedlings will grow too fast and get weak and leggy. Most seedlings grow fine in air temperatures as low as 50 degrees, as long as soil temperature is maintained at about 65 to 70.

 Give them light and warmth and keep them moist, and your seeds will work hard on your behalf. At the risk of repeating myself, the best thing you can do in the garden is to observe your plants.  Keep an eye on them and they’ll let you know if they’re happy.

sowing seeds

Direct sow into the ground for best results

Plants with taproots like beet and carrot need to be sown directly into the ground

Jun 052014
 

by Avis Licht

Urban and suburban yards can be beautiful and productive

Urban and suburban yards can be beautiful and productive

Growing food in urban settings. When we think about where and how our food is grown, our first image is usually of large fields of one kind of crop: rows and rows of corn or lettuce or broccoli.  So the term “urban farming” may have a confusing connotation – rows and rows of broccoli down Main Street? Doesn’t quite fit.

rabbits carefully grown for food

Lean protein, grown with scraps from the garden

But imagine this – City parks with fruit trees, vacant lots with flowers and vegetables, small back  yards with herbs, vegetables and fruit trees, balconies from the first floor to the thirtieth with pots of herbs and edible flowers. Rooftops exposed to the sun with food, flowers and even bee hives. It’s the new view of farming and it’s  starting to happen all over the world. Roof top gardens in New York City


.London bees on roof tops

In the next series of articles I’ll show you how people are growing fresh, delicious, organic food within arms reach of their kitchen. And you can do it too.   From roof tops to vertical gardens, you’ll find ways to pick your food fresh off the plant.

Children learning to sow seed

Teaching children to sow seed.

Teach your children well.

Here is Urban Adamah, a city farm in Berkeley, California.  Find out more about Urban Adamah here.

March 2011

November 2011


May 082014
 

by Avis Licht

Herbs in Containers

Herbs in Containers

Many people have told me they don’t plan on putting in a vegetable garden this year because of drought conditions and wanting to save water. But I tell them, YES! To save water you should plant your own vegetable garden.  Sometimes we confuse water we save at home with water that needs to be saved state wide. A large scale farm uses much more water to grow, harvest, wash and transport to market the vegetable and fruit that you could grow at home using a fraction of that water.

We just need to grow smart.

Here are my top five favorite and easy tips to save water in your garden, and still have a productive and beautiful yard.

1. Use containers and pots for growing herbs and small veggies. You can control the amount of water they use easily. You can use water from the sink or shower that you collect while waiting for it to warm up.

Bok choy in container

Bok choy in container

2. Use raised beds and interplant with a variety of vegetables to make best use of all the area. An example would be broccoli, lettuce and radish. By the time you harvest the radish and lettuce, the broccoli will be big and cover the whole bed.

Interplant fast and slow growing vegetables together.

Interplant fast and slow growing vegetables together.

3. Use drip irrigation. Put water to the roots and not the air. 

Use drip irrigation

Use drip irrigation

4. Mulch the soil to preserve moisture and keep it from getting compacted.

Young plants benefit from compost

Mulching keeps the yard looking good and provides a healthy environment

5. Use a moisture meter, or at the very least, use a trowel to check the moisture of your soil. Just because the soil is dry on top, doesn’t mean it is dry down below. Be sure to check before you irrigate.

To buy this moisture meter go to my store:


moisture meter

Best tool ever. This will save you time, water and money.

Mar 122014
 

by Avis Licht

chard

Chard can be sowed in the ground or in pots


chard

The larger chard in the upper part of the photo was planted in November. The baby chard seedling was sown in January and planted in March. They will provide delicious greens for more than a year.

 You might be surprised at how early you can start sowing and planting your Spring vegetables. Of course, I’m not talking about snow or frosty ground. BUT, still there are a few great crops that can withstand what nature throws at them. If you live in a really cold clime, then you can start sowing indoors in many places. For those of you who live where the snow has left or never been, then consider these great plants.

LETTUCE:  This is one of my family’s favorite foods.  Mixed with other raw vegetables it’s a sure winner. I love butter lettuce, like the Marvel of Four Seasons, Red romaine and baby Bibb.

BOK CHOY: An Asian green that has a delicate flavor and can be eaten  both raw and cooked. You can sow this either in pots or directly in the ground.

CHARD: One of the easiest to grow and most nutrious greens. And it’s not only green. It comes in rainbow colors of red, yellow, orange and green. The variety I like to grow is Rainbow chard, of course. You can sow it in pots early and then transplant them or sow directly in the ground when it’s above 50 degrees.

BROCCOLI: There are different varieties of broccoli. Kale, cabbage and cauliflower are included in this family. But it doesn’t matter which one you grow, they’re all great. After I harvest the main crown from the broccoli, the plant grows many, many side shoots that are just as good. Also, the leaves are good to eat as well.

Bok Choy

Grow small greens in containers for small gardens or decks. This is bok choy.

Seeds of Change

Red lettuce

Red lettuce seedlings are planted between the broccoli plants. They are a good companion plant to broccoli. The broccoli is planted 2 feet apart, which leaves a lot of room between them. While they are small, it’s good to plant the lettuce seedlings which will be harvested before the broccoli gets too big.

very young broccoli

Broccoli seedling started in January, planted outdoors in March. I also sowed radishes in between the broccoli. The radishes will grow quickly and be harvested before the broccoli covers the area.

Check out my Store for tools that I recommend and use myself.  A good tool should last a long time and make your work easier and safer. If you shop through my Amazon store I get a small fee that helps support this free blog.
Gardening tools and seeds

Feb 102014
 

by Avis Licht

Size of your seed may determine how you sow it

Large seeds often go directly in the ground, and very small seeds do as well.

If you’re thinking about your Spring garden and what to sow, you’re probably wondering if last year’s leftover seeds are good to sow this year. Everyone wants to know. Don’t waste money buying new seed if you’ve got what’s good but you don’t want to lose precious time by sowing bad seed.

Here is a simple method to see if your seed is still viable.

1. Moisten a paper towel and place 10 to 20 seeds of one variety on it. Roll up the towel and place it in a plastic bag labeled with the seed variety. You can keep it on the kitchen counter at room temperature while you are testing. Check the seeds after 2 or 3 days, then every day for a week or two if needed; different varieties have different timing for germination. Be sure to make sure the towel stays moist. Count the number of germinated seeds and divide them by the number of seeds tested. This will give you the germination percentage. If 8 seeds out of 10 have germinated – you have 80% germination. Less than 80% germination means your seeds still have some viability but that you will need to sow them more thickly in order to get a good crop. Seeds with less than 50% germination may not be worth the trouble and you can go seed shopping!

If you do need to buy seeds try Seeds of Change. They are a great organization and provide organic, non – GMO seed. I definitely recommend buying their seed. You can do that by clicking here: Seeds of Change

2. Store unused seeds in a cool, dry place to ensure their maximum germination rates. I use empty herb and seasoning bottles to store my seed.  I try to collect as much of my own seeds as possible. The glass bottles are labeled and I can also see the seed inside to remind me what I have.

Seed storage containers

Empty seasoning and herb bottles are used for storing seed.

20% Off e-Gift Cards with code AFFBVALD until 2/14 only at Burpee.com!

 Seed Savers is also a good company. Rainbow Chard is delicious, beautiful and super healthy.
Seed storage bottle was old salt container

With these bottles you can even sprinkle out   the seed evenly. Perfect use for an old salt bottle.

Here are some good Seed Catalogs – Resources.

Here’s a great chart that Roger Doiron from Kitchen Gardeners International posted, which came from Colorado State University. It covers many common vegetables for your home garden. Of course, viability also depends on the conditions that the seed has been stored in. Too wet, too cold, too hot, too dry – all these can affect your seed germination, BUT, generally you can follow the chart.


20% Off e-Gift Cards with code AFFBVALD until 2/14 only at Burpee.com!

Jan 212014
 

by Avis Licht

Combine your raised bed with a top and voila! a cold frame and bird protector

Combine your raised bed with a top and voila! a cold frame and bird protector

This raised bed has many positive attributes. Let me count the ways.

1. It is easy to build. Using either recycled or new wood, you only need to put the four sides together with angle brackets. I suggest that you make the bed small enough that you can reach over to harvest and weed; not more than 3 feet deep. It should be long enough to grow the kind of crop you want and fit into the area that you want to put it.

With simple corner piece, you can make your box and top strong

With a simple corner piece, you can make your box and top strong


2. You can put wire underneath the bed easily to keep the gophers out. I suggest using hardware cloth, as it is strong and won’t rust out for a long time and the opening is small enough to keep the gophers from coming through.

Hardware cloth

Put wire under box to keep the gophers out


3. You can fill the raised bed with the best topsoil for your needs. You can buy organic soil and add compost or manure depending on your crops. Basically, you have more control over the soil when you bring it in, but it can also be expensive.  If you have reasonable topsoil in your garden, you can mix it with amendments. Bought topsoil also has the advantage of being weed free.

4. The beauty of the cover is that it can be used as a cold frame when covered with plastic, a shade bed when covered with shade cloth or as bird protection when covered with bird netting. With hinges it is easy to open and close. This makes for better control of temperature in the bed: you can prop it all the way open if the sun is out or just a little bit for air flow.  A hinged top makes for easy harvesting. Take a look at this picture of my kale, that the birds are using as a bird feeder. Yikes! Gotta get a cover on them.

This raised bed is covered with a plastic top, but it could also just be wire for bird protection

This raised bed is covered with a plastic top, but it could also just be wire for bird protection

Bird damage to a mature kale plant.

Bird damage to a mature kale plant.

Let me know what beds you use and if they work well for you.


[portfolio_slideshow id=2775]

Jun 072013
 

by Avis Licht

[portfolio_slideshow include=”2632,2630,2631,2629,2627,2628″]

I love carrots fresh from the garden, but I also have had some real problems growing them.  I get the beds beautifully prepared, raked and ready to go.  Sow the seed, water the bed, watch it germinate and bam! the next day the seedlings are all gone. What in the world?!?

Overnight, small and voracious insects come out and devour my delicate seedlings. Earwigs, sow bugs, snails and slugs are all culprits.  After several seasons of failure, I decided to grow my carrots in containers, where the little buggers can’t get them. Sure enough I have had incredible success.  Not only do the seeds germinate, but growing in potting soil, the carrots come out perfectly formed and absolutely delicious.

Purple Cosmic Carrots

Purple Cosmic Carrots

The pots I used are called Smart Pots.  They are made from fabric that is strong, light weight and come in many sizes.  It is perfect for  folks who don’t have place to store containers when not in use.  They fold up, last for years and create excellent growing conditions for your plants. You can buy them here at discounted prices: Smart Pots.

Baby carrots from Smart Pot

Baby carrots from Smart Pot


I tried some different kinds of carrots this year including, Cosmic Purple, which you can see is a lovely purple, Chantenay Red Core and Shin Kiroda, a baby Japanese variety with short 3″ -5″ carrots, just right for a container. I use only organic potting mix which you can get here: Organic Potting Soil.

You can buy organic vegetable seed packets from Seed Savers Exchange here: Organic Vegetable Seeds.

Be sure to give your carrots plenty of sun, at least 6 hours a day.Carrots need constant moisture – don’t let them dry out, but also, don’t drown them.

Children will love to eat these baby carrots, they are sweet and just the right size.


May 212013
 
Edible landscaping

by Avis Licht

Bamboo poles for climbing plants

For a front yard, make sure your structures are ornamental as well as useful.


Edible landscaping has become more popular than I ever thought it would or could. Every day we hear about some new project in cities all over the world. We’re seeing gardens that are both beautiful and have delicious, healthy produce. I mean, it only makes sense.

In Marin County the municipal water district has been encouraging people to conserve water by planting low water use plants as well as food gardens.  In May they have a tour of the best gardens that use principals that they call “Bay Friendly”:  organic, drought resistant, permeable surfaces, habitat friendly for beneficial birds and insects, and lovely to look at.

On the tour last weekend I took some photos from a few of the gardens that incorporated some good edible landscaping ideas.  See if anything inspires you for your garden. (Click on the photos to enlarge them.)

Artichoke, plum, alstroemaria

Raised vegetable box

Raised vegetable boxes define an area and let you put good growing soil into a small area. It’s also easy to maintain.

California native plants

These California native plants look good, are low maintenance, provide flowers and habitat. They go beautifully in an edible landscape.

Native California plants

Another view of the same yard. This shows that the native plants create a small patio area and the vegetables are at the far end of the yard near the fence.

To read more about designing your edible landscape, read this post. 


Be sure to leave a comment or shoot me a question by going to the Ask Avis page.

Container Gardening

This suburban backyard is all raised beds and container plantings. Easy to maintain and very productive.

Chicken coop

This tiny chicken coop in an unused side yard provides fresh eggs for the owners.

Fruit trees in containers

I’ve never seen this many fruit trees in containers. Lots of varieties but also a smaller harvest from the containers. When growing in pots, be sure to give plenty of water and nutrients. It is easier to find the right growing conditions when you can move the pots to the right micro climate. Since they will be dwarf simply by being in pots you can grow more trees in a smaller area.


To find out more about growing in containers read my post on self watering planters.

Cauliflower

This huge cauliflower was in a raised planter. You can get huge results when you have the best soil and perfect growing conditions.


tower of strawberries

This tower of strawberry pots is fun to look at and certainly easier to harvest the strawberries.


To find out more about growing strawberries read this post.


Back yard garden

Path, flowers and bird bath highlight the backyard garden. This yard has many fruits and vegetables, yet is entirely enchanting. At least I think so.


The Entry Patio

Entering the garden, you are led by a curving path, under fruit trees, by flowers, herbs and native plants.

Vegetable Garden

I love that this vegetable garden looks like a garden garden. It’s not just utilitarian.


[portfolio_slideshow id=2575]

Nov 102012
 

by Avis Licht – 

carrots

Beautiful, delicious carrots from a container planting

People who live in urban areas or in apartments often think they can’t grow food. But using planters can be a fun and easy way to grow certain crops.  Containers have their challenges, particularly because of limited soil and need for careful watering and fertilizing.  On the up side, you can put them in small places, in the right light conditions and keep the bugs away. For more on container growing, read this post.

A confession – for two years I haven’t been able to grow any carrots, though I’ve sowed a whole lot of seeds. I prepare the bed carefully, rake and smooth it. Sow it. Water it. Watch and wait.  Sure enough the seeds germinate, I give a victorious shout. The next day I come out and all the seedlings are gone. Some ravenous sow bugs, earwigs, slugs, snails or combination of any or all of the above have managed to decimate my crop. For gardening beginners, this could be very discouraging, especially if an experienced gardener can’t seem to have success.

See those carrots in the photo? Those are mine. I grew them. In a container! Here’s how:

1. Get a pot: clay, wood, plastic or cloth – doesn’t matter.  For carrots, the pot should be 10 -12 inches deep.

Container for planting

A cloth container – use and put it away when you don’t need it. These cloth pots are easy to transport, easy to store: a real plus in urban areas. Find them at this site: Smart Pots.


2. Fill container with planting  medium

Carrot seedlings

A mix of seed starting medium and worm compost.


3. Keep seed moist to germinate, keep pot watered, but not soggy. Thin seedlings: 1/2 -1 inch apart.

Carrots in pot

2 months after sowing, carrots have filled in container and are ready for harvesting


When harvesting, gently separate the greens and look for the largest carrots . Pull them out carefully, making sure not to disturb the neighboring carrots. It wouldn’t hurt to give them a little water after harvesting to settle the roots.

In a 3 gallon size pot (like the one on the left) I will harvest more than 50 small carrots.  They are were incredibly sweet and I had NO bug problems.


Be sure to read more about container planting in this post.  Sign up for an email subscription to this blog so you won’t miss a post.

container grown carrots

Even on tiny decks you can grow fun food. Not only herbs and flowers, but greens, salads and much more.


Mar 052012
 
Healthy, hardy beets germinating outdoors

by Avis Licht

Help your seeds with grow lights

If you don’t have enough light in your house you can use these simple grow lights

Yesterday I talked about seed starting medium and today I want to talk about light and heat.

When starting seeds early in the season, it is usually too cold to start them outside.  That means, they are either in the house, cold frame or greenhouse.  It’s a rare house that has enough sunlight to start seedlings indoors and not have them get leggy.  It’s an even rarer house that has a greenhouse or cold frame.

Light for starting seeds:

Most seedlings require 14 to 16 hours of direct light to manufacture enough food to produce healthy stems and leaves. The characteristic legginess that often occurs when seedlings are grown on a windowsill indicates that the plants are not receiving enough light intensity, or enough hours of light. If your seedlings are in a south-facing window, you can enhance the incoming light by covering a piece of cardboard with aluminum foil and placing it in back of the seedlings. The light will bounce off the foil and back onto the seedlings.

If you do not have a south-facing window, you will need to use grow lights. When growing seedlings under lights, you can use a combination of cool and warm fluorescents, or full-spectrum fluorescent bulbs. Incandescent bulbs produce too much heat in relation to the light given off. They also lack the blue-spectrum light that keeps seedlings stocky and dark green.

To get excellent pots, potting soil, greenhouses and more, go to my store and you can find what you need easily.

Simple outdoor growing house

Along a protected south facing wall, this little house can provide protection for your seeds

Seedlings need a high intensity of light. The fluorescent bulbs should be placed very close to the plants—no more than three inches away from the foliage—and should be left on 12 to 14 hours per day. If you are growing your seedlings on a windowsill, you may need to supplement with a few hours of artificial light, especially during the winter months.

Temperature for starting seeds:

The temperatures for optimum germination listed on seed packets refer to soil temperature, not air temperature. Although seeds can vary drastically, most vegetable seeds need a warm soil temperature around 78 deg. F.

If the soil is too cold, seeds may take much longer to germinate, or they may not germinate at all. To provide additional warmth, you can use a heat mat or place the containers on top of a warm refrigerator, television, or keep them in a warm room until the seeds germinate. Just be sure to get your seedlings to a sunny window or under lights within 24 hours of seeing little sprouts emerging through the soil surface.

After germination, most seedlings grow best if the air temperature is below 70 degrees F. If temperatures are too warm (over 75), the seedlings will grow too fast and get weak and leggy. Most seedlings grow fine in air temperatures as low as 50 degrees, as long as soil temperature is maintained at about 65 to 70.

Healthy, hardy beets germinating outdoors

Some seeds can be sown directly in the ground like these beets

 Give them light and warmth and keep them moist, and your seeds will work hard on your behalf. At the risk of repeating myself, the best thing you can do in the garden is to observe your plants.  Keep an eye on them and they’ll let you know if they’re happy.


© 2011-2024 Edible Landscaping Made Easy With Avis Licht All Rights Reserved