Jan 312015
 
Seed sowing medium

by Avis Licht

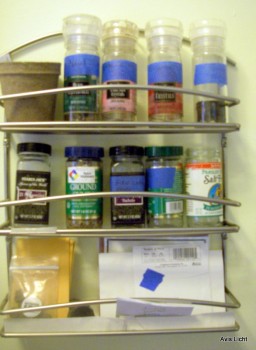
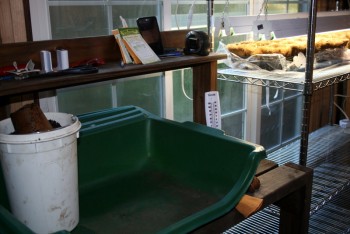
1. Prepare your table for sowing: Potting mix, containers for sowing, seeds and labels.

I use organic potting mix from my local nursery. I try to use either bioegradable pots, like these coconut fiber pots, or reuse the plastic ones over and over. I save my cans and plastic containers from the grocery store to use for either sowing or transplanting.


IMG_0758

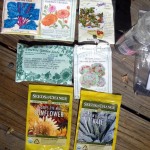
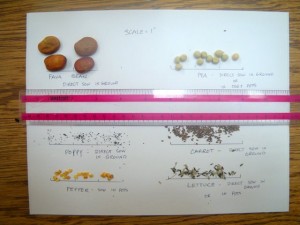
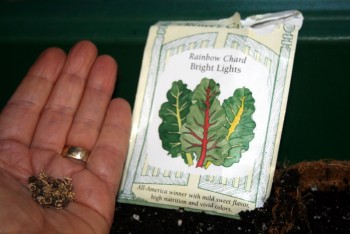
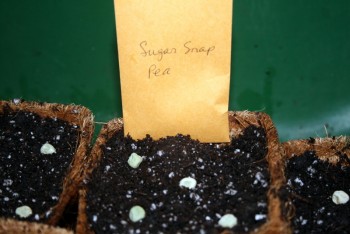
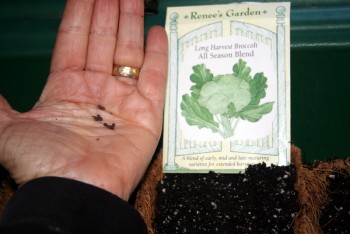
2. Choose your favorite seeds that will grow in your climate, and make sure you are sowing at the right time:

It’s late January, and I live in Northern California, where we can grow many vegetables year round.  It’s a good time to start Broccoli, Cabbage, Cauliflower, Chard, Kale, Kohlrabi, Leek, Onion, Spinach and Peas. In my hand you can see Chard seed. As seed goes, they’re pretty big and easy to handle. To get an early start, I sow them indoors in pots for transplanting in late February. You can also sow Chard directly in the ground when your soil warms up a bit.

IMG_0759


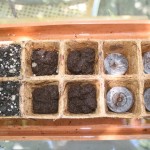
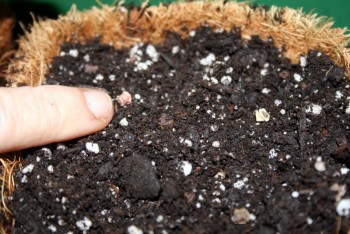
3. Fill your pots to the top, then place a few seeds on the surface. My finger is pointing to the seed. For chard, which is fairly large, I will push the seed into the soil so that it gets a firm seating into the soil. Then cover lightly.


IMG_0761

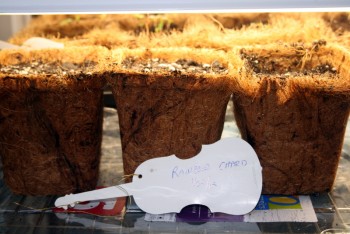
4. Label your pots with the name and date of sowing. Believe me, this is an important step, as you will probably not remember what you sowed or when you sowed it.

IMG_0763

IMG_0764

IMG_0765

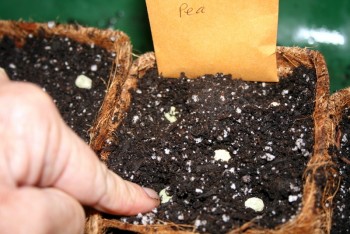
Push large seeds firmly into the soil. Peas can go half an inch deep.

IMG_0766

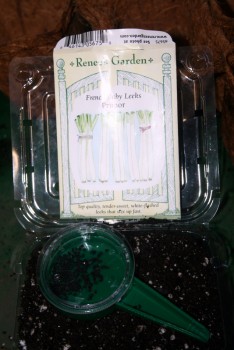
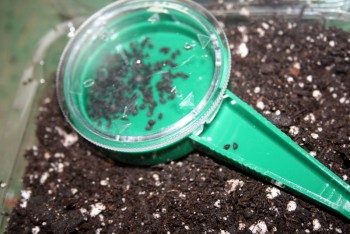
Leeks are small seed and hard to handle.  I use this seed sower which gently lets out seeds a few at a time.  Because leeks are small seedlings, you can sow many in a small pot. When they are ready to be transplanted you can easily pull them apart. More on transplanting later.

IMG_0768

Here’s Broccoli. It’s a favorite in our household and I like to grow a lot of it. It’s a small seed. I put 5 seeds in a 4 inch pot.  When they’re about 3 inches tall I take them out of the pot carefully and transplant them.

IMG_0771

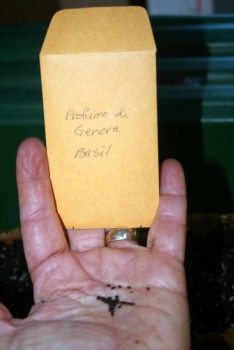
Basil seed looks a lot like broccoli only smaller. If you are using small pots for sowing, then sow 2 seeds per pot. That way you can figure that every pot will have at least one plant.

IMG_0772

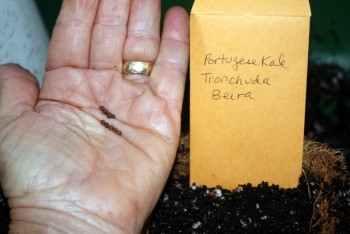
Here’s kale. It’s become very popular lately. There are many kinds of kale. Personally, I like it cooked.  It’s a little tough raw.  I really had a good laugh the first time someone told me I had to massage my kale for salad making! But it’s true.  If you rub your kale with a little salt and olive oil it gets more tender.

IMG_0773


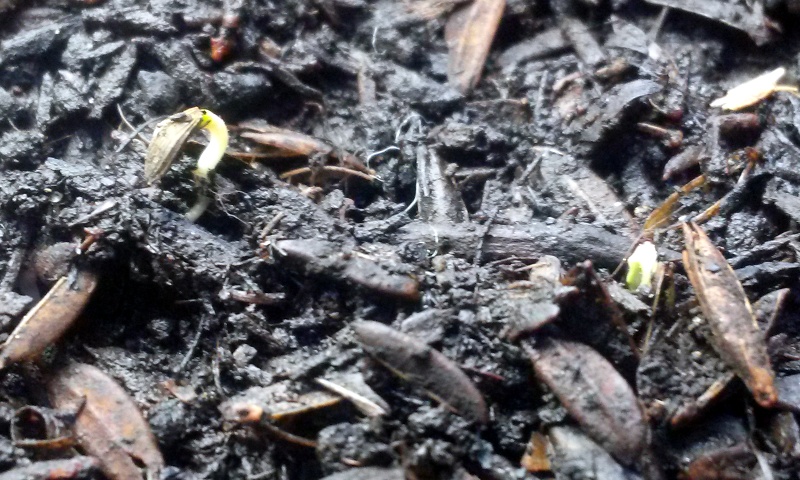
5. Gently water in your seeds. You want the soil moist, but not soaking wet. Keep the surface moist so that the seeds don’t dry out.  As soon as they germinate you can cut back on the water a little.

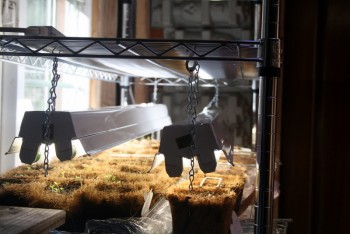
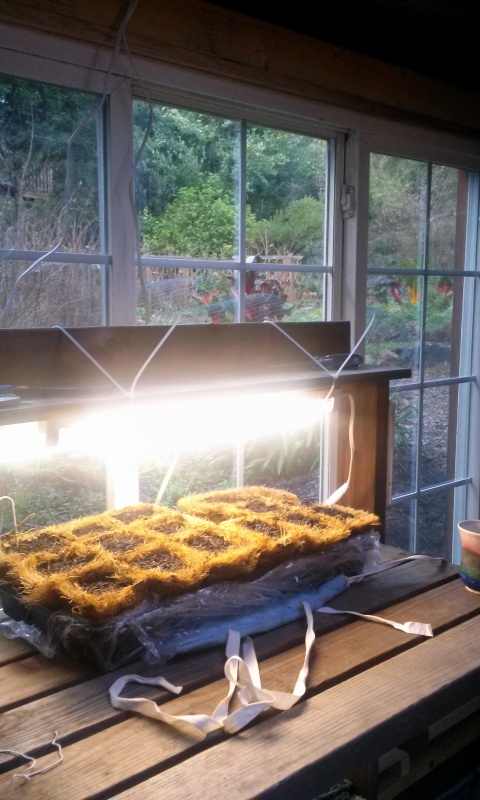
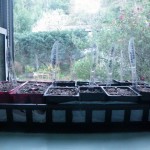
6. Make sure your plants get plenty of light. I use flourescent lights in a shed to make sure they’re strong and sturdy.

Be sure to read more about lights and seedlings in this article to find out which lights and how long to leave them on.

Seeds

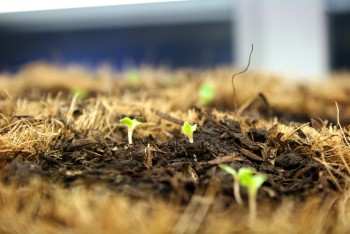
As soon as your seed germinates it needs plenty of light


Well, that just about takes care of the steps to successful seed sowing.  Don’t be afraid. Growing your own plants from seed is one of the most satisfying and magical parts of gardening. If you’re having troubles or need advice, just go to the Ask Avis page and let me know what’s up. Or leave a comment or suggestion at the bottom of the page.  I look forward to hearing from you.


IMG_0774

Jan 272015
 

by Avis Licht

sowing seeds

Sowing seeds and germinating in the kitchen window

Seeds, though small in size are a force of nature.  They carry the future in their tiny form. All the information to grow a might oak is in that tiny acorn.  In nature, every seed is slightly different and allows for the possibility of change:  sometimes better, sometimes worse than it’s parent.  Depending on the conditions after sprouting, a seed can grow strong and healthy or be weak. Like a person with a strong immune system, a healthy plant can withstand disease and attack by pests.

Seed packets

Get seed from organic, reputable seed companies


I’m not going to get into a discussion here about hybrid seeds or GMO, but allow me the premise that healthy plants produce healthy seed and it is to your benefit to choose seed from reputable companies that sell healthy, organic seeds.

It is then up to you to make sure you give those seeds the right growing conditions: from the soil you use to plant them, to the sun and warmth for sprouting. In this post you’ll learn how to mix your soil, sow seed, cover it and water it. It sounds simple, and is, but there are a few basic things you can do to assure success.

earthworm castings

Earthworm castings are a wonderful medium for starting seeds

Soilless seed starter medium

Clean, light medium for starting seed is a good idea


1. Choose your seeds: Pick the right plant for your climate it and sow it at the right time. Pick your favorite veggies and see if they are appropriate for your climate and the size of your garden. You can do this by googling your plant, reading seed packets, or talking to your gardening neighbors.  They often have the best information. In the U.S. you can get a lot of information at this site, SmartGardener.com by typing in your zip code.

2.Mix your seed starting medium: Seeds have enough energy in them to germinate and grow their first true leaves.  After that they need some, but not a lot of nutrition in their sprouting medium.  We can call this needing breakfast.  I mix my own compost or earthworm castings in with a medium like the Seed Starter from E.B. Organics. This starter is sphagnum moss, perlite, and gypsum.  It is clean, light and has no real nutrient.  Seeds will germinate and send roots quickly into the medium.  By mixing it with a little compost or earthworm castings you will add “breakfast”.

filled seed containers

Put the seed medium into container and tamp it down.

Seed starting medium - mix it up a little

Mix different materials in a container


3. Sow your seeds on the surface.  In the small six packs (recycled, of course from previous use), I put 2 seeds per section.  In the larger 2 inch pots I put 4 seeds per pot, and in the 4 inch container I put 6 – 8 seeds.  I use the larger pots for quick germinating larger plants, like chard and broccoli. I use the smaller pots for lettuce, spinach, bok choy and smaller plants. Lightly cover the seeds.  The smaller the seed, the less soil on top.  Your seed packet will tell you how deep to cover your seed.

Seed sowing under lights

Using flourecent lights and a heating pad, seeds get an early start

4. Lightly water your seeds.  A heavy  flow of water will displace your seeds. Use the lightest setting on your watering wand, a light sprinkling can or a spray bottle.  Be sure that your medium is moist before you put the seed in it.  You want it moist, but not soaking wet. Seeds need to be kept moist until germination.  If they are in the sun, be sure to water them a few times a day.

Lettuce seed

Tiny seeds need to be on the surface of the soil, and watered gently.

Broccoli seedlings

Seedlings this size are ready for planting outside

Next step will be how to prepare your garden beds.  We’ll talk about that tomorrow.

You’re ready to grow wonderful, delicious food in your edible landscape. Whether you have pots on the deck, a few square feet, or an entire yard for growing, only do as much as you can happily take care of. Remember, you’re trying to enjoy this project.

the ornamental vegetable garden

A vegetable garden doesn’t have to be square


Feb 102014
 

by Avis Licht

Size of your seed may determine how you sow it

Large seeds often go directly in the ground, and very small seeds do as well.

If you’re thinking about your Spring garden and what to sow, you’re probably wondering if last year’s leftover seeds are good to sow this year. Everyone wants to know. Don’t waste money buying new seed if you’ve got what’s good but you don’t want to lose precious time by sowing bad seed.

Here is a simple method to see if your seed is still viable.

1. Moisten a paper towel and place 10 to 20 seeds of one variety on it. Roll up the towel and place it in a plastic bag labeled with the seed variety. You can keep it on the kitchen counter at room temperature while you are testing. Check the seeds after 2 or 3 days, then every day for a week or two if needed; different varieties have different timing for germination. Be sure to make sure the towel stays moist. Count the number of germinated seeds and divide them by the number of seeds tested. This will give you the germination percentage. If 8 seeds out of 10 have germinated – you have 80% germination. Less than 80% germination means your seeds still have some viability but that you will need to sow them more thickly in order to get a good crop. Seeds with less than 50% germination may not be worth the trouble and you can go seed shopping!

If you do need to buy seeds try Seeds of Change. They are a great organization and provide organic, non – GMO seed. I definitely recommend buying their seed. You can do that by clicking here: Seeds of Change

2. Store unused seeds in a cool, dry place to ensure their maximum germination rates. I use empty herb and seasoning bottles to store my seed.  I try to collect as much of my own seeds as possible. The glass bottles are labeled and I can also see the seed inside to remind me what I have.

Seed storage containers

Empty seasoning and herb bottles are used for storing seed.

20% Off e-Gift Cards with code AFFBVALD until 2/14 only at Burpee.com!

 Seed Savers is also a good company. Rainbow Chard is delicious, beautiful and super healthy.
Seed storage bottle was old salt container

With these bottles you can even sprinkle out   the seed evenly. Perfect use for an old salt bottle.

Here are some good Seed Catalogs – Resources.

Here’s a great chart that Roger Doiron from Kitchen Gardeners International posted, which came from Colorado State University. It covers many common vegetables for your home garden. Of course, viability also depends on the conditions that the seed has been stored in. Too wet, too cold, too hot, too dry – all these can affect your seed germination, BUT, generally you can follow the chart.


20% Off e-Gift Cards with code AFFBVALD until 2/14 only at Burpee.com!

Jan 132012
 
sowing seeds

by Avis Licht

sowing seeds

Sowing seeds and germinating in the kitchen window

Seeds, though small in size are a force of nature.  They carry the future in their tiny form. All the information to grow a might oak is in that tiny acorn.  In nature, every seed is slightly different and allows for the possibility of change:  sometimes better, sometimes worse than it’s parent.  Depending on the conditions after sprouting, a seed can grow strong and healthy or be weak. Like a person with a strong immune system, a healthy plant can withstand disease and attack by pests.

Seed packets

Get seed from organic, reputable seed companies


I’m not going to get into a discussion here about hybrid seeds or GMO, but allow me the premise that healthy plants produce healthy seed and it is to your benefit to choose seed from reputable companies that sell healthy, organic seeds.

It is then up to you to make sure you give those seeds the right growing conditions: from the soil you use to plant them, to the sun and warmth for sprouting. In this post you’ll learn how to mix your soil, sow seed, cover it and water it. It sounds simple, and is, but there are a few basic things you can do to assure success.

earthworm castings

Earthworm castings are a wonderful medium for starting seeds

Soilless seed starter medium

Clean, light medium for starting seed is a good idea


1. Choose your seeds: Pick the right plant for your climate it and sow it at the right time. Pick your favorite veggies and see if they are appropriate for your climate and the size of your garden. You can do this by googling your plant, reading seed packets, or talking to your gardening neighbors.  they often have the best information. In the U.S. you can get a lot of information at this site, SmartGardener.com by typing in your zip code.

2.Mix your seed starting medium: Seeds have enough energy in them to germinate and grow their first true leaves.  After that they need some, but not a lot of nutrition in their sprouting medium.  We can call this needing breakfast.  I mix my own compost or earthworm castings in with a medium like the Seed Starter from E.B. Organics. This starter is sphagnum moss, perlite, and gypsum.  It is clean, light and has no real nutrient.  Seeds will germinate and send roots quickly into the medium.  By mixing it with a little compost or earthworm castings you will add “breakfast”.

filled seed containers

Put the seed medium into container and tamp it down.

Seed starting medium - mix it up a little

Mix different materials in a container


3. Sow your seeds on the surface.  In the small six packs (recycled, of course from previous use), I put 2 seeds per section.  In the larger 2 inch pots I put 4 seeds per pot, and in the 4 inch container I put 6 – 8 seeds.  I use the larger pots for quick germinating larger plants, like chard and broccoli. I use the smaller pots for lettuce, spinach,bok choy and smaller plants. Lightly cover the seeds.  The smaller the seed, the less soil on top.  Your seed packet will tell you how deep to cover your seed.

Kitchen window provides sun

In my kitchen greenhouse window I can start seeds early in the season.

4. Lightly water your seeds.  A heavy  flow of water will displace your seeds. Use the lightest setting on your watering wand, a light sprinkling can or a spray bottle.  Be sure that your medium is moist before you put the seed in it.  You want it moist, but not soaking wet. Seeds need to be kept moist until germination.  If they are in the sun, be sure to water them a few times a day.

Broccoli seedlings

Seedlings this size are ready for planting outside

Next step will be how to prepare your garden beds.  We’ll talk about that tomorrow.

You’re ready to grow wonderful, delicious food in your edible landscape. Whether you have pots on the deck, a few square feet, or an entire yard for growing, only do as much as you can happily take care of. Remember, you’re trying to enjoy this project.

the ornamental vegetable garden

A vegetable garden doesn’t have to be square


Nov 082011
 
Low retaining walls can help prevent erosion

Low stone retaining walls keep soil from falling into the driveway

Erosion of  hillsides can range from minor movement that is easy to repair, to major and dangerous situations.

Caveat! Caveat! Caveat!

If you think you have a major problem, please refer to a professional soil engineer or contractor to help you.  In this post, I am only going to address simple  erosion problems.


Building low stone retaining walls can be simple and effective for keeping  hillsides from eroding.

These walls were built without mortar in  a method called drystack.  Only soil was used to hold them in place.  Cutting back into the hillside, laying the stone, back filling with soil and then planting keeps the base of the wall stable.

Loose soil will collect in the beds at the bottom of the hill.

Vegetated swale

The swale is covered with a biodegradable erosion blanket and sowed with clover and wildflower seeds


When assessing your slope for erosion problems look for these signs:

  • Channels already formed in the hillside from runoff
  • Bare soil that is exposed to  rain or water runoff
  • Downspouts or other water sources

Ways to minimize water damage include:

  • Create swales that are on the contour of your slope
  • Build retaining walls that have drainage in them
  • Sow seed and plant  fast growing shrubs to cover bare soil
  • Mulch, mulch, mulch


Wild strawberry and Mahonia with stone wall

At the top of the stone wall you can see the wild strawberry (click to enlarge)

In the photo above I planted a native strawberry that sends out many runners and roots into the hillside.  It will cover the hill very quickly. Other California native plants that provide excellent cover are creeping Ceanothus, trailing Manzanita and  Sonoma Sage and Coastal Sage Brush.

Planting on steep hills

Creeping ceanothus, trailing manzanita and other natives were used on this steep shady slope

Small stone walls

Small walls at the base of trees keep soil and mulch in place

The most important action for you to take in your garden is OBSERVATION.  Go out in the rain and storms and watch how the water flows.  This is the best way to learn about your garden and the only way to really know what is happening.


© 2011-2024 Edible Landscaping Made Easy With Avis Licht All Rights Reserved