compost | Edible Landscaping Made Easy With Avis Licht - Part 2

Feb 262014
 
Rough compost is used for large areas
  • by Avis Licht –  Mulch is great for the garden, but it’s important to use the right mulch in the right place.  Here are some tips on how to pick the best mulch for your garden.
Mulch is great for the garden

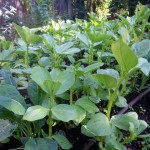
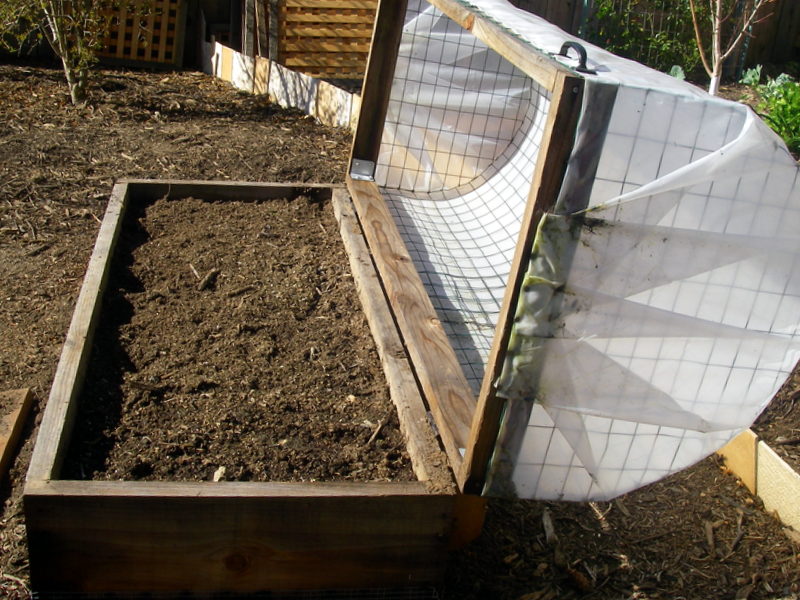
. For vegetables I use organic compost.  It is pretty in the beds and useful for the plants.

MULCH IS GOOD FOR THE GARDEN

There are many kinds of mulch and each has its particular benefits and disadvantages. Sometimes it’s better not to use any mulch.  It can be from natural materials like bark and compost or man made from plastic and rubber.

Rough compost is used for large areas

We take our lessons on mulching from mother nature.  Falling leaves, twigs, needles, flowers and fruit fall to the ground, covering the soil.  They decompose, adding nutrient back into the earth. They also protect the soil from sun, wind and hard rains to keep the soil from eroding, blowing away and becoming compacted. In our desire to be “neat” we often rake up leaves and put them in the garbage in a misguided effort to keep the garden looking tidy. If you want to enjoy a very funny story on lawns and raking leaves, check this out: A Story About Lawns and God.

Here’s how to keep the garden looking good and stay healthy at the same time.

ADVANTAGES OF MULCHING

  1. Conserves water by preventing evaporation
  2. Reduces weed growth
  3. Keeps soil cooler in summer and warmer in winter
  4. Organic materials improve soil structure as they breakdown
  5. Reduces splash onto leaves and buildings
  6. Reduces erosion by slowing down water runoff and allowing water to penetrate the soil, reduces wind erosion
  7. Reduces soil compaction, which in turn allows water and air to penetrate into the soil
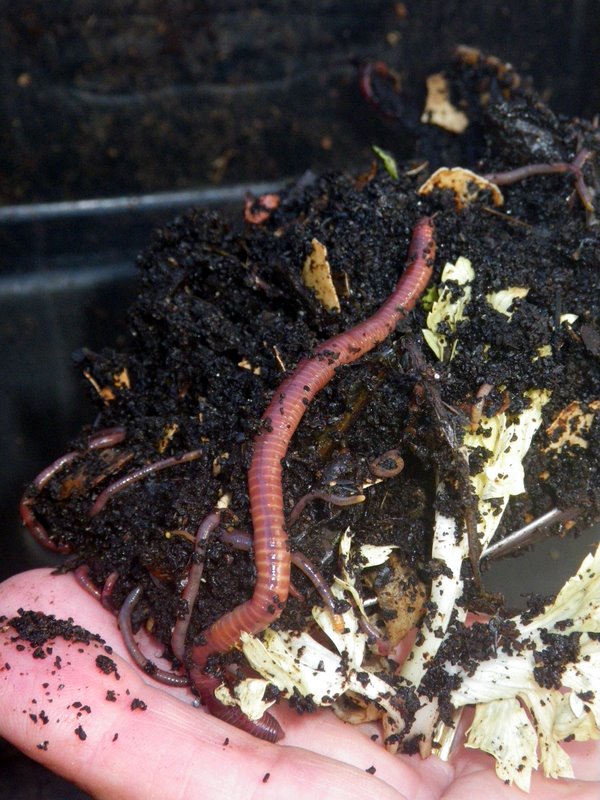
  8. Encourages worms.(Yes!)
  9. Looks good (Also Yes!)
Organic compost around herbs

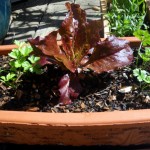
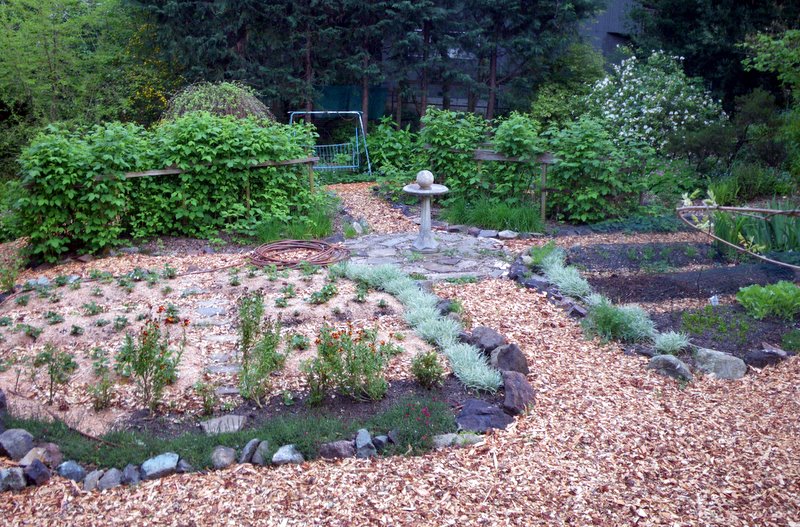
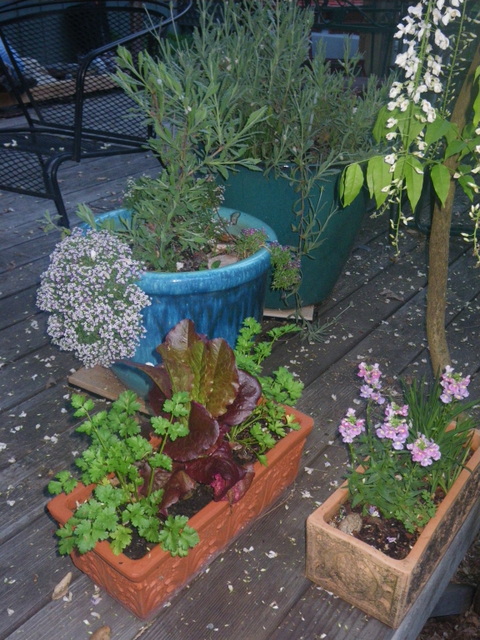
Compost around herbs looks good and adds to the health of the soil and plants

DISADVANTAGES OF MULCHING

  1. Mulched beds are slower to warm up in spring – especially a concern for vegetable gardens
  2. Can import weed seed – especially in compost and manure that has not been sufficiently heated
  3. Can prevent native bees from creating homes in the ground. (Warning, this link doesn’t encourage mulching, but has some good points)
  4. Large and small bark mulches can take nutrient out of the soil as they break down. (This link has more information on problems with mulch)
  5.  Inorganic mulches like plastic and shredded rubber do not decompose, they just break up into  smaller pieces that are garbage.
  6. Mulches that are too thick can prevent water and air from entering the soil.
  7. Mulches too close to the trunk or crown of a plant can cause it to rot.

TYPES OF MULCH

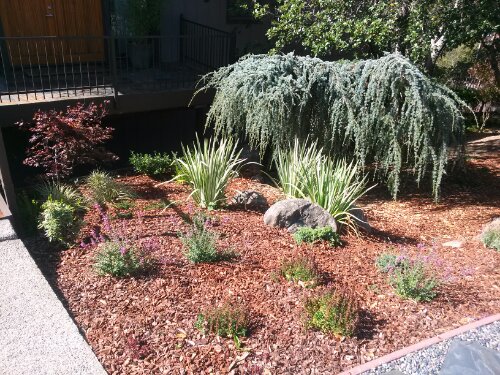
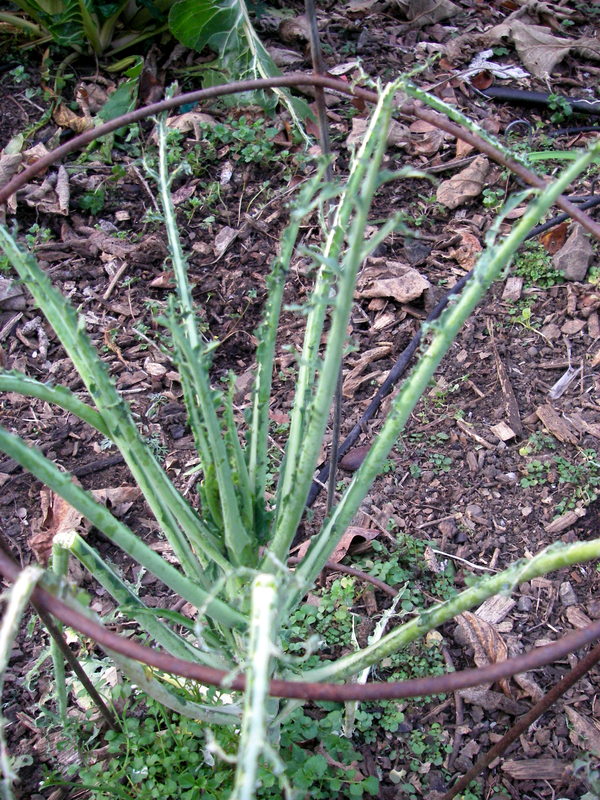
  1. Bark, either shredded or sized (1/4″, 1/2″ or larger) can be very ornamental and tidy.  They do not add nutrient value to the soil.  It is also hard to clean up falling leaves from areas mulched with bark. Bark can be expensive.
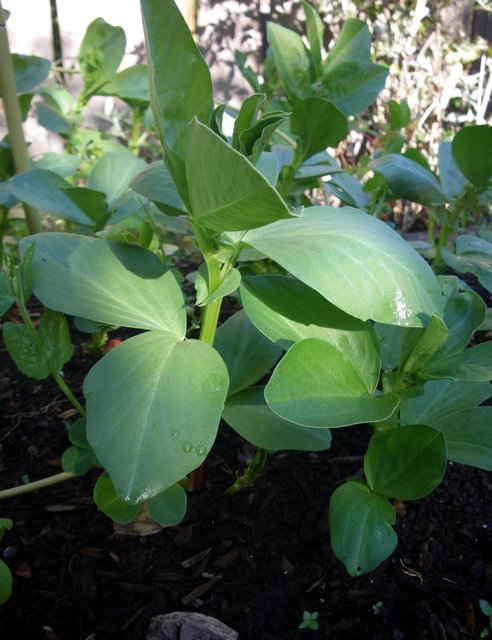
  2. Compost is excellent for most plants.  It can be bought or you can use your own.  I found it difficult to make enough of my own compost to cover all my garden.  So I used it on the most important plants – my vegetables and strawberries. Be aware that compost can have weed seed. There are many sources for good looking, safe compost. (Contact your local soil and amendment supply store.)
  3. Manure that is well composted is an excellent mulch in most parts of the garden.  Horse stables have different methods of composting their piles.  Test it in one area of your garden to make sure you don’t import unwanted weeds.
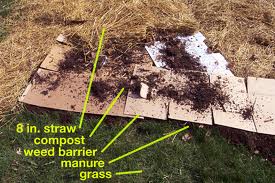
  4. Straw and hay. Hay has seeds and you don’t want to use it.  Straw on the other hand, is basically weed free.  It isn’t particularly pretty, so use it in the vegetable garden.  It can create habitat for slugs and worms if kept  moist.  So have an eye out for that.
  5. Leaf mold is from leaves that have decomposed. I rake up all my oak leaves and put them in a big pile over the winter.  In spring I move aside the top leaves and underneath is a beautiful  amount of composted leaves, known as leaf mold. Don’t worry it’s not moldy! I put this on my fruit, raspberries, strawberries and currants.  You can also use it in your perennial garden. Don’t use leaves from Eucalyptus, Walnut, Bay or diseased trees. Their leaves have allelopathic elements that inhibit the growth of plants.
  6. Living mulch is a low growing ground cover.  It protects the soil by covering it, and also increases soil health by growing roots, which creates humus, aeration and water penetration. Live plants also create a healthy atmosphere of transpiration, moisture and habitat for birds and insects.
  7. Rocks, stones and pebbles can also be used as mulch. They can be very ornamental, while still preserving moisture, protecting the soil and reducing weeds.  Stone will absorb heat and release it into the ground.  This kind of mulch is excellent for desert plants, succulents and alpine plants.

WHERE TO MULCH

  1. New plantings – Cover areas that are exposed until the plants fill in
  2. Vegetable garden – Use compost to mulch around your young plants. This will keep the soil surface from compacting and will add nutrients and worms.
  3. Put around trees
  4. All shrubs, flowers and perennials
  5. Basically everywhere, except those special parts of the wild garden where you want to leave soil for your native bees to take up residency.
  6. Replace mulches as they decompose, faster for composted areas, longer for bark.
Young plants benefit from compost

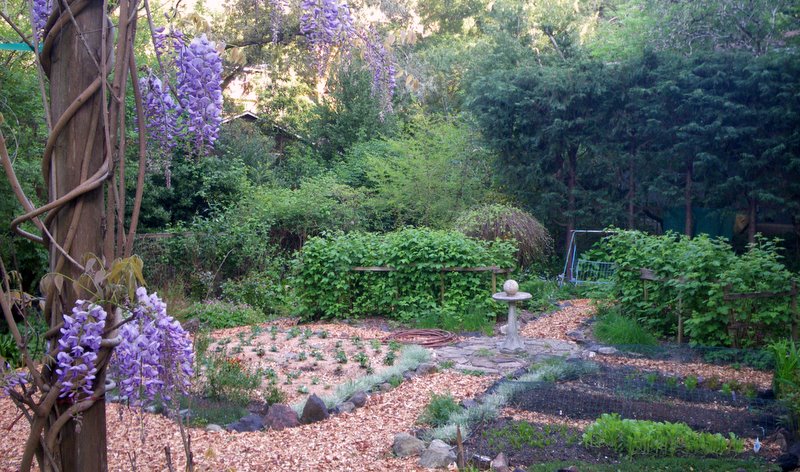
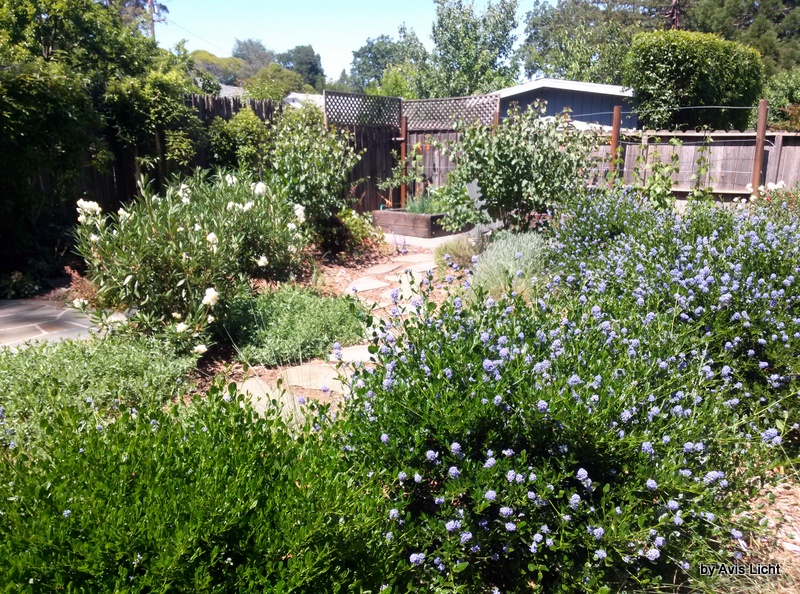
Mulching keeps the yard looking good and provides a healthy environment

Feb 112014
 
Spring Garden Made Easy


Get my book  and  be ready for Spring!


It won't be long before the spring garden starts to grow.

I

It’s that time of year – time to start the Spring Garden.  If you want to know what to grow in your own climate, how to start seed and how to make compost, be sure to get my e book.  Under $5 and you get all the information I learned in 40 years of gardening.  Well, maybe not all, but probably the best parts.

Robert Kourik, author of Your Edible Landscape – Naturally writes:
“Avis has condensed over four decades of gardening skill into one information-packed handbook. This is important reading for the beginning gardener. You will skip making many mistakes by reading this attractive handbook first.”

If you would like a simple, easy to follow handbook on starting your Spring Garden, then you’re in luck. I’ve written a concise, 20 page manual for the novice gardener. Based on 40 years of gardening experience I’ve winnowed down the information to make it a straight forward process.Only $4.99.  You can’t afford not to have this helpful guide to start your Spring Garden!

Spring Garden Table of Contents

Table of Contents

Spring Garden Made Easy

The first book, The Spring Garden Made Easy, is aimed at helping you start out, one step at a time to be successful and inspire you to keep going. There will be set backs – snails, earwigs, gophers, deer, they all want a part of your garden. We learn to how to keep them from getting too much and even how to share. Click on the Buy Now button above or on the right side of the web page and you can download it immediately.My hourly consultation is definitely more than $10, which is the cost of the book.  Since I can’t be with all of you in your garden, take this opportunity to pick my brain by buying the book.  Be sure to sign up for the blog as well, it’s free and it’s got lots of information.  I always love to hear from my readers.  Leave me a comment and let me know how your garden grows. In the joy of gardening, Avis

Jan 292014
 

By Avis Licht

Mulch

Use mulch, plant drought resistant plants, and drip irrigation

On the west coast of the United States we’re experiencing the worst drought in over 150 years. With more people needing more water, food and goods it is important that all of us do our part to reduce our water use.

Gardeners love their plants and don’t want them to die. I’ll continue writing posts on best gardening practices to help you keep your garden healthy and happy using less water.

Most plants absorb almost all their water through their roots. A well-developed root structure will be your insurance for survival in drought conditions.


The best way to get excellent roots is to have loose, friable soil with plenty of humus and organic matter. By working the soil with a fork or rototiller and incorporating compost and/or manure you create the conditions for the soil to be like a sponge that holds and then releases water. Read more about compost here.

Big Mother earth worm

Worms are important for soil health.

A note on roots. When soil moisture varies widely from wet to dry it damages the delicate root hairs that are responsible for taking up moisture. Using mulch is very important to maintain the moisture in the soil by slowing evaporation.

mulched garden

Protect your roots by protecting the soil with mulch.

A note on leaves on the plants. Leaves don’t absorb much moisture but they do transpire moisture; The hotter and more windy the day, the more water the plants lose through their leaves . Row covers or shade cloth put over the plants in hot weather will reduce transpiration rates. You can find row covers and hoops to put them in your garden at this link: Row Covers for the Garden. You can buy shade fabric here: Shade Fabric.

Be sure to sign up on my subscription or feed burner to get notified when I put up more posts. You won’t want to miss any of this great information. I’ll keep writing about drought conditions and ways to keep your garden healthy and happy.

Jan 242014
 
Hemerocallis - Edible flowers - look good and taste good

posted by, not written by Avis Licht

I make it a rule to only post what I write unless I have a guest blogger.  A friend sent me this story about lawns and drought and some other crazy garden behavior.  We haven’t been able to find the author but hope you enjoy the story.

Japanese Maple leaves resting on the ground in the Fall.

Japanese Maple leaves resting on the ground in the Fall.

Of Lawns and God

GOD: St. Francis, you know all about gardens and nature. What in the world is going on down there in the USA? What happened to the dandelions, violets, thistles and stuff I started eons ago? I had a perfect, no-maintenance garden plan. Those plants grow in any type of soil, withstand drought and multiply with abandon. The nectar from the long lasting blossoms attracts butterflies, honeybees and flocks of songbirds. I expected to see a vast garden of colors by now. But all I see are these green rectangles.

ST. FRANCIS: It’s the tribes that settled there, Lord. The Suburbanites. They started calling your flowers “weeds” and went to great lengths to kill them and replace them with grass.

GOD: Grass? But it’s so boring. It’s not colorful. It doesn’t attract butterflies, birds and bees, only grubs and sod worms. It’s temperamental! Do these Suburbanites really want all that grass growing there?

ST. FRANCIS: Apparently so, Lord. They go to great pains to grow it and keep it green. They begin each spring by fertilizing grass and poisoning any other plant that crops up in the lawn.

GOD: The spring rains and warm weather probably make grass grow really fast. That must make the Suburbanites happy.

ST. FRANCIS: Apparently not, Lord. As soon as it grows a little, they cut it, sometimes twice a week.

GOD: They cut it? Do they then bale it like hay?

ST. FRANCIS: Not exactly Lord. Most of them rake it up and put it in bags.

GOD: They bag it? Why? Is it a cash crop? Do they sell it?

ST. FRANCIS: No, sir — just the opposite. They pay to throw it away!

GOD: Now, let me get this straight. They fertilize grass so it will grow. And when it does grow, they cut it off and pay to throw it away?

ST. FRANCIS: Yes, sir.

GOD: These Suburbanites must be relieved in the summer when we cut back on the rain and turn up the heat. That surely slows the growth and saves them a lot of work.

ST. FRANCIS: You aren’t going to believe this, Lord. When the grass stops growing so fast, they drag out hoses and pay more money to water it so they can continue to mow it and pay to get rid of it.

GOD: What nonsense. At least they kept some of the trees. That was a sheer stroke of genius, if I do say so myself. The trees grow leaves in the spring to provide beauty and shade in the summer. In the autumn they fall to the ground and form a natural blanket to keep moisture in the soil and protect the trees and bushes. Plus, as they rot, the leaves form compost to enhance the soil. It’s a natural circle of life.

ST. FRANCIS: You’d better sit down, Lord. The Suburbanites have drawn a new circle. As soon as the leaves fall, they rake them into great piles and pay to have them hauled away.

GOD: No. What do they do to protect the shrub and tree roots in the winter and to keep the soil moist and loose?

ST. FRANCIS: After throwing away the leaves, they go out and buy something which they call mulch. They haul it home and spread it around in place of the leaves.

GOD: And where do they get this mulch?

ST. FRANCIS: They cut down trees and grind them up to make the mulch.

GOD: Enough! I don’t want to think about this anymore. St. Catherine, you’re in charge of the arts. What movie have you scheduled for us tonight?

ST. CATHERINE: “Dumb and Dumber,” Lord. It’s a real stupid movie about . . .

GOD: Never mind, I think I just heard the whole story from St. Francis.

Source: Unknown

Plant food not lawns!

Plant food not lawns!


Jan 212014
 

by Avis Licht

Combine your raised bed with a top and voila! a cold frame and bird protector

Combine your raised bed with a top and voila! a cold frame and bird protector

This raised bed has many positive attributes. Let me count the ways.

1. It is easy to build. Using either recycled or new wood, you only need to put the four sides together with angle brackets. I suggest that you make the bed small enough that you can reach over to harvest and weed; not more than 3 feet deep. It should be long enough to grow the kind of crop you want and fit into the area that you want to put it.

With simple corner piece, you can make your box and top strong

With a simple corner piece, you can make your box and top strong


2. You can put wire underneath the bed easily to keep the gophers out. I suggest using hardware cloth, as it is strong and won’t rust out for a long time and the opening is small enough to keep the gophers from coming through.

Hardware cloth

Put wire under box to keep the gophers out


3. You can fill the raised bed with the best topsoil for your needs. You can buy organic soil and add compost or manure depending on your crops. Basically, you have more control over the soil when you bring it in, but it can also be expensive.  If you have reasonable topsoil in your garden, you can mix it with amendments. Bought topsoil also has the advantage of being weed free.

4. The beauty of the cover is that it can be used as a cold frame when covered with plastic, a shade bed when covered with shade cloth or as bird protection when covered with bird netting. With hinges it is easy to open and close. This makes for better control of temperature in the bed: you can prop it all the way open if the sun is out or just a little bit for air flow.  A hinged top makes for easy harvesting. Take a look at this picture of my kale, that the birds are using as a bird feeder. Yikes! Gotta get a cover on them.

This raised bed is covered with a plastic top, but it could also just be wire for bird protection

This raised bed is covered with a plastic top, but it could also just be wire for bird protection

Bird damage to a mature kale plant.

Bird damage to a mature kale plant.

Let me know what beds you use and if they work well for you.


[portfolio_slideshow id=2775]

Jan 162014
 

by Avis Licht

Mulch

Good soil preparation and mulching are essential for holding moisture in the soil

In Northern California we’re experiencing a record breaking drought this winter. The rainy season isn’t over – yet, but there is no rain forecast for the rest of January, and reservoirs and streams are very low.

There are a few simple and easy steps you can take to prepare your garden for  drought conditions. And you should start as soon as possible.

1. Cover your exposed soil with mulch or compost. By covering your soil, you allow rain, when and if it comes, to penetrate into the soil and not run off.  There are many kinds of mulch for different conditions.  Please read this post to find out more about which mulch is the right one for your garden.


Sheet mulching is an excellent method to turn water hungry lawn into efficient, beautiful and water conserving plantings.  Please read my description of sheet mulching here.


Sheet mulching

Layers for sheet mulching


2. Check your irrigation system for leaks. Every year your system needs to be checked.  Digging in the beds, gophers, raccoons, plants, freezing weather: all can break or loosen your irrigation pipes and cause leaks.  Those leaks can lose LOTS of water.  Please read this great article by Robert Kourik – drip irrigation expert.

Lettuce planted for winter harvest

In line emitter irrigation pipe


3. Container planting produces great crops with very little water. You might want to consider planting in pots and containers for certain crops. You can control water use easily and get your food and flowers easily. Read here for more about container planting.

the water at the top drips down to the plants at the bottom.  Great use of space and water.

The water at the top drips down to the plants at the bottom. Great use of space and water.

A good harvest in a small place, with very little water.

A good harvest in a small place, with very little water.

Ornamental containers can grow herbs and food.

Colorful pots mixed with herbs, lettuce and flowers are easy to harvest


4.Convert high water use plants to native plants. There are many beautiful native plants that can serve the same purpose as your water hungry plants. Winter is a good time to do that planting. Here are a few ideas for native plants in this post: California Native Plants

Manzanita and Ceanothus are easy to grow and use very little water

Manzanita and Ceanothus are easy to grow and use very little water

Nov 192013
 
feijoa sellowiana

by Avis Licht –

feijoa sellowiana


Pineapple Guava

Fruit that ripens in the Fall


The Pineapple Guava is one of my favorite plants.  It serves many purposes in the edible garden. It’s an easy care, evergreen shrub that has edible flowers, edible fruits and somehow, the deer DON’T eat it.  It almost sounds to good to be true.

Where I live, deer eat almost all our plants, so having one that does all these good things is a real treasure.

Climate:The Pineapple guava grows in Zones 8 – 10.  What this really means is that it likes some cool weather, can go down to 10 deg. F, likes rain in the 30″ – 40″ range, and doesn’t like super hot daytime weather – not so good in the desert.

Soil: It’s adaptable to a wide range of soils, including acidic soil, but prefers a humus rich soil that is well drained.  Adding compost and not manure works for this plant.

Water: This is considered a drought tolerant plant, meaning it survives with relatively little water, but needs adequate water for good fruit production. During dry spells you should give it additional water.  In real terms, this means observe your plant. No matter what the books say, you always need to observe your plants in your own garden setting to see how they are faring and what they need. Everyone’s garden is different from the norm that all these books talk about.  You’ll always want and need to adjust requirements to your own situation.

by Avis Licht – If you need some great information on starting your Spring Garden, have a look at my new ebook, called The Spring Garden Made Easy

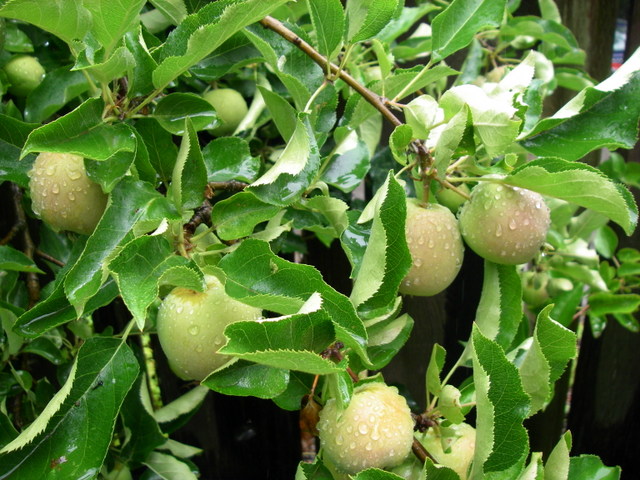
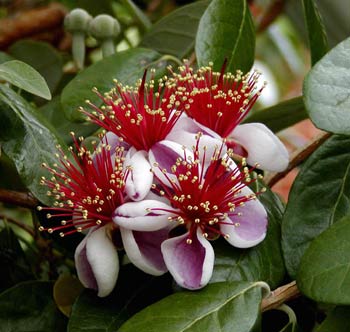
See these pretty pink petals? They are edible. Just gently pull them off and leave the rest of the flower so that it turns into fruit. The petals are really delicious. Take my word for it.

Sun: Full sun is best – but it can tolerate partial shade

Wind:The Pineapple guava makes a good windbreak. It can take some salt air, but I wouldn’t put it on the dunes as a first line wind break.

Care:  What I really love about this plant is that it needs so little care.  It just grows happily on its own. You can prune it for shape or let it alone. If you prune it back hard, you will lose some fruit production.

Pests: Almost none. Well, I haven’t seen any.

Be sure to check out my store of favorite reliable tools and implements for the garden.

Fruit and flowers:  The flowers which bloom late Spring are edible. The thick petals are spicy and are eaten fresh. The petals may be plucked without interfering with fruit set. The fruit ripens in late Fall, which is a great boon, since almost everything else in the garden is gone.  The fruit in the picture below, came from my garden on November 19th. They taste fresh and tangy. We eat them by scooping out the fruit with a spoon.  Or you can  cook them in puddings, pastry fillings, fritters, dumplings, fruit-sponge-cake, pies or tarts.

Scoop the fruit of the pineapple guava

Scoop the fruit of the pineapple guava out of the skin.

Don’t forget to check out my ebook: The Spring Garden Made Easy. It’s only $4.99 and gives a mountain of information.

Nov 122013
 

by Avis Licht

Spring Garden Made Easy

A cover crop is an area of planting that is sown for the purpose of improving the soil and keeping the ground “covered” to prevent erosion.

The right plant can:

  • Increase the  organic matter content of the soil
  • Increase the availability of nutrients
  • Improve the soil’s tilth, which is the texture of the soil
  • Reduce weeds by choking out undesirable plants
  • Reduce soil pests
  • Enhance the soil’s biological activity.

Fava beans are one of my favorite cover crops. You can sow them late in the Fall even in cold weather.

Fava beans germinate quickly and grow even faster.  You can use the tops for compost, eat the beans, and when you’re done with the plants you can leave the roots in the ground.  Fava beans  will have put more nitrogen into the soil than it takes out.  I mean, this is a plant that keeps on giving.

It’s not a good idea to  leave any areas of your garden bare in the winter. Rain will compact the soil. The ground is subject to erosion and leaching of nutrients when nothing is growing. I sowed my Fava Beans in November and 3 weeks later they were over 8 inches tall. The moral here is better late than never.

In the Spring, when you’re ready to plant your veggies, you can cut down the fava beans even if you don’t harvest the bean for eating.  It will make an excellent addition to your compost pile and leave the soil in better condition.

Once we’ve got our garden planted, we can sit back and welcome winter back again.

And while you’re relaxing around the fire, it’s time to start perusing those beautiful seed and plant catalogs for Spring and even get a leg up on your spring garden with my ebook, The Spring Garden Made Easy.

Spring Garden Made Easy


To help you get started on your Spring Garden, there’s plenty of good advice in my ebook: The Spring Garden Made Easy. It’s only $4.99. If you’ve gotten useful information from my blog,here’s a way to keep me going. Thanks for reading. Be sure to leave a comment and let me know if you have any questions or suggestions. I love to hear from you

Bell beans grow all winter long

Bell beans grow all winter long

The summer vegetables are gone and it's ready for fava beans as a cover crop

The summer vegetables are gone and it’s ready for fava beans as a cover crop

Nov 102012
 

by Avis Licht – 

carrots

Beautiful, delicious carrots from a container planting

People who live in urban areas or in apartments often think they can’t grow food. But using planters can be a fun and easy way to grow certain crops.  Containers have their challenges, particularly because of limited soil and need for careful watering and fertilizing.  On the up side, you can put them in small places, in the right light conditions and keep the bugs away. For more on container growing, read this post.

A confession – for two years I haven’t been able to grow any carrots, though I’ve sowed a whole lot of seeds. I prepare the bed carefully, rake and smooth it. Sow it. Water it. Watch and wait.  Sure enough the seeds germinate, I give a victorious shout. The next day I come out and all the seedlings are gone. Some ravenous sow bugs, earwigs, slugs, snails or combination of any or all of the above have managed to decimate my crop. For gardening beginners, this could be very discouraging, especially if an experienced gardener can’t seem to have success.

See those carrots in the photo? Those are mine. I grew them. In a container! Here’s how:

1. Get a pot: clay, wood, plastic or cloth – doesn’t matter.  For carrots, the pot should be 10 -12 inches deep.

Container for planting

A cloth container – use and put it away when you don’t need it. These cloth pots are easy to transport, easy to store: a real plus in urban areas. Find them at this site: Smart Pots.


2. Fill container with planting  medium

Carrot seedlings

A mix of seed starting medium and worm compost.


3. Keep seed moist to germinate, keep pot watered, but not soggy. Thin seedlings: 1/2 -1 inch apart.

Carrots in pot

2 months after sowing, carrots have filled in container and are ready for harvesting


When harvesting, gently separate the greens and look for the largest carrots . Pull them out carefully, making sure not to disturb the neighboring carrots. It wouldn’t hurt to give them a little water after harvesting to settle the roots.

In a 3 gallon size pot (like the one on the left) I will harvest more than 50 small carrots.  They are were incredibly sweet and I had NO bug problems.


Be sure to read more about container planting in this post.  Sign up for an email subscription to this blog so you won’t miss a post.

container grown carrots

Even on tiny decks you can grow fun food. Not only herbs and flowers, but greens, salads and much more.


Oct 302012
 

by Avis Licht

Whether you plant edible crops for the winter or not, there are a few things you can do to keep your garden healthy and protected for the winter.

Clean up under your fruit trees and mulch with compost


1. Clean out the old beds and if you have room, be sure to compost your old foliage.  There are a lot of nutrients in those plants that  came out of your ground and you can put those nutrients back into the soil. Composting is an important part of garden health.


Fava beans make a wonderful winter cover crop


2. Plant cover crops to protect the soil from erosion and add nutrients as well as humus to the soil.  Fava beans and bell beans can be sown even in cold, wet weather.


3. Sheet mulch to cover large areas to improve the soil, get rid of weeds and prepare for future planting without having to dig the soil.  Sound too good to be true? Well it really works. Here’s an article about sheet mulching in my own back yard.


Mulching around plants


4. Mulch the soil around plants. This is one of the most important things you can do in the winter to protect the soil from erosion, hold moisture, protect roots from extreme weather and add nutrient. There are many types of mulch. Leaves, straw, wood chips, compost, and manure are some of the most common and easiest to use. As with everything else in the garden, there’s always lots to learn.  Different mulches  work better in different conditions. Check out my article on best mulching practices.


Frost on fallen leaves

Oct 082012
 

by Avis Licht

Tomatoes, apples, squash

Bring in the harvest from summer to make room for winter crops


The changing seasons in the garden can leave us with  mixed feelings .  The end of the summer season means that we need to clear the beds for the winter garden while it’s still warm enough to plant. The regret is that we have to take out plants that are still producing.

I still have tomatoes, but they are ripening verrrry slowly due to the cold evenings and shorter days. Sadly, I’ll be pulling them out. You can bring in the green tomatoes and they will ripen, though not as perfectly as they did on the vine in the middle of summer.

tomatoes in October

Even cherry tomatoes are slow to ripen in the Fall.

Happily, this will make room for my winter crops, like broccoli, cabbage, cauliflower and lettuce. I’ll be writing about what to grow for winter and how to do it. Be sure to subscribe to my blog so that you can get updates every time I write.


At the Indian Valley College Farm and Garden, the students were busy pulling out the summer crops like cucumbers, beans and squash to make room for the cool weather crops.  They were making wonderful piles of compost.  Layering greens, dry material, manure and water. Nothing goes to waste in the garden.  We may loose a few cucumbers, but gain a lot of compost.


Compost

Starting the compost pile.

Layering compost piles

Take the plants that are done producing and start your compost!


In areas that you won’t be putting in food crops, be sure to cover the ground with cover crops to enhance fertility and protect the soil.  Use fava beans, bell beans, vetch, clover and buckwheat.

direct sow your fava beans

Large seeded plants like beans and peas can go directly into the soil.

Jun 062012
 
rolling self watering planters


tomato in self watering container

Plants thrive with good moisture in planters


by Avis Licht – When I gave a talk recently on edible landscaping, many people had questions about container planting.  For gardeners with decks, small gardens, or special climate conditions, containers are a simple and easy solution.  However, there are a few tips for helping you grow your plants more successfully. People don’t realize how fast pots dry out and how hard it is to get them moist again.  Once soil has dried out, if you water the pot with a hose, it just runs on through.

Keeping your soil moist is a trick that requires some practice.  Using drip irrigation in your pots, for 3 or 4 minutes 2  or 3 times a day often works.  If you don’t have your pots on an irrigation system try these self watering planters.  They really work!

1. Make sure there’s enough room in the container for root growth of your plants. 

Here are some suggestions for what plants to grow in different size pots.

  •   6″ depth is the minimum – chives, lettuce, radishes, other salad greens, basil, coriander, Asian greens, mint, thyme
  •    12″ for larger veggies – pole beans, carrots, chard, cucumber, eggplant, fennel, leeks, peppers, spinach, parsley, rosemary,beets, broccoli, okra, potatoes, sweet corn, summer squash, dill, lemongrass, bush beans, garlic, kohlrabi, onions,  peas,
  • 18″ -24″  for miniature trees like lemons or limes.
organic tomato fertilizer

From your local nursery or online, find organic fertilizers

2. Use the right soil mix. For self watering planters I suggest you use the mix from Gardener’s Supply formulated just for that.  You’ll need to add nutrition in the form of compost, aged manure, blood meal and other organic fertilizers. The plants rely on you 100% for their nutrition. Be sure to feed them.  Read up on what your plants need and add it to the potting soil. Using foliar feeding or a liquid fertilizer like seaweed solution works well.Don’t just put soil from the garden into your pots.  It will be too heavy and dry out easily.


3. Place the planters where they will get the best light and be protected from wind or blasting hot sun. Gardener’s Supply even has self watering planters that have castors on them so you can move them around to catch the changing light and heat conditions.

rolling self watering planters

Pots can look good and be easy to move

May 302012


worms in the bin

by Avis Licht – I really love worms.  Some people think I’m a little crazy about my worm love, but when you know more about them, you’ll love them too.  It’s hard to believe such a small creature can do so much heavy lifting.   Check out these facts:

1.When compared with soil, worm casts also contain:

5 times more nitrogen;
7 times more phosphorus;
1.5 times the calcium;
11 times more potassium;
3 times more exchangeable magnesium.

2. Worm compost is organic, non-burning and rich in nutrients.  Vermicompost contains eight times as many microorganisms as their feed, which promotes healthy plant growth.

Be sure to sign up with your email to get all my posts. Go to the right column and you’ll find the sign up spot. I never share or give your emails to anyone else. Don’t miss any important gardening information.

3.Worms tunnel deeply in the soil and bring subsoil closer to the surface mixing it with the topsoil. Slime, a secretion of earthworms, contains nitrogen. Nitrogen, as we all know, is an important nutrient for plants. 

4. When expelled, worm casts consist of granules, surrounded by a mucus, which hardens upon exposure to air. When granular castings are mixed into garden or houseplant soils there is a slow “time release” of nutrients. However, the hardened particles of mucus do not readily break down. Instead, they serve to break up soils, providing aeration and improving drainage. Worm casts therefore provide an organic soil conditioner as well as a natural fertiliser.

5. The casts are also rich in humic acids, which condition the soil, have a perfect pH balance, and have plant growth factors similar to those found in seaweed.

Worms live where there is food, moisture, oxygen and a favorable temperature. If they don’t have these things, they go somewhere else. Don’t let this happen to your worms!

Here’s how to provide your worms with a happy home:

1. Get a multi layer worm box.  It allows the worms to travel to new food in the next layer, keeps the rain out, collects worm juice at the bottom and lets you collect finished castings without sifting.  The worms move up to the next layer when they’ve finished the food in the first layer.

Multi level worm bin

2. Layer bedding material in the box.  It can be torn newspaper, sawdust, leaves, dried leaves or any biodegradable, carbon based material. You can use horse or composted rabbit manure. Earthworm bedding should retain moisture, remain loose, and not contain much protein or organic nitrogen compounds that readily degrade.  Don’t put the box in the sun. It will get too hot for your worms.

torn newspaper for bedding

3.Add moist materials like composted manure, soil, leaves and worms. I got these worms from Urban Worm Composting.

Worms for composting

These worms are from Urban Adamah in a composted material. Lay them in the box.

4.After worms are added, keep the bedding moist but not soggy. If you’re using kitchen scraps, cut them up into 2″-3″ pieces. It’s easier for them to eat.  Feed them 2 or 3 times a week, a few cups at a time. If you leave on vacation, don’t worry, they’ll be fine.  Just make sure they have a little food before you go. Cover the food with cardboard or shredded newspaper. It keeps them moist.

food for your worms

Egg shells, banana peels, lettuce, coffee grounds – all good.

5. What NOT to feed your worms: 

Use Caution When Adding These:

Breads — can attract red mites
Potato skins, onions, garlic, ginger — get consumed slowly and can cause odors
Coffee grounds — too many will make the bin acidic

Do Not Feed:

Meat, poultry, fish, dairy — protein attracts rodents
Potato chips, candy, oils — worms do not like junk food and these attract ants
Oranges, lemons, limes — citrus has a chemical substance (limonene) that is toxic to worms

Let me know if you have problems.  There’s usually a simple solution.

Gotta love those worms!

Earthworms galore

Earthworms galore


Apr 242012
 
Delicious homegrown tomatoes

We love a salad of different kinds of tomatoes

by Avis Licht – A fresh picked, ripe, delicious tomato is one of the best foods in the garden. They are soooo much better than store bought and so easy to grow, that they are one of the most widely grown vegetables. Here are a few tips that will help insure you get the best, tastiest and healthiest tomatoes.

1. Pick a sunny site. You can’t make up for lack of sun.  Look for at least 7 hours of sun per day.

2. Tomatoes prefer well drained, neutral  to slightly acid soil.  Add lime to acid soil and sulfur to alkaline soil. Make sure your soil drains well. They don’t like sitting in water.

3. Pick several varieties that are suitable to your climate.  For instance, if you live near the coast and fog, it’s better to grow cherry tomatoes that don’t need a long, hot season.  The larger the tomato, the longer the season. There are plants known as determinate and indeterminate.  Determinate types are bushier, need little or no staking and tend to bear all their crop at once.  They do well in pots or containers. Indeterminate grow taller and need staking.  They bear their crop over a longer period of time.  If you plant some of each you will have tomatoes over a longer period. Check out this site for varieties of heirloom tomatoes.

Young tomatoes

Stake your tomatoes early and keep them off the ground to reduce rot and pests

4. Set out your plants after all danger of frost has passed.  The biggest mistake people make is putting out their tomatoes too early, during a warm period in early spring. They get whacked by a late frost, or just cold weather.  Tomatoes like warm soil.  Put the plants in and after the weather warms up a little, then mulch them.

5. Give tomatoes well aged manure or compost.  They don’t need a lot of nitrogen, but do need the micronutrients in the compost for good flavor.

6. HERE’S AN IMPORTANT TIP: Give your tomatoes regular water.  If the roots dry out, they don’t take up the calcium in the soil, which results in cracked fruits and end rot.  However: when the plants are getting ripe, you can cut back on the amount of water. Mealy, watery tomatoes are usually a result of OVER WATERING!


moisture meter

Best tool ever. This will save you time, water and money. Click on the picture to buy it!

I use this simple, inexpensive gauge to let me know how moist the soil is.  You can’t tell by looking at the surface if you need to water.  The top of the soil can be dry and the soil at a few inches below may be wet.  Check first before you water. Believe me, this is one of my most used tools.


7. When you finally get your delicious tomatoes – DON’T put them in the refrigerator.  It ruins their flavor. Keep them out on the counter out of the sun. Hardly anyone knows this. But you know it now.

Cherry tomato

These cherry tomatoes start bearing early, give a lot and last until the first frost.


Mar 262012
 
Lettuce and parsley in a pot

Herbs and lettuce grow well in pots on the deck.

by Avis Licht

In other posts I’ve written about seeds; where to get them, and how to sow them. Now that they’ve turned into sturdy little seedlings, I’ll show you how to plant them.

1. First thing is to make sure your bed is ready for the seedlings.  This means that the soil should be worked up into a fine tilth so that it is soft and crumbles easily off your trowel. Add whatever amendments you have at hand, like compost, bone meal or manure into the soil before you transplant your seedlings.

2. Depending on how your seeds were started, you will either take them out of their little six packs, or as in the case of these photos, from a bunch of seeds sown in a container.

Pulling apart lettuce seedlings

Gently open the root ball to separate the seedlings (click to enlarge)

Lettuce seedlings

Hold your seedlings gently (click to enlarge)


Keep separating the seedlings until you have them one at a time. Lay them so that the roots are straight down, not crunched up. Gently hold the leaf, open up a hole deep enough to let the roots dangle straight down and not get crunched up. (if you get my drift).  Slowly let the soil back into the hole to cover the roots. Gently firm in the soil around the crown of the seedlings.  You want the roots too make contact with the soil, but not rip the roots by pressing too hard.

Firm in the soil

Gently press the soil around the seedling. (Click to enlarge)

Hold by the leaf and let the roots dangle

Gently hold the leaf and dangle the roots (click to enlarge)


Keep the soil below the crown of the leaf so that it doesn’t rot. Be sure to water in your seedlings.  Put the water at the base of the plant slowly so that the water seeps into the soil.  This will allow the roots to make contact with the soil and get moisture. If roots are not in contact with the soil, but are in air holes, they will dry out.

It’s best to plant into moist soil that crumbles in your hand, not too wet and not too dry.

A bed of lettuce

Closely planted lettuce in Spring

lettuce newly planted

This seedling will start growing immediately


After they are planted you need to make sure they don’t dry out. Check the soil for moisture if it doesn’t rain. Just looking at the surface of the soil doesn’t tell you if it’s moist underneath.  Check with a trowel down a few inches.  If it’s dry at 2 inches or if the plants are wilting, be sure to water them.

Don’t forget to take your walkabout in the garden to keep an eye on your seedlings.  If anyone is causing trouble, like birds or snails, you’ll want to catch them right away. Now all you have to do is be a little patient, then the eating begins.

I took this photo this morning after a gentle rain.

rain on strawberry blossoms

It's late March and the strawberries are starting to blossom

© 2011-2024 Edible Landscaping Made Easy With Avis Licht All Rights Reserved