Avis Licht

I received my B.S. in Conservation of Natural Resources, from the University of California, Berkeley. After that I studied with the great horticulturist, Alan Chadwick for 2 years. He brought French Intensive organic gardening to its height in Santa Cruz, California and many of his students have gone on to start farms, seed companies, and teach organic gardening. In 1978 I co founded the Commonweal Garden in Bolinas It was an organic farm and teaching center. Since 1983 I've been designing and installing landscapes in California. Edible landscaping is my specialty, but sustainable, native plant, and ALWAYS BEAUTIFUL gardens are what I love to do. After 35 years of gardening and designing gardens, I've decided to share my experience using the internet to reach more people. I hope you find what I have to say, useful, interesting and inspiring. Please let me know what areas you're interested in. Thanks for stopping by.

May 302012


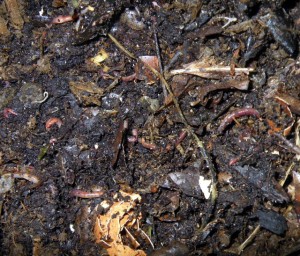
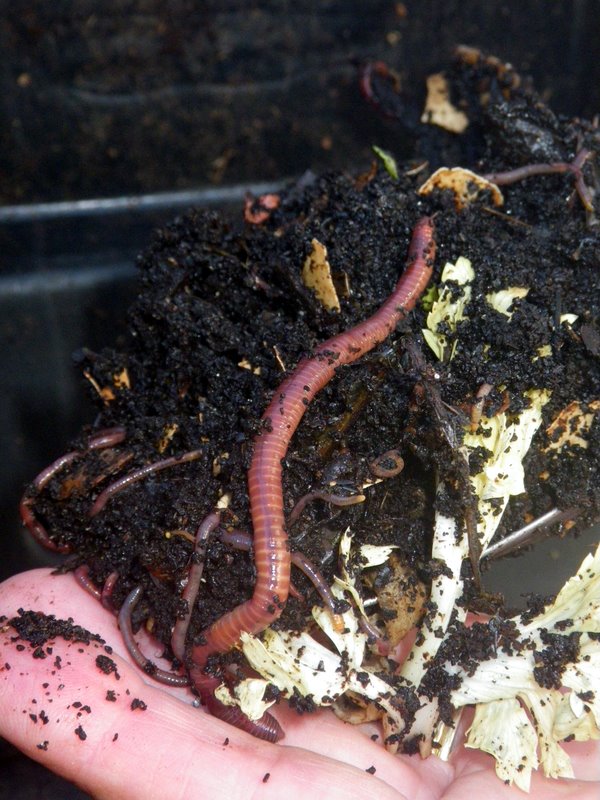
worms in the bin

by Avis Licht – I really love worms.  Some people think I’m a little crazy about my worm love, but when you know more about them, you’ll love them too.  It’s hard to believe such a small creature can do so much heavy lifting.   Check out these facts:

1.When compared with soil, worm casts also contain:

5 times more nitrogen;
7 times more phosphorus;
1.5 times the calcium;
11 times more potassium;
3 times more exchangeable magnesium.

2. Worm compost is organic, non-burning and rich in nutrients.  Vermicompost contains eight times as many microorganisms as their feed, which promotes healthy plant growth.

Be sure to sign up with your email to get all my posts. Go to the right column and you’ll find the sign up spot. I never share or give your emails to anyone else. Don’t miss any important gardening information.

3.Worms tunnel deeply in the soil and bring subsoil closer to the surface mixing it with the topsoil. Slime, a secretion of earthworms, contains nitrogen. Nitrogen, as we all know, is an important nutrient for plants. 

4. When expelled, worm casts consist of granules, surrounded by a mucus, which hardens upon exposure to air. When granular castings are mixed into garden or houseplant soils there is a slow “time release” of nutrients. However, the hardened particles of mucus do not readily break down. Instead, they serve to break up soils, providing aeration and improving drainage. Worm casts therefore provide an organic soil conditioner as well as a natural fertiliser.

5. The casts are also rich in humic acids, which condition the soil, have a perfect pH balance, and have plant growth factors similar to those found in seaweed.

Worms live where there is food, moisture, oxygen and a favorable temperature. If they don’t have these things, they go somewhere else. Don’t let this happen to your worms!

Here’s how to provide your worms with a happy home:

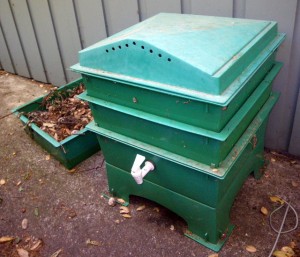
1. Get a multi layer worm box.  It allows the worms to travel to new food in the next layer, keeps the rain out, collects worm juice at the bottom and lets you collect finished castings without sifting.  The worms move up to the next layer when they’ve finished the food in the first layer.

Multi level worm bin

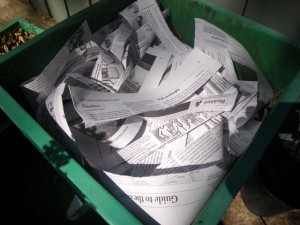
2. Layer bedding material in the box.  It can be torn newspaper, sawdust, leaves, dried leaves or any biodegradable, carbon based material. You can use horse or composted rabbit manure. Earthworm bedding should retain moisture, remain loose, and not contain much protein or organic nitrogen compounds that readily degrade.  Don’t put the box in the sun. It will get too hot for your worms.

torn newspaper for bedding

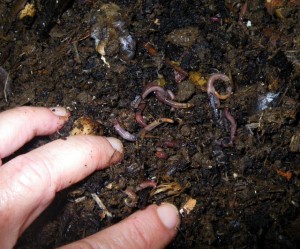
3.Add moist materials like composted manure, soil, leaves and worms. I got these worms from Urban Worm Composting.

Worms for composting

These worms are from Urban Adamah in a composted material. Lay them in the box.

4.After worms are added, keep the bedding moist but not soggy. If you’re using kitchen scraps, cut them up into 2″-3″ pieces. It’s easier for them to eat.  Feed them 2 or 3 times a week, a few cups at a time. If you leave on vacation, don’t worry, they’ll be fine.  Just make sure they have a little food before you go. Cover the food with cardboard or shredded newspaper. It keeps them moist.

food for your worms

Egg shells, banana peels, lettuce, coffee grounds – all good.

5. What NOT to feed your worms: 

Use Caution When Adding These:

Breads — can attract red mites
Potato skins, onions, garlic, ginger — get consumed slowly and can cause odors
Coffee grounds — too many will make the bin acidic

Do Not Feed:

Meat, poultry, fish, dairy — protein attracts rodents
Potato chips, candy, oils — worms do not like junk food and these attract ants
Oranges, lemons, limes — citrus has a chemical substance (limonene) that is toxic to worms

Let me know if you have problems.  There’s usually a simple solution.

Gotta love those worms!

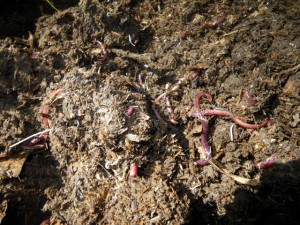
Earthworms galore

Earthworms galore


May 242012
 
June in the Northern California Garden

Water, feed and stake up your plants before they fall over.

by Avis Licht

With the warm sun on our backs we can heave a sigh of relief that the winter is over. The Summer Solstice is the longest day of the year and we can expect some spectacular days ahead of us.

Your plants will be growing fast now. Irrigation coupled with warm weather can produce excess growth that is attractive to unwanted critters, like snails and slugs.


• IRRIGATION

In many places early summer is the time to start some serious watering in the garden. If you’re lucky to have summer rains, be sure to check the soil for moisture.  Windy days and hot sun can really take the moisture out of the plants and the soil.

I still recommend checking your soil with a trowel to be sure it is neither too dry nor too wet. Just looking at the surface, does NOT tell you what ‘s going on underneath.

For those of you who would like to learn more about putting in an excellent irrigation system I recommend Robert Kourik’s book, Drip Irrigation for Every Landscape and All Climates. You can find this book and others he has written on his website:

www.Robert-Kourik.com

• CRITTER CONTROL

Snails and slugs are in abundance due to all the moisture and spring growth. Controlling these guys organically can be tricky. They come out at night when it’s cool and moist. You can go out with a flashlight and see exactly who’s doing what to whom. At this point you can hand pick them off the plants. (This is not the most frequently chosen method around these parts.) You can also collect your eggshells in a can, and then crumble them around your plants. The snails don’t like the sharp edges of the shells and won’t crawl over them. You can also use Slug Magic, a product found in nurseries that has the main ingredient of Iron Phosphate which kills them. This is considered a safe and organic method of getting rid of snails and slugs. You can find this from Gardener’s Supply.

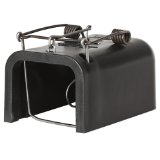
gopher trap

Effective and safe for handling. It will kill your gopher quickly

Another pesky critter is the gopher. You will notice their presence by raised mounds of soil. Gophers tunnel underground and push the soil up. They can and will eat roots and stems, killing your plants quickly and easily. I’ve had entire broccoli plants pulled under into the tunnels. Traps, either metal or wood can be set into the tunnels. It means digging into the soil and putting a trap facing in both directions of the tunnel. Only those not afraid of pulling out a dead gopher should try this. this trap is called a Victor Box trap.  You can get it through Amazon.

A preventive measure is to put mesh wire, called hardware clothe, in the soil. It can go under a bed of vegetables or in the hole where you are putting a bush or shrub. This is an initial investment of time and money, but lasts for years and protects your plants.

Of course, there are many more pesky critters, but to keep this post short and readable, I’ll save them for another day. Stay tuned for how to cope with aphids, deer, raccoons and more.
•TIP OF THE DAY

A wilting plant may be just that, not because the soil dry but because a mole or gopher may have tunneled near the roots and exposed them to the air, which dries the plant. Check for these critters and fill the holes around the roots.

Be sure to add fresh mulch to the garden. This will preserve moisture and help the soil. It will help keep your plants happy and healthy.

Edible Patio

The edible landscape is ready for summer entertaining


May 212012
 
Edible landscaping at its finest

Take out the lawn and put in fruit trees, vegetables, flowers, bees and rabbits and you may just have the garden of eden.

By Avis Licht – What do you imagine when you hear the term “urban farm” ?  To me it sounds big with rows of vegetables and possibly a barn with animals. But that’s not the reality of urban farms that I visited in Berkeley, California last week.  Over the next few weeks I’ll be high lighting a variety of gardens/farms in the city.  Some are backyards, some are vacant properties on loan to non profit organizations and some are community gardens.

Today I want to show you how one woman, Ruby Blume turned her backyard into a fully functioning mini farm, providing her with most of her food needs, including meat, honey, fruits and vegetables, mushrooms and plenty of beauty.

She co wrote the book Urban Homesteading with Rachel Kaplan and runs the Institute of Urban Homesteading in Oakland, California. They offer many classes in gardening, animal husbandry, kitchen skills, food preparation, handcrafts, permaculture and much more.

On Saturday, June 9th, 2012, they will be hosting an Urban Farm Tour from 11am – 5 pm in Oakland and  Berkeley. Details and descriptions at iuhoakland.com

vegetables in the backyard

A small backyard can produce a lot of food. Grow what you love to eat.

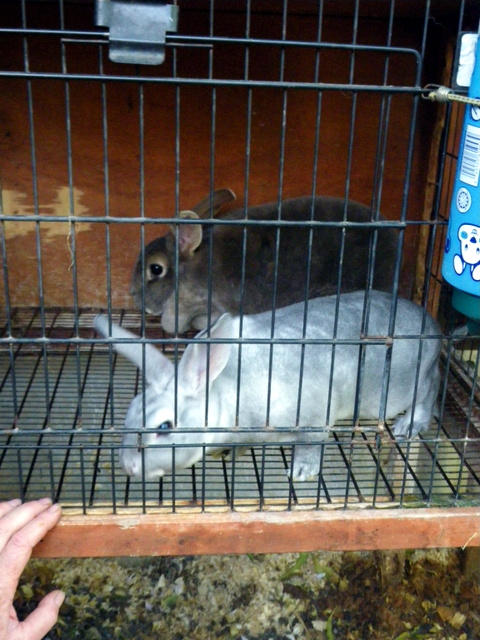
rabbits

When you raise your own animals, you know how they've been treated

Rabbits - 8 weeks old
Rabbits are ready to eat after 8 weeks
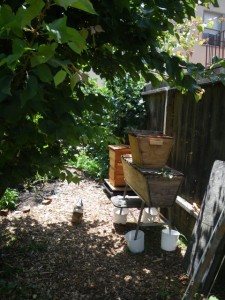
Honey Bees

A few hives can be safely put in a backyard for honey and pollination


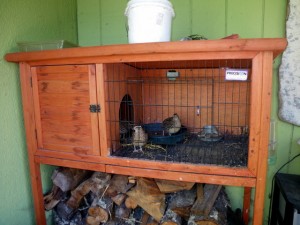
Quails for eggs

Quails -They don't take up much room, are beautiful to look at and apparently lay good eggs for eating. Lovely quail house.


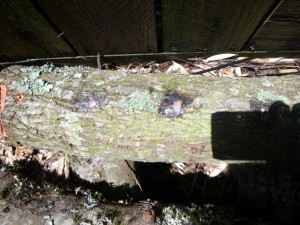
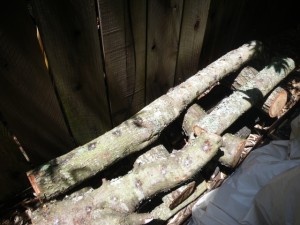
Oak logs for growing mushrooms

You can grow mushrooms at home by buying spores and inserting them into the logs


Oak logs for mushroom growing

Ruby had her logs at the side of the house where nothing else would grow


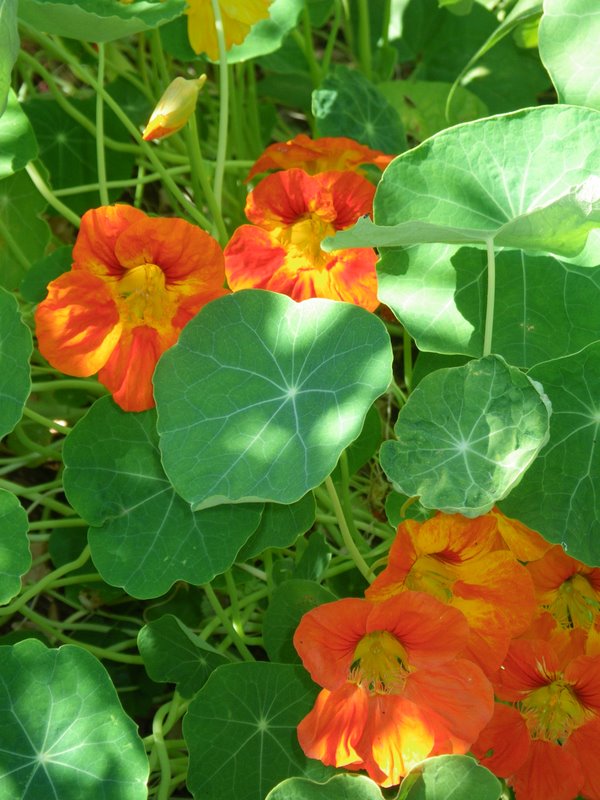
Flowers for beauty and food

Edible flowers add to the diversity and beauty of the garden


May 162012
 
edible landscape
edible landscape

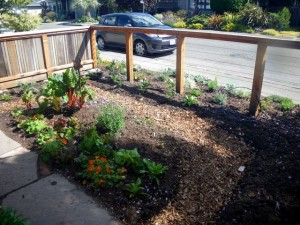
A peek at the edible front yard

by Avis Licht – Saturday, May 19th, 2012 is a day to tour beautiful Bay friendly Gardens in Marin County, California. The host gardens represent diverse microclimates and demonstrate the many different styles of Bay-Friendly gardens. You will find urban homesteads with orchards, chickens and bees, greywater installations and drought tolerant replacements for water thirsty lawns. Touring existing gardens is a great way to get new ideas for your own garden.

I’ll be giving a talk on Edible Landscaping Made Easy at 11 am in Larkspur at one of the gardens we’ve transformed from ornamental to beautifully edible. I’ll talk about design ideas, existing conditions, setting priorities and answering questions.

If you’re in the area be sure to come by. The garden tour is $10 for all the gardens.  To find out more visit http://bayfriendlycoalition.org/GardenTour.shtml.


Just getting started on the spring garden

Set out beds and paths and start planting!


edible landscape

A small front yard turning into and edible landscape

May 072012
 
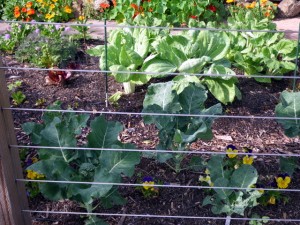
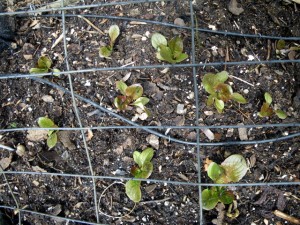
Lettuce with drip irrigation


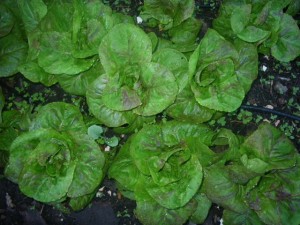
A bed of lettuce

Closely planted lettuce in Spring

by guest blogger extraordinaire: Robert Kourik

Robert Kourik is a guest blogger for this site. He’s definitely got the right credentials. Author of Your Edible Landscape Naturally, and Drip Irrigation for Every Landscape and All Climates, he’s got lots of experience and lots of opinions. In this article he has some radical suggestions for how to use your drip irrigation.  Give it a try and see for yourself if it works in your garden. Let me know what you think. Being conscious of our water use is imperative and drip irrigation is an important tool.

Robert writes:

It’s about time to start up drip irrigation systems. No matter how you use drip irrigation, frequently or every once in a while, it will always be more efficient than any sprinkler you’re currently using.

Consider daily irrigation for the best growth and greatest vegetable yields. Daily irrigation doesn’t use gallons of extra water. Oddly enough, infrequent watering may use more water than frequent, even daily, irrigation. If you have young seedlings, their roots are shallow, near the soil surface. They need access to water easily. Infrequent watering can have the effect of deep soil moisture and shallow dryness.

The other main consideration for frequent watering of small amounts is the texture of your soil. If you have a sandy or light loam soil, water will go through quickly and not be held in the soil. A clay soil will hold moisture much longer and should be watered less frequently. As with all the other tips you’ve read, observation of your own plants in your own garden will be the best way to determine what works best for you.

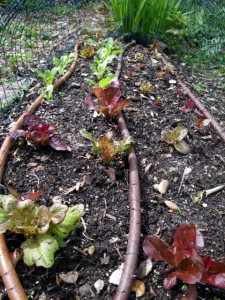
1/4 inch drip with lettuce

Newly planted baby bibb lettuce with 1/4 in drip

Lettuce grown

Lettuce fills in with 1/4 in drip

Once I planted a drought-resistant landscape with plants such as lavender, santolina, rockroses and rosemary. The day after planting, the timer was set to irrigate for 15 minutes. After the risk of transplant shock was over, the drip irrigation was turned on each day for only eight minutes to replace the moisture lost each day by transpiration. The plants flourished, even though each one-half-gph emitter was distributing only seven tablespoons of water per emitter each day. Contrast this with a nearby garden with a similar soil and plants arbitrarily watered only twice a month for four hours. This amounts to two gallons per emitter for the two-week period, or just more than 18 tablespoons of water per day—more than twice the water used in the flourishing landscape.

Please visit Robert at his website: RobertKourik.com and find out about all his books.

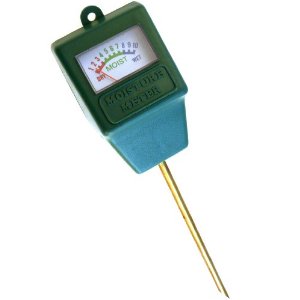
I would add one more thing to help you decide how much and how often to water. Use a moisture meter. It has a probe that you can put into the soil to see what the moisture is at different levels below the surface. A dry surface does NOT mean the soil is dry. You need to check 2 – 6 inches below to see if your soil is wet or dry.
moisture meter

Best tool ever. This will save you time, water and money.

May 042012
 
Path into the Garden


by Avis Licht – Designing your edible landscape can seem formidable. Here are a few ideas to help you move forward on your own yard.

1. Simplify your garden.  Remove any unwanted fences, structures, and unhealthy plants.  Open up your yard before you decide what you want to add.

Apple tree as the centerpiece of new landscaping

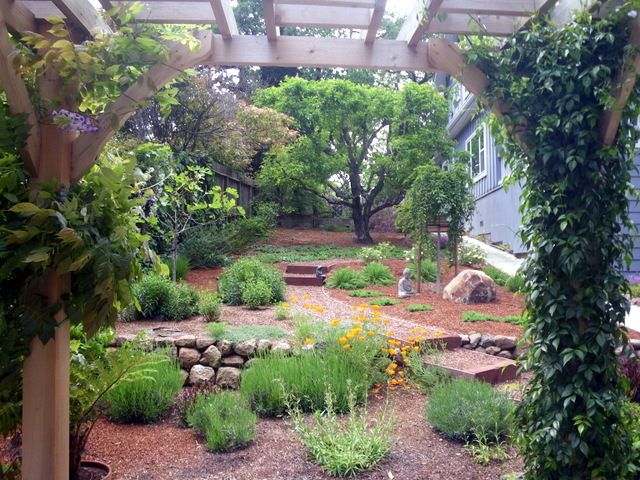
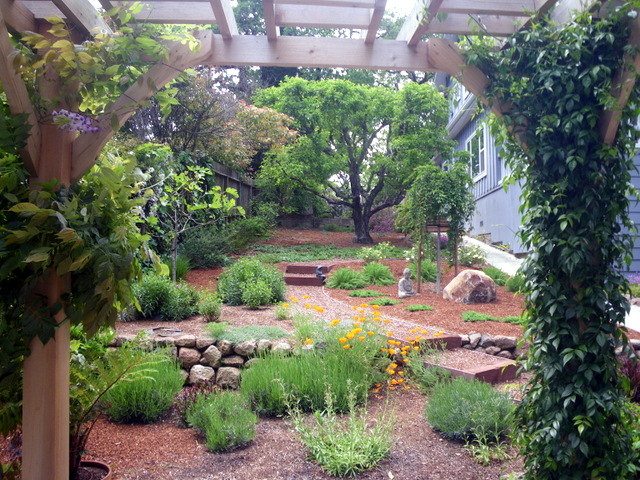
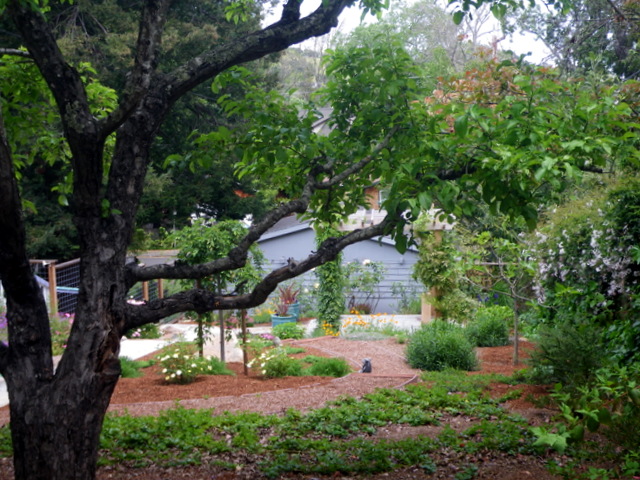
3.Here is the yard, fully landscaped. You can see the beautiful apple tree and you can stroll up the garden path.

Old fence, tree and lots of ivy

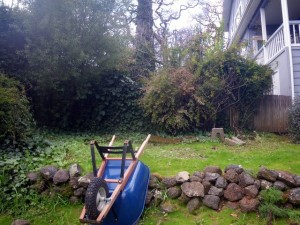
1.This is the side yard before we cleaned it up. You can’t see the apple tree behind the fence and old shrubs.


Fence and old shrubs removed


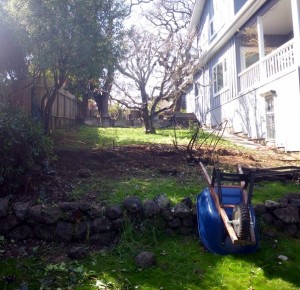
After removing the fence and old shrubs, we realized there was an open view to the old apple tree. It was previously  hidden, and now is the centerpiece of the garden. By clearing out the old, it will help you see what you want to keep and open up new vistas.

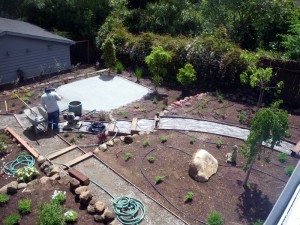
2. Once you’ve cleaned the place up, you can decide where to put your paths, retaining walls and any structures.Next decision: where to put paths.  It is important to be able to walk through the garden, to enjoy it and also to take care of it. The path on the right side of the house existed and we left it as is to access the house.  The path through the garden is a winding, informal path that encourages you to slow down and enjoy the view.

siting paths, sitting area and retaining walls

Lay out your paths, retaining walls and sitting area


View from gazebo

Sitting under the gazebo you have a fine view of the yard.

Gazebo and paths

Structures create outdoor rooms for eating, reading and relaxing in the garden

3. Finally, you can choose what plants you want to use. In this yard, there are a lot of low maintenance plants like herbs and California native plants.  You can see lavender, rosemary, Salvia, penstemon, thyme, oregano and California poppies.  Along the fence and for ground covers we used Manzanita, Ceanothus, Osmanthus and cotoneaster. At the top of the garden is a small vegetable and herb garden near the kitchen, where it is easily accessible.

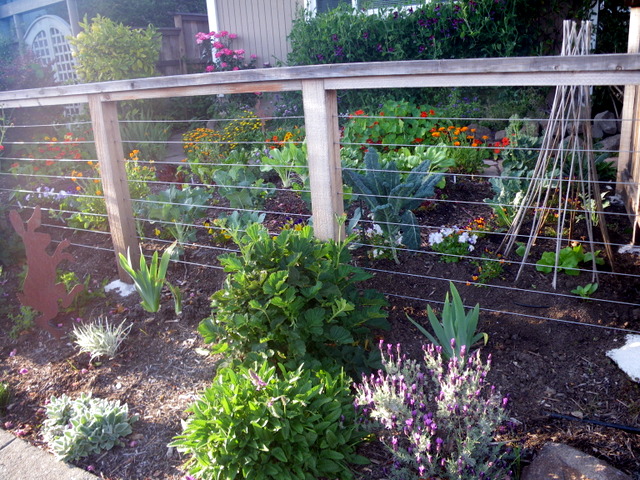
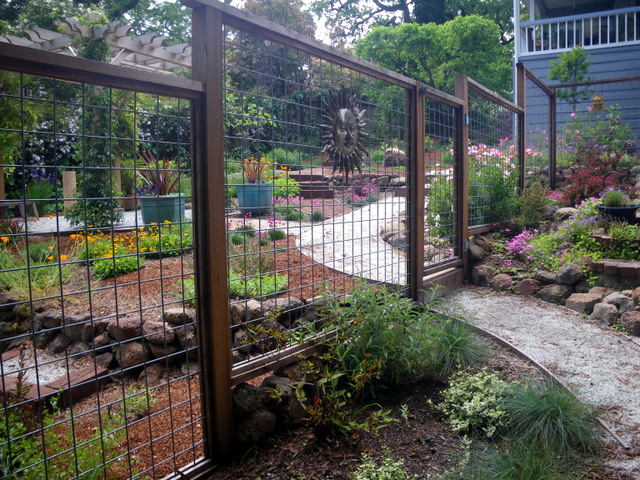
An open fence invites you into the garden

An open deer fence lets you look into the garden.

I’m available by phone, skype or in person for hourly consultations.  Send me a note via this blog and we can arrange it.


Herbs and vegetables

Outside the kitchen are the herbs and vegetables

Looking down the garden towards the carport

From the vegetable garden you can look down the garden to the sitting area.


Use these three simple ideas to help you get started.  You’ll be surprised how they can open up your eyes to new possibilities.

To help you get started on your vegetable garden there is plenty of information in my ebook, The Spring Garden Made Easy.  It’s on sale for $4.99

Spring Garden Made Easy


May 022012
 
Rose


Roseby Avis Licht – Do you want to make your mother happy? If she’s like me, she wants something useful and thoughtful. My sons have really nailed it over the years.  Each of the suggestions below are gifts from my sons. Of course, I’m not exactly a “normal” girl, but, hey, get a gal what she wants. If  your mom likes to garden consider getting her one of these:

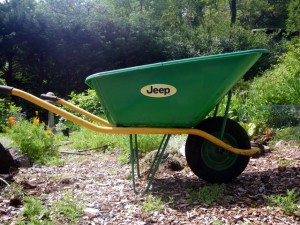
wheelbarrow

Sturdy, lightweight and well balanced wheelbarrow


1: A light weight, well balanced wheel barrow. Seriously. Most wheel barrows are made for men and are too heavy and unwieldy. I use my wheel barrow all the time and it makes my life easier. I never want to do more work than necessary and that means never moving more weight than I have to.

Jeep Model HO-5P for Homeowners 

The perfect wheelbarrow solution for around the garden. Even with 150 pounds, this corrosion-proof 5 cu. ft. wheelbarrow remains light because the tub is up front over the wheel. A steep angle of inclination assures that even a “wet” load will never spill a drop.

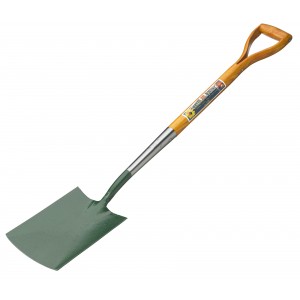
D handled spade

I've had my spade for 40 years. It looks like this only dirtier


2. A strong, well balanced spade. This one should last the rest of her life, hopefully a long one. I’ve said it before and I’ll say it again.  It’s worth spending more now on a good tool and having it last than having to replace one that breaks, or gets wobbly.


3. You can never go wrong with flexible, well fitting gloves.  A woman’s got to keep her hands looking good and still keep them in the dirt. These gloves fit perfectly, allowing you to use your fine motor skills, unlike some of those gloves that make you want to rip them off your hands so you can get some actual work done. (Click on the photo to order a pair!)

Don’t forget to tell your mother you love her. She’ll like that too.


Apr 302012
 

by Avis Licht – Growing food in containers is easy and straightforward. Here are some tips that will give you greater success.

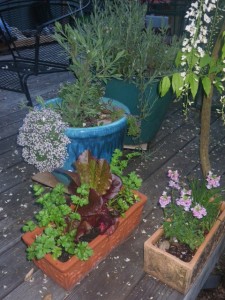
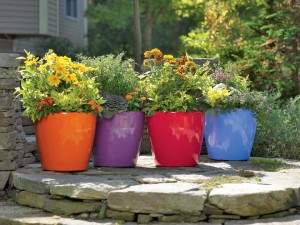
Ornamental containers can grow herbs and food.

Colorful pots mixed with herbs, lettuce and flowers are easy to harvest

1. Site your pots so they get enough sun for the type of plant you are growing. Lettuce doesn’t need to be in full sun, but most of your herbs prefer it sunny. If you’re planting on a deck with an overhang be sure to watch what the sun does during the day. If you have a choice, morning sun is better for plants than afternoon sun, which can be really hot.

2. Choose plants that you like to eat and will be sure to harvest. Herbs are a great choice for containers, as you can cut a little bit off regularly and the plant still looks good and grows well. Herbs suitable for containers are: Rosemary, parsley, thyme, chives, basil, cilantro, lemon verbena, oregano, lavender, tarragon, sage and mint.

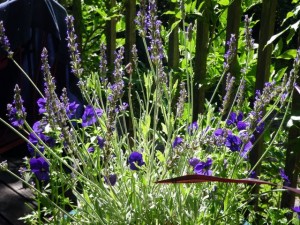
Blue violas

These violas have been blooming for 5 months

3. Edible flowers, of course are a great plant for containers. They are ornamental as well as edible. You can decorate your meals with them. Some of the easiest to grow include, nasturtiums, dianthus, calendula, Lemon Gem marigold, Citrus Mixed marigold and Tangerine Gem marigold. Scented geraniums have leaves and flowers that you can use to garnish food. Pansies are well known, can grow in shade and are easy to find. Pansy and violet leaves and flowers are edible and nutritious.

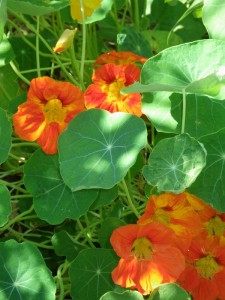
Nasturtiums


Pansy and lavender in pot

Pansy and lavender combine nicely in pots


4. IMPORTANT TIP! Plants in containers dry out quickly. Sun on the pots heats up the sides and causes them to dry out.  It is important to keep them moist.  When soil dries out water goes through the soil without being absorbed. People think they’re watering when they put the hose to the pots, but in fact, if the soil is dry, the water goes through the pot and out the bottom.

There are a couple of ways to deal with this.  If you have a drip system, put the pots on their own schedule and water them 5 minutes, 2 or 3 times a day. This allows the water to soak in and not drip out the bottom.

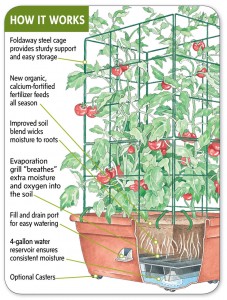
One of the best solutions to container planting that I’ve found are self watering pots.  They have a reservoir at the bottom and the moisture wicks up into the soil.  Some of these pots only need watering once a week or even once every two weeks and your plants stay healthy and strong.  It is a great solution.

I’ve been using these containers for years with huge success. You can get them from Gardener’s Supply along with a light weight soil medium for growing your plants. They have a special container and mix just for tomatoes

tomato in self watering container

Self watering containers keep plants from drying out.

.

self watering  pots

Keep plants moist and healthy with self watering containers

Gardener's Supply Company

Let me know what are your favorite plants to grow in containers.

Apr 242012
 
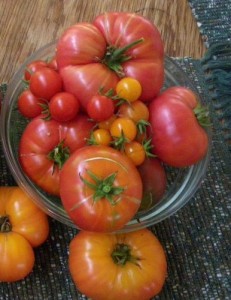
Delicious homegrown tomatoes

We love a salad of different kinds of tomatoes

by Avis Licht – A fresh picked, ripe, delicious tomato is one of the best foods in the garden. They are soooo much better than store bought and so easy to grow, that they are one of the most widely grown vegetables. Here are a few tips that will help insure you get the best, tastiest and healthiest tomatoes.

1. Pick a sunny site. You can’t make up for lack of sun.  Look for at least 7 hours of sun per day.

2. Tomatoes prefer well drained, neutral  to slightly acid soil.  Add lime to acid soil and sulfur to alkaline soil. Make sure your soil drains well. They don’t like sitting in water.

3. Pick several varieties that are suitable to your climate.  For instance, if you live near the coast and fog, it’s better to grow cherry tomatoes that don’t need a long, hot season.  The larger the tomato, the longer the season. There are plants known as determinate and indeterminate.  Determinate types are bushier, need little or no staking and tend to bear all their crop at once.  They do well in pots or containers. Indeterminate grow taller and need staking.  They bear their crop over a longer period of time.  If you plant some of each you will have tomatoes over a longer period. Check out this site for varieties of heirloom tomatoes.

Young tomatoes

Stake your tomatoes early and keep them off the ground to reduce rot and pests

4. Set out your plants after all danger of frost has passed.  The biggest mistake people make is putting out their tomatoes too early, during a warm period in early spring. They get whacked by a late frost, or just cold weather.  Tomatoes like warm soil.  Put the plants in and after the weather warms up a little, then mulch them.

5. Give tomatoes well aged manure or compost.  They don’t need a lot of nitrogen, but do need the micronutrients in the compost for good flavor.

6. HERE’S AN IMPORTANT TIP: Give your tomatoes regular water.  If the roots dry out, they don’t take up the calcium in the soil, which results in cracked fruits and end rot.  However: when the plants are getting ripe, you can cut back on the amount of water. Mealy, watery tomatoes are usually a result of OVER WATERING!


moisture meter

Best tool ever. This will save you time, water and money. Click on the picture to buy it!

I use this simple, inexpensive gauge to let me know how moist the soil is.  You can’t tell by looking at the surface if you need to water.  The top of the soil can be dry and the soil at a few inches below may be wet.  Check first before you water. Believe me, this is one of my most used tools.


7. When you finally get your delicious tomatoes – DON’T put them in the refrigerator.  It ruins their flavor. Keep them out on the counter out of the sun. Hardly anyone knows this. But you know it now.

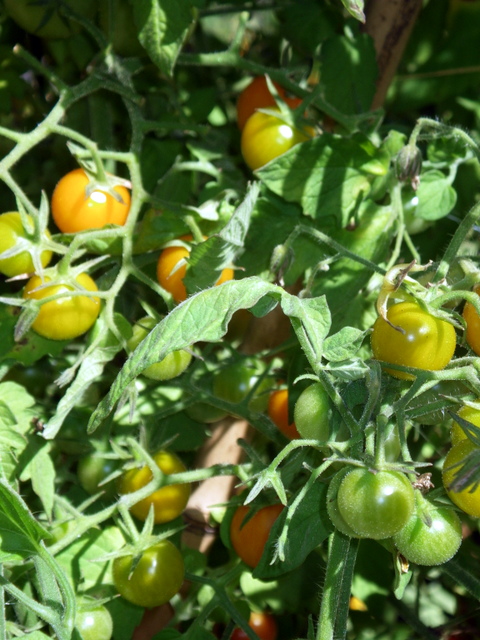
Cherry tomato

These cherry tomatoes start bearing early, give a lot and last until the first frost.


Apr 192012
 

If you find useful information in my blog, please be sure to sign up for an RSS feed or email subscription.

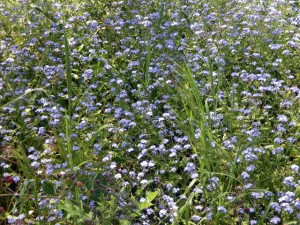
Blue Forget Me Nots

Weeds come in many disguises like this invasive Forget me Not

This always happens every Spring. I think I’m on top of the jobs I need to do in the garden, and then boom, I look out the window and the weeds have grown overnight like the bean in Jack and the Beanstalk. Although some of them actually look kind of pretty, like these Forget-me-Nots. This innocuous looking plant is actually an aggressive, invasive plant. Have you ever tried pulling out these “innocuous” plants when they’ve gone to seed? Their seeds stick to you like glue and it can take hours to get them off your clothes and socks.

In general we mean a plant is a weed when we don’t want it in the garden at all, or at least not where it has shown up.  Certain plants are always unwanted.  These are the category of pernicious weeds such as poison oak, creeping morning glory, bermuda grass and the plants that are harmful to you or impossible to get rid of. Let me  say right off the bat, that I never use chemical poisons. Weeds in my yard need to be removed by hand, digging them out, or by barriers to cover them and keep them from getting sunlight, or by spraying them with nontoxic potions, such as, Dr Earth Weed and Grass Herbicide or vinegar/soap/ solutions. (Use white vinegar: Add 2 tablespoons of dish soap to vinegar. Pour this mixture in a spray bottle. Spray your weeds!)

In his book, On Good Land: Autobiography of an Urban Farm, Michael Abelman wrote this great bit on weeds.  “When dealing with “weeds,” timing is especially critical.  Remember that “weeds” are merely plants out of place and that weed competition is primarily a problem in the early stages of crop development.

“Three things resolve weed competition easily: early cultivation, the right tool and attitude.  The goal is to never weed but to cultivate.  Cultivation aerates the soil around the plants, and cuts off or buries young tender weeds.  If you have to actually weed, your are too late and will have created far more work for yourself.”

Don’t be too late – start weeding now!

If you want to find some great tasting heirloom tomatoes, Burpee is having a sale. You can get them on special just through this site:$10 off orders of $40 or more with code AFFTOFF thru 4/23 at Burpee.com!

TOOLS  I RECOMMEND.

My favorite tools for cultivating weeds out of your garden:

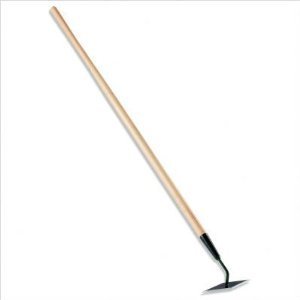
Long handled hoe

Best use of time and energy - use this hoe early and often

The Hoe : This long handled, double edge weeder, lets you go back and forth for most efficient use.  When the weeds are young and the blade is sharp, you just put it lightly below the soil surface and it cuts them off cleanly, leaving them in the ground.  You don’t have to bend over and it is easy on the back.

Corona Clipper SH61000 Diamond Hoe

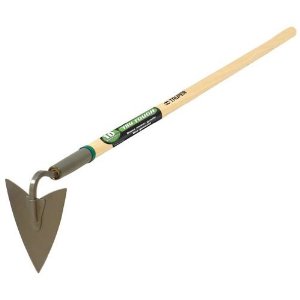
The Triangle Hoe: I use this hoe to go between plants that are close together, especially good in vegetable beds and flower beds. Like all other cutting tools, you should keep the blade sharp.


Truper 30002 Tru Tough 54-Inch Welded Warren Hoe, 4-3/4-Inch Head, Wood Handle

Long handled triangle hoe

Great for tight places: vegetables and flowers. The Triangle Hoe $22.99

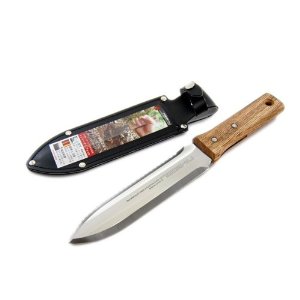
Hori Hori Japanese Weeding Tool

The Hori Hori: This strong tool is useful for many tasks $27.95

Japanese Hori Hori Garden Landscaping Digging Tool With Stainless Steel Blade & Sheath

Hand Weeding: The Japanese Weeding Knife: Hori Hori Tool

I love this tool and use it all the time. It’s good for weeding, planting, and scarifying the soil. I have a confession, though. I put it down in the garden about 6 months ago and can’t find it. I know it’s there and am sure each day that it will turn up. I’m afraid I’ll have to get another one.  Is there a GPS tracking app for lost hand tools?

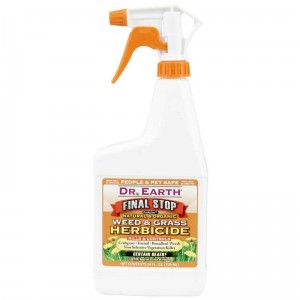
SPRAYS: Usually a last resort, sometimes we have to go there.  For particularly pernicious weeds like poison oak, bindweed and bermuda grass I use Dr Earth Weed and Grass Herbicide.  Ingredients include Citric Acid, Cinnamon Oil, Clove Oil, Soybean Oil, Rosemary Oil, Sesame Oil, and Thyme Oil. You can buy this from Organic Green Roots, which donates a portion of every sale to school gardens.

Safe weed spray

Apr 112012
 
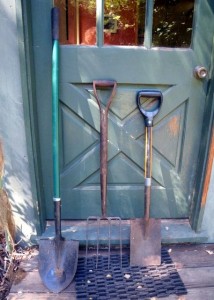
Long handled shovel, Digging fork and D handled spade

Tools I can't live without - Not every woman's idea of a great thing to have, but it is mine

by Avis Licht
Although gardening can be a very simple and straightforward event, there are some basic tools that are necessary for success and a few that just plainly make it easier and better. Here are some of my favorites:

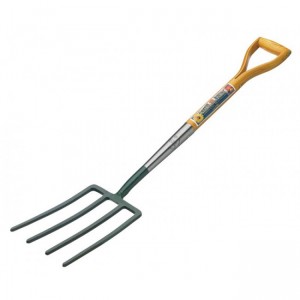
1. A strong digging spade and fork for loosening up the soil. I’ve had my English digging tools for 40 years. Take care of your tools and they last a lifetime.  It is worth the extra money for a strong tool.  They are made so that you can leverage the D handle for moving the soil without hurting your back.

A strong tool won’t bend, break or give up on you.  You can count on it to do the work for a lifetime.  I use my digging for for breaking up hard pan, dividing plants, loosening soil and digging beds. Though it’s hard to fork over the dough for a good tool, you’ll realize it more than pays its own way when it lasts 40 years.

D handled spade

This handle allows for leverage in moving soil without hurting your back.

D handle garden fork

Excellent for digging and loosening up the soil


I am thrilled to be able to offer Clarington Forge tools. I have used them for years, and they are absolutely high quality. Click on the banner and take a look at what they have.

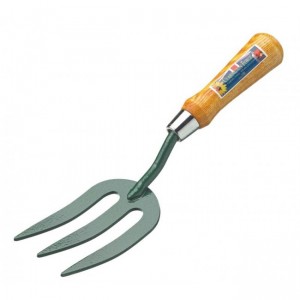
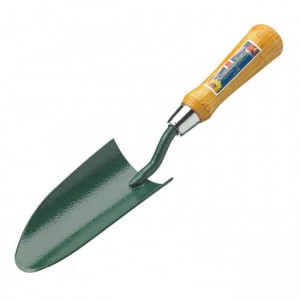
2. Small hand tools: A planting trowel should fit comfortably in your hand and be strong.  Cheap trowels bend easily at their neck and break in no time.  I know, I’ve tried them. A small hand fork works to loosen up soil as it becomes compacted over the season.  We hate compacted soil.

Ergonomic hand fork

To loosen up the soil around plants, this tool is essential.

Ergonomic hand trowel

Strong and angled correctly. You will use this tool a lot.


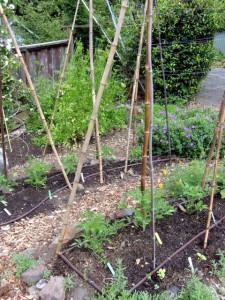
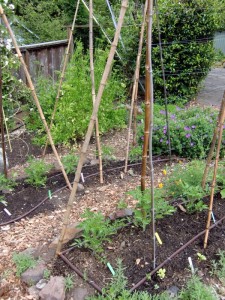
Bamboo poles for staking tomatoes

Start early for staking tall plants so they can grow tall and straight


10% off orders over $50 at Gardener’s Supply Company! Expires 5/24/12.


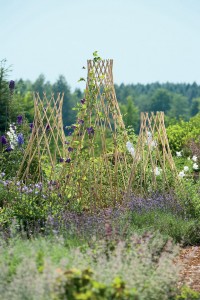
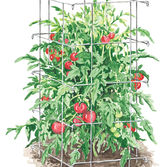
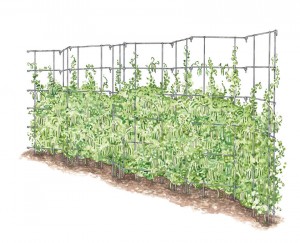
3.Plants grow quickly and many of them need support.  One of the biggest mistakes gardeners make is to  wait too long before staking up plants like peas, beans, tomatoes, cucumbers and flowers.  Once a plant falls over it is hard to train it  up without hurting the stems.  Have a look at these growing supports. Sometimes you can make your own, but sometimes you can buy what works best for a reasonable cost.

Expandable and lovely willow trellis

Use them in the summer, then put away in the winter for next year.

tomato cage

It is important to hold up your tomatoes, or they will rot on the ground

pea fences

Peas and beans grow faster and better when staked early

Gardener’s Supply Company Deals of the Week: amazing discounts on Gardener’s Supply favorites!

Apr 092012
 
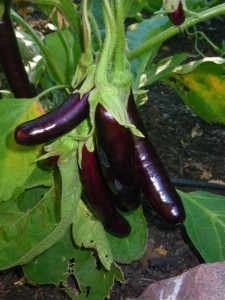
Japanese eggplant

Eggplant with basil and tofu anyone?

by Avis Licht

When deciding what to plant in your garden, in addition to the obvious parameters of site and climate, you can have fun with ideas based on what kind of food you like to eat.  Are you Italian/pizza lovers? Is your favorite dinner a Mexican style salsa/burrito/tomale? Why not plant a theme garden based on your favorite meals?  To make that homemade pizza sauce you could plant different heirloom varieties of paste tomatoes, with 3 different types of peppers and quantities of flavorful herbs.

When deciding on the vegetables for your style of garden, you can also look up recipes and find out the best herbs for your dishes.  Instead of  going from store to store trying to find the right herb, you could just go out and pick it fresh.

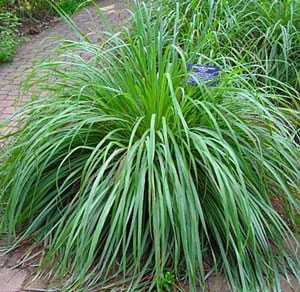
Asian herbs include: Chinese chives, coriander, cilantro, ginger, Thai basil, lemongrass, peppermint, sorrel  and dill. Asian cuisine is vast and covers many countries, but there are some herbs like the lemongrass that have a very particular flavor which can be hard to find in stores.  Although it is a tropical herb and doesn’t live in climates below 30 deg F. you can treat it as an annual and it will give you plenty of leaves.

Lemon grass

Beautiful in the edible landscape, Lemongrass is an unusual and wonderful herb for Thai food.

Herbs that are common to many types of cuisine and easy to grow include: onions, cilantro, garlic and basil. Mediterranean herbs like rosemary, marjoram, oregano, parsley, sage, thyme and bay leaves are easy to grow and should be in everyone’s garden.  It’s hard to describe the difference between fresh and dried herbs to those who don’t use fresh herbs.  I guess it’s like the difference between breathing in the fresh air at the ocean and using an oxygen tank with tubes up your nose. Well, that may be a little extreme, but you get my drift.

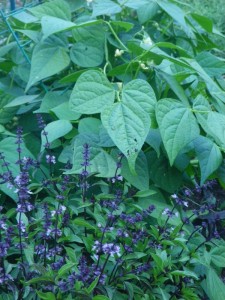
Thai Basil

Thai Basil has a unique flavor- grown with beans in this photo

Some unusual vegetables that you would use in Chinese and Japanese cuisines include bok choy, Napa cabbage, daikon radish, green onions, snow peas and soybeans. You can find seeds for these plants in any of the catalogs in my Resource page.

For a Mediterranean garden you would plant all of the following:  tomatoes, eggplant, and peppers,asparagus, Tuscan kale, Savoy cabbage, radicchio, endive, artichokes, zucchini, fennel, bell peppers.

For Mexican cooking, legumes (black beans, pinto beans), corn, and a variety of peppers (poblano, jalapeno, ancho, serrano) are key. And don’t forget the squashes. They’re easy to grow, taste great and keep well, (that would be winter squash).

beauty in the vegetable garden

Themed gardens are beautiful as well as productive

Stay tuned for landscape plans for theme gardens. Subscribe to my blog and you won’t miss any of the information you need to keep your garden healthy, beautiful and bountiful.

Here’s a great recipe I found for Homegrown Pizza Sauce – all ingredients from the garden:

How to make Homegrown Pizza Sauce

.

Ingredients

“I’ve always made pizza sauce based on my mother’s recipe, starting with a can of tomato sauce. This year, I started with paste tomatoes from my garden with great success. You’ll notice that the amounts in the ingredient table below are rough; please add veggies and herbs according to your taste

  • 3 pounds very ripe tomatoes, washed, stemmed, quartered, and seeded
  • 1 yellow onion, very small dice
  • 4 garlic cloves, minced
  • 2 tbl. dried oregano
  • 1 tbl dried thyme
  • 2 bay leaves
  • 1 tbl. olive oil
  • sea salt, black pepper, and sugar to taste.
  1. Place quartered tomatoes in large saucepan over medium heat. Cook, stirring frequently. The tomatoes will let go of a surprising amount of juice.
  2. Remove from heat and strain off solids. Set solids aside and return juice to the stove.
  3. Simmer juices, uncovered, until reduced.
  4. Add tomato solids back into the saucepan and stir in all remaining ingredients except sugar.
  5. Bring sauce back to a simmer and cook, stirring regularly, until the onions are translucent and the sauce has reduced to the desired consistency.
  6. Taste.
  7. Add a small amount of sugar, mix thoroughly, and taste again. Repeat until you achieve an acidity that tastes good to you.
  8. Sauce should keep in the refrigerator for about a week, in the freezer for a few months, or may be canned.” From www.opensourcefood.com.

Don’t forget, it’s not too late to start your Spring Garden. To help you I’ve put together a handbook on the steps you can take to be successful in your garden. Included is information on soil, sites, annuals, perennials, fruits and much more. This is a 20 page guide to get you started on your edible landscape. Forty years of gardening has given me plenty to share. If you have enjoyed my blog, be sure to get my booklet.

$4.99 – such a deal

Spring Garden Made Easy

Apr 032012
 
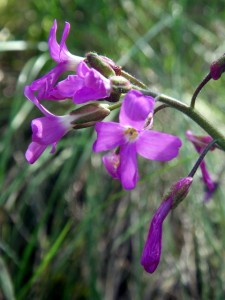
Arabis blepharophylla - Coast Rock Cress

This lovely, small California wild flower is rare and endangered - Coast Rock Cress

by Avis Licht – Rare and endangered.  What does this mean for this little plant and for this great planet, Earth?

I photographed this flower a few days ago on the hill behind my house, in  county open space. My neighbor noticed it and asked me to identify it. What  a treat. In the case of this California wild flower, Arabis blepharopylla, it means that there are very few of them and they have a limited distribution.  The California Native Plant Society has a ranking system for rare and endangered plants. The levels go from 1 – considered extinct, to 4 – uncommon and status should be monitored. This plant is rated 4, uncommon, but not about to go extinct.

We care about even small, unimpressive plants and animals because they are part of the intricate web of life.  All life has evolved through interactions with its environment. Everything that lives, plants, animals and humans all must eat to live and nourish each other. Let’s resolve to do this consciously.

Urban and suburban development has destroyed large areas of wildlands.  By planting native plants in your yard you can create wildland corridors that support birds and allows beneficial pollinators to flourish. We can  improve what we’ve damaged by native plant restoration. Native plants belong in your garden as well as the wilds. Find out what grows in your neighborhood.

The rare and endangered flower is a reflection of the much bigger issue – the rare and endangered earth.

How would you rank the status of Earth on this 1 to 4 ranking system? 1 is extinct.Well, we’re not extinct yet, so that  brings us to 2 – exceedingly rare and uncommon.  Hard to argue with that.

Earth from space

NASA provides us with an amazing perspective of our Earth

With only one earth and billions of humans trying to live well, no one is exempt from looking at the choices they make in their life. Whether you take a small step or a running leap toward a sustainable life, it’s still your choice.  Plant a fruit tree today.
Here is the information you need to start your Spring garden. Included is information on soil, sites, annuals, perennials, fruits and much more. This is a 20 page guide to get you started on your edible landscape. Forty years of gardening has given me plenty to share. If you have enjoyed my blog, be sure to get my booklet. $4.99

Spring Garden Made Easy

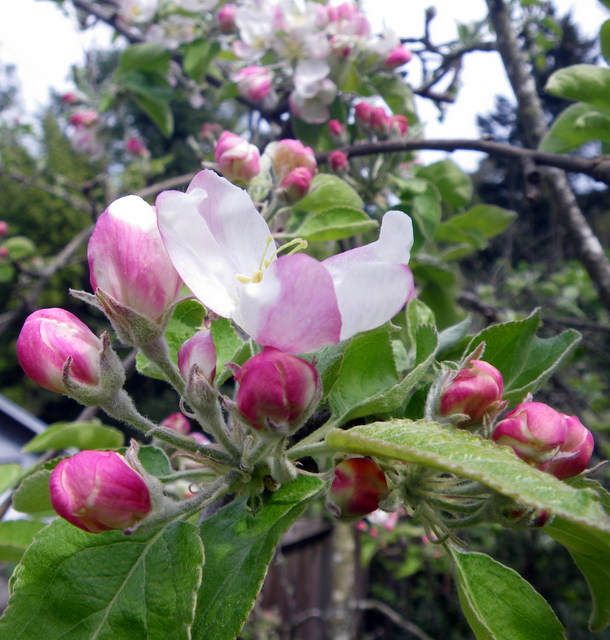
apple blossoms

Apple blossoms in Spring - Beauty - In Late summer - Food

Beauty surrounds us


Mar 282012
 
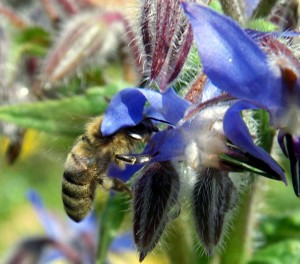
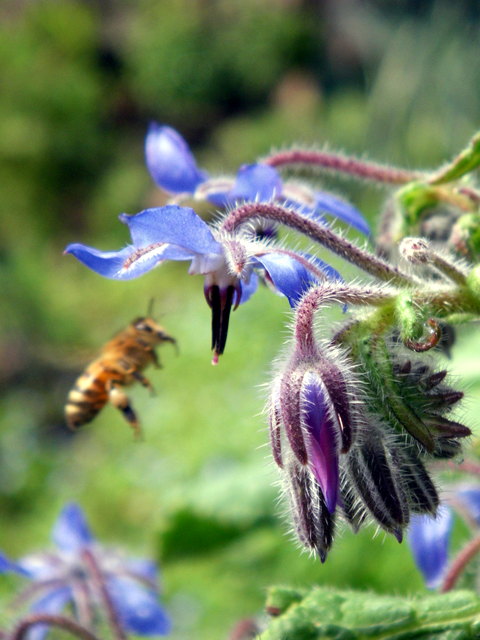
Honey bee in borage


Honey bee in borage

Borage blooms early and long - the bees love it (click to enlarge)

by Avis Licht

Often, when I design a garden people ask me if it will bring bees.  Usually, it’s because they are afraid of having bees in the garden. Bees, who are gentle creatures, are more interested in finding nectar and pollen than stinging you. Often people mistake yellow jackets, who come in late summer to eat your sweet fruit or meat at the outdoor barbeque, for bees.  They are not the same at all.

Bees are absolutely necessary to the health and productivity of your garden. We need them to pollinate our fruits and vegetables.  35%  of our food worldwide is pollinated by bees. Imagine a world without honey. Well, please don’t do that.

Recently there has been a disappearance of bees called Colony Collapse Disorder. Entire hives die without apparent cause.  By planting bee friendly plants you can personally aid in their resurgence.

The best plants are ones that are native to your locale or grow well in your climate. Herbs, flowers, and flowering trees all contribute to their food source.

Using only organic controls in the garden is another way of protecting your bees.


Don’t forget to buy my ebook on The Spring Garden Made Easy 

Spring Garden Made Easy


There are many wonderful bee plants.  These are a few of my favorites.

Lavender and violas

Lavender can be planted in the ground or in containers. Beautiful everywhere.

1. Lavender: For millenium lavender has been used in soaps, balms and sachets as well as medicinally for its calming effect. My local ice cream shop makes the best honey lavender ice cream.  Grow it in full sun, well drained soil, in climates that don’t go below 20 deg F.

2. Salvias: In the sage family there are many herbal and ornamental varieties of Salvias.  Bees and hummingbirds love them and they come in many colors.

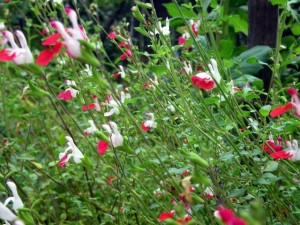
Salvia Hot Lips

This bi colored Salvia, Hot Lips, is just one of many varieties. (click to enlarge)


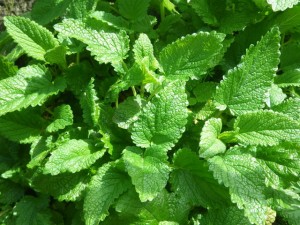
3. Lemon Balm, Melissa officinale – In the mint family, Lemon Balm has a wonderfully lemony flavor for tea. It is considered one of the premier bee plants. Melissa is a Greek word meaning honeybee.

Lemon balm

In the mint family, Lemon Balm has a wonderful lemon flavor and is easy to grow


4. Ceanothus– California lilac (many varieties). Many native plants are helpful to the bees. The California Lilac grows on the hills in California and as its name suggests is wonderfully fragrant. It flowers in the blue, purple and whites and  can be a very low growing shrub or up to 15 ft. Well drained, sunny sites are what it needs to thrive. It requires very little care.

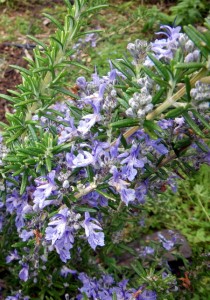
Rosemarinus officinalis

This rosemary is planted next to my Apple tree. It brings the bees to pollinate the tree.

5. Rosemary – One of the most loved herbs for cooking, rosemary is easy to grow and long lived.  The bees love it. In my garden it starts to bloom early in Spring and is under the apple trees which are just starting to bloom.  This companion planting encourages the bees to pollinate my fruit trees.

In the herb family you can plant Basil, Catnip, Dill, Fennel, Hyssop, Lavender, Parsley, Rosemary, Thyme, and Sage to encourage your friendly bees.

In the ornamental flowers, try Agastache, Salvia, Bachelor Button, Black Eyed Susan, Clematis, Coreopsis, Lantana, Larkspur, Sweet William , Yarrow, and Zinnias.

In shrubs, Ceanothus, Manzanita, Arbutus, Mahonia and Philadelphus are beautiful and useful.

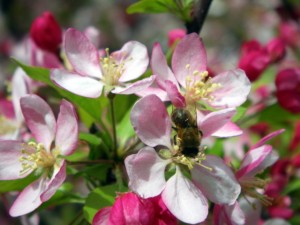
The Crab Apple tree blooms early and is absolutely buzzing with activity.

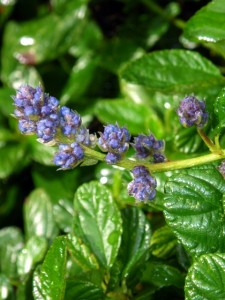
California lilac

The buds on this Ceanothus are just getting ready to open. (click to enlarge)


Crab Apple Blossom with bee

The bees adore this Crab Apple which blooms in early spring

Coming in for a landing

Coming in for a landing


Mar 262012
 
Lettuce and parsley in a pot

Herbs and lettuce grow well in pots on the deck.

by Avis Licht

In other posts I’ve written about seeds; where to get them, and how to sow them. Now that they’ve turned into sturdy little seedlings, I’ll show you how to plant them.

1. First thing is to make sure your bed is ready for the seedlings.  This means that the soil should be worked up into a fine tilth so that it is soft and crumbles easily off your trowel. Add whatever amendments you have at hand, like compost, bone meal or manure into the soil before you transplant your seedlings.

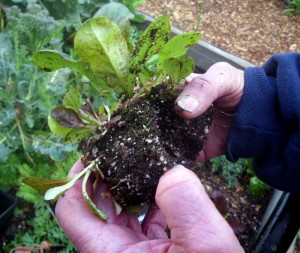
2. Depending on how your seeds were started, you will either take them out of their little six packs, or as in the case of these photos, from a bunch of seeds sown in a container.

Pulling apart lettuce seedlings

Gently open the root ball to separate the seedlings (click to enlarge)

Lettuce seedlings

Hold your seedlings gently (click to enlarge)


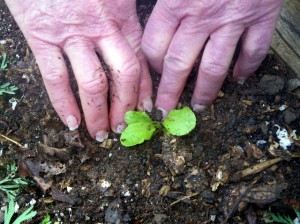
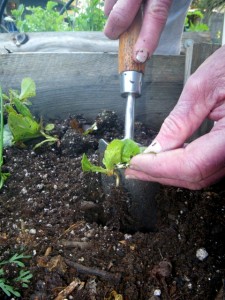
Keep separating the seedlings until you have them one at a time. Lay them so that the roots are straight down, not crunched up. Gently hold the leaf, open up a hole deep enough to let the roots dangle straight down and not get crunched up. (if you get my drift).  Slowly let the soil back into the hole to cover the roots. Gently firm in the soil around the crown of the seedlings.  You want the roots too make contact with the soil, but not rip the roots by pressing too hard.

Firm in the soil

Gently press the soil around the seedling. (Click to enlarge)

Hold by the leaf and let the roots dangle

Gently hold the leaf and dangle the roots (click to enlarge)


Keep the soil below the crown of the leaf so that it doesn’t rot. Be sure to water in your seedlings.  Put the water at the base of the plant slowly so that the water seeps into the soil.  This will allow the roots to make contact with the soil and get moisture. If roots are not in contact with the soil, but are in air holes, they will dry out.

It’s best to plant into moist soil that crumbles in your hand, not too wet and not too dry.

A bed of lettuce

Closely planted lettuce in Spring

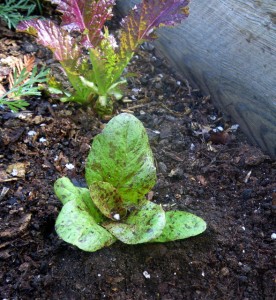
lettuce newly planted

This seedling will start growing immediately


After they are planted you need to make sure they don’t dry out. Check the soil for moisture if it doesn’t rain. Just looking at the surface of the soil doesn’t tell you if it’s moist underneath.  Check with a trowel down a few inches.  If it’s dry at 2 inches or if the plants are wilting, be sure to water them.

Don’t forget to take your walkabout in the garden to keep an eye on your seedlings.  If anyone is causing trouble, like birds or snails, you’ll want to catch them right away. Now all you have to do is be a little patient, then the eating begins.

I took this photo this morning after a gentle rain.

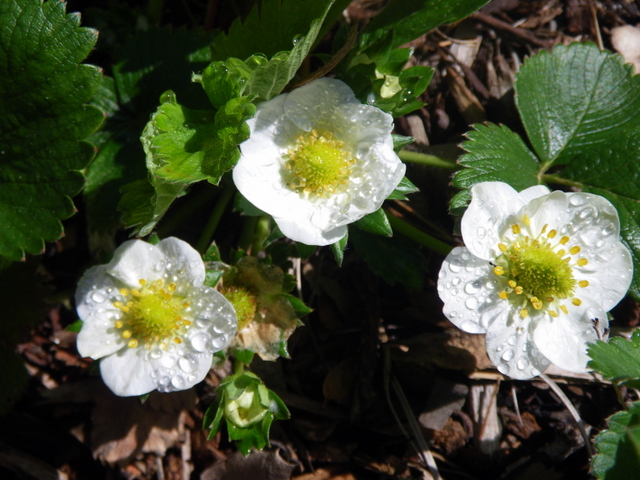
rain on strawberry blossoms

It's late March and the strawberries are starting to blossom

© 2011-2024 Edible Landscaping Made Easy With Avis Licht All Rights Reserved