vegetables | Edible Landscaping Made Easy With Avis Licht - Part 2

Feb 182014
 
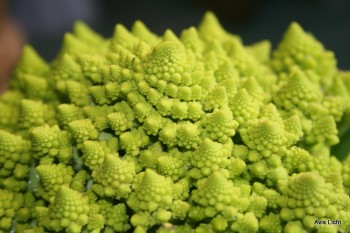
Romanesco caulofloer

click to enlarge photo

by Avis Licht

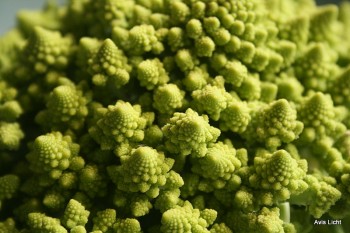
Fractals and the fibonacci sequence – two of natures amazing design schemes. Here they are demonstrated beautifully in the Romanesco cauliflower.

A fractal is a geometric pattern that is repeated at ever smaller scales to produce irregular shapes and surfaces that cannot be represented by classical geometry.

To understand more about  fractals and biomimicry read this article in Livescience. Biomimicry looks to nature and natural systems for inspiration. After millions of years of tinkering, Mother Nature has worked out some effective processes. In nature, there is no such thing as waste — anything left over from one animal or plant is food for another species. Inefficiency doesn’t last long in nature, and human engineers and designers often look there for solutions to modern problems.

For more on the Fibonacci Sequence in nature read this: Fibonacci in Nature.

I harvested this head of cauliflower today, February 16th. It’s been a cold and dry winter. But this beauty carried on and turned into a wonderful head. The brassica family is a sturdy and incredibly healthy food. I found this article on the Brassicas and their nutrient value to be eye opening. It will make you a believer.

If you live in a moderate climate, it’s time to start thinking about sowing your seeds for  broccoli, cauliflower, bok choy and the other brassicas. I wrote about seed starting in this post: Starting Seeds in your Edible Landscape.

To find out which Hardiness Zone you live in click here. See if it’s time for you to start getting your Brassicas, otherwise known as the cabbage family, into the garden.

The Fibonacci Sequence manifested clearly in a simple(?) vegetabke

The Fibonacci Sequence manifested clearly in a simple(?) vegetable

When choosing plants for your edible landscape, it’s good to consider unusual varieties like this Romanesco Cauliflower. They look beautiful, are easy to grow and taste wonderful.  And your friends will ask, “What in the hell is that?”

You will find my ebook, the Spring Garden Made Easy, a straight forward guide to getting your garden going and growing.

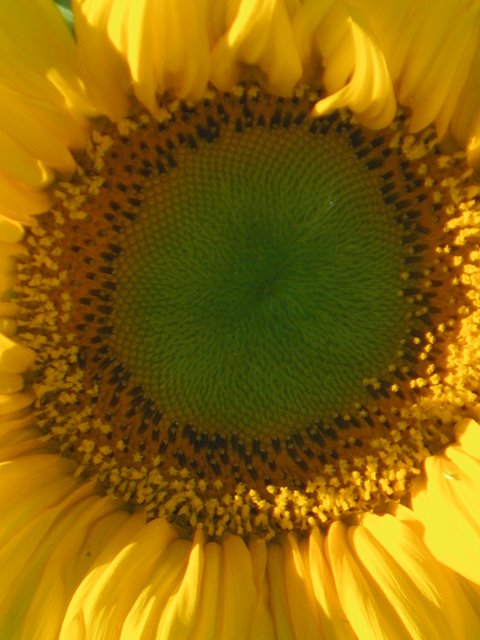
sunflower

Another example of the Fibonacci sequence

Cauliflower-Fibonacci

Feb 102014
 

by Avis Licht

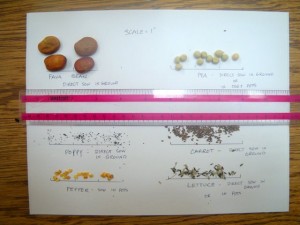
Size of your seed may determine how you sow it

Large seeds often go directly in the ground, and very small seeds do as well.

If you’re thinking about your Spring garden and what to sow, you’re probably wondering if last year’s leftover seeds are good to sow this year. Everyone wants to know. Don’t waste money buying new seed if you’ve got what’s good but you don’t want to lose precious time by sowing bad seed.

Here is a simple method to see if your seed is still viable.

1. Moisten a paper towel and place 10 to 20 seeds of one variety on it. Roll up the towel and place it in a plastic bag labeled with the seed variety. You can keep it on the kitchen counter at room temperature while you are testing. Check the seeds after 2 or 3 days, then every day for a week or two if needed; different varieties have different timing for germination. Be sure to make sure the towel stays moist. Count the number of germinated seeds and divide them by the number of seeds tested. This will give you the germination percentage. If 8 seeds out of 10 have germinated – you have 80% germination. Less than 80% germination means your seeds still have some viability but that you will need to sow them more thickly in order to get a good crop. Seeds with less than 50% germination may not be worth the trouble and you can go seed shopping!

If you do need to buy seeds try Seeds of Change. They are a great organization and provide organic, non – GMO seed. I definitely recommend buying their seed. You can do that by clicking here: Seeds of Change

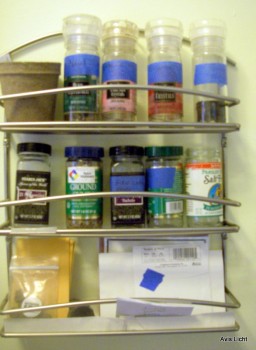
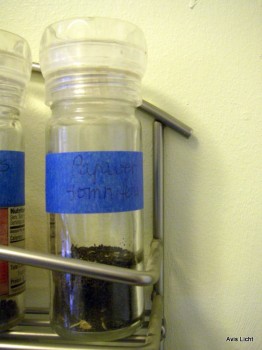
2. Store unused seeds in a cool, dry place to ensure their maximum germination rates. I use empty herb and seasoning bottles to store my seed.  I try to collect as much of my own seeds as possible. The glass bottles are labeled and I can also see the seed inside to remind me what I have.

Seed storage containers

Empty seasoning and herb bottles are used for storing seed.

20% Off e-Gift Cards with code AFFBVALD until 2/14 only at Burpee.com!

 Seed Savers is also a good company. Rainbow Chard is delicious, beautiful and super healthy.
Seed storage bottle was old salt container

With these bottles you can even sprinkle out   the seed evenly. Perfect use for an old salt bottle.

Here are some good Seed Catalogs – Resources.

Here’s a great chart that Roger Doiron from Kitchen Gardeners International posted, which came from Colorado State University. It covers many common vegetables for your home garden. Of course, viability also depends on the conditions that the seed has been stored in. Too wet, too cold, too hot, too dry – all these can affect your seed germination, BUT, generally you can follow the chart.


20% Off e-Gift Cards with code AFFBVALD until 2/14 only at Burpee.com!

Nov 122013
 

by Avis Licht

Spring Garden Made Easy

A cover crop is an area of planting that is sown for the purpose of improving the soil and keeping the ground “covered” to prevent erosion.

The right plant can:

  • Increase the  organic matter content of the soil
  • Increase the availability of nutrients
  • Improve the soil’s tilth, which is the texture of the soil
  • Reduce weeds by choking out undesirable plants
  • Reduce soil pests
  • Enhance the soil’s biological activity.

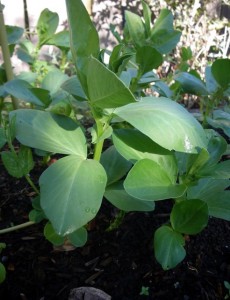
Fava beans are one of my favorite cover crops. You can sow them late in the Fall even in cold weather.

Fava beans germinate quickly and grow even faster.  You can use the tops for compost, eat the beans, and when you’re done with the plants you can leave the roots in the ground.  Fava beans  will have put more nitrogen into the soil than it takes out.  I mean, this is a plant that keeps on giving.

It’s not a good idea to  leave any areas of your garden bare in the winter. Rain will compact the soil. The ground is subject to erosion and leaching of nutrients when nothing is growing. I sowed my Fava Beans in November and 3 weeks later they were over 8 inches tall. The moral here is better late than never.

In the Spring, when you’re ready to plant your veggies, you can cut down the fava beans even if you don’t harvest the bean for eating.  It will make an excellent addition to your compost pile and leave the soil in better condition.

Once we’ve got our garden planted, we can sit back and welcome winter back again.

And while you’re relaxing around the fire, it’s time to start perusing those beautiful seed and plant catalogs for Spring and even get a leg up on your spring garden with my ebook, The Spring Garden Made Easy.

Spring Garden Made Easy


To help you get started on your Spring Garden, there’s plenty of good advice in my ebook: The Spring Garden Made Easy. It’s only $4.99. If you’ve gotten useful information from my blog,here’s a way to keep me going. Thanks for reading. Be sure to leave a comment and let me know if you have any questions or suggestions. I love to hear from you

Bell beans grow all winter long

Bell beans grow all winter long

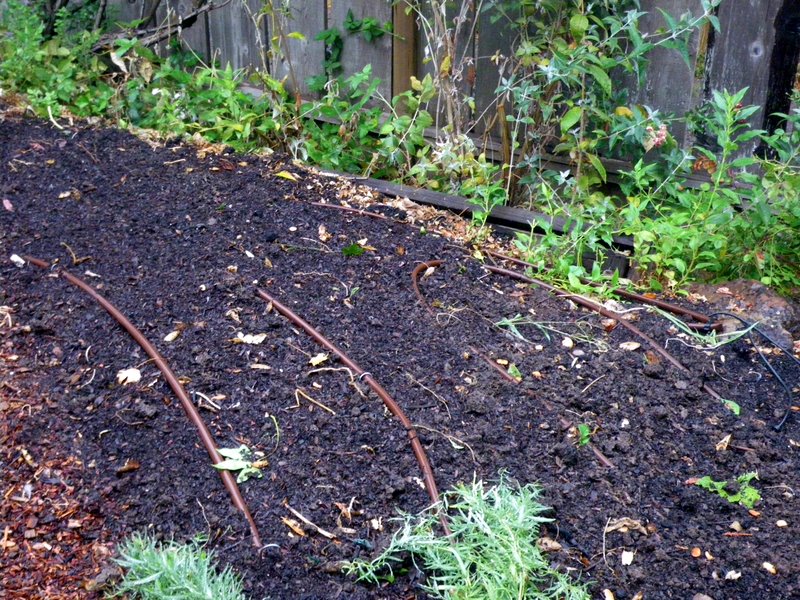
The summer vegetables are gone and it's ready for fava beans as a cover crop

The summer vegetables are gone and it’s ready for fava beans as a cover crop

May 212013
 
Edible landscaping

by Avis Licht

Bamboo poles for climbing plants

For a front yard, make sure your structures are ornamental as well as useful.


Edible landscaping has become more popular than I ever thought it would or could. Every day we hear about some new project in cities all over the world. We’re seeing gardens that are both beautiful and have delicious, healthy produce. I mean, it only makes sense.

In Marin County the municipal water district has been encouraging people to conserve water by planting low water use plants as well as food gardens.  In May they have a tour of the best gardens that use principals that they call “Bay Friendly”:  organic, drought resistant, permeable surfaces, habitat friendly for beneficial birds and insects, and lovely to look at.

On the tour last weekend I took some photos from a few of the gardens that incorporated some good edible landscaping ideas.  See if anything inspires you for your garden. (Click on the photos to enlarge them.)

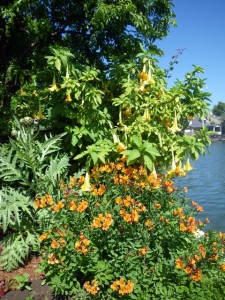
Artichoke, plum, alstroemaria

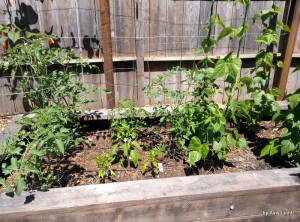
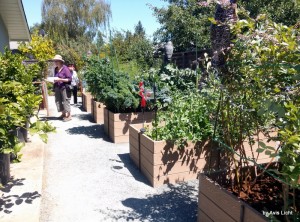
Raised vegetable box

Raised vegetable boxes define an area and let you put good growing soil into a small area. It’s also easy to maintain.

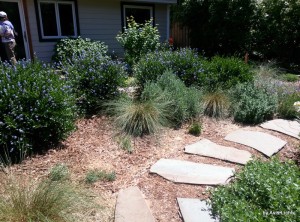
California native plants

These California native plants look good, are low maintenance, provide flowers and habitat. They go beautifully in an edible landscape.

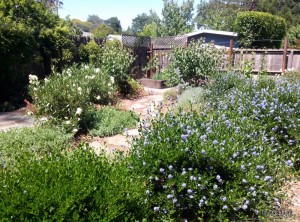
Native California plants

Another view of the same yard. This shows that the native plants create a small patio area and the vegetables are at the far end of the yard near the fence.

To read more about designing your edible landscape, read this post. 


Be sure to leave a comment or shoot me a question by going to the Ask Avis page.

Container Gardening

This suburban backyard is all raised beds and container plantings. Easy to maintain and very productive.

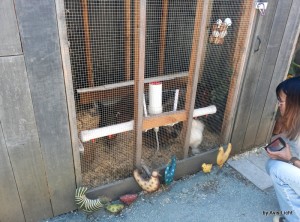
Chicken coop

This tiny chicken coop in an unused side yard provides fresh eggs for the owners.

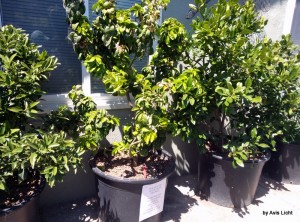
Fruit trees in containers

I’ve never seen this many fruit trees in containers. Lots of varieties but also a smaller harvest from the containers. When growing in pots, be sure to give plenty of water and nutrients. It is easier to find the right growing conditions when you can move the pots to the right micro climate. Since they will be dwarf simply by being in pots you can grow more trees in a smaller area.


To find out more about growing in containers read my post on self watering planters.

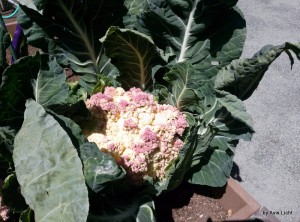
Cauliflower

This huge cauliflower was in a raised planter. You can get huge results when you have the best soil and perfect growing conditions.


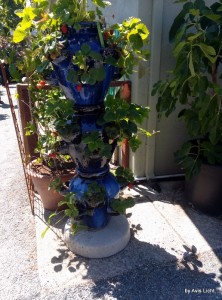
tower of strawberries

This tower of strawberry pots is fun to look at and certainly easier to harvest the strawberries.


To find out more about growing strawberries read this post.


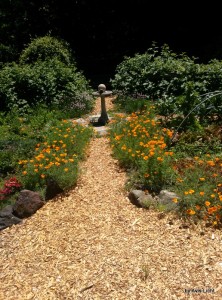
Back yard garden

Path, flowers and bird bath highlight the backyard garden. This yard has many fruits and vegetables, yet is entirely enchanting. At least I think so.


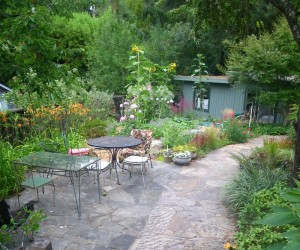
The Entry Patio

Entering the garden, you are led by a curving path, under fruit trees, by flowers, herbs and native plants.

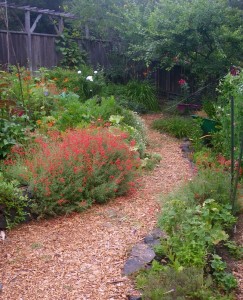
Vegetable Garden

I love that this vegetable garden looks like a garden garden. It’s not just utilitarian.


[portfolio_slideshow id=2575]

Dec 032012
 

by Avis Licht  

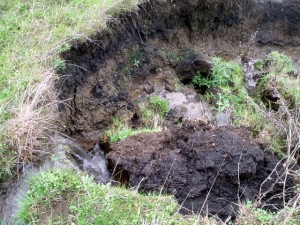
Erosion caused by overgrazing of cattle 

I’m sitting in my office, looking out the window at the pouring rain.  A huge winter storm has descended on us.  For the water we are grateful. We just need to make sure that it  doesn’t all run off  and erode our precious soil. Erosion of topsoil is one of those strangely ignored problems that can create huge problems, but can be addressed with straightforward solutions.

In their book, Topsoil and Civilization, Vernon Carter and Tom Dale, make the convincing case that our misuse of topsoil is directly related to the downfall of civilizations. It takes 500 years to form 1 inch of topsoil and with unsafe soil practices this important layer can be washed away in minutes. They write, “Civilized man was nearly always able to become master of his environment temporarily.  His chief troubles came from delusions that his temporary mastership was permanent.  He thought of himself as “master of the world” while failing to understand fully the laws of nature.”

Topsoil supports life.  Through thousands of years topsoil was formed as organic matter decayed and was deposited in layers.  For 350 million years the quality and quantity of soil and life increased. With the advent of civilized man, soil building processes was reversed in most places.

A tiny fragment of the land area on the earth represents the soil that we depend on for the world’s food supply.  This small fragment competes with all the other needs – housing, cities, schools, land fills, etc. It is up to each one of  us to take care of, protect and enhance our own topsoil.

THINGS YOU CAN DO TO PROTECT YOUR SOIL:

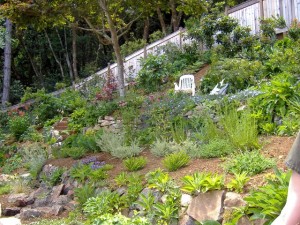
1. Plant to cover your soil. In vegetable gardens use cover crops in the winter where you don’t have vegetables growing.

Plants cover concrete wall

Once the plants are in you can barely see the retaining wall

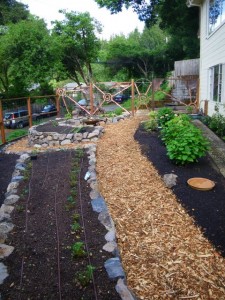
2. Judicious use of wood and stone to form retaining walls can make a big difference in stopping erosion.

Stone for raised beds

Raised beds using stone for both low and tall walls

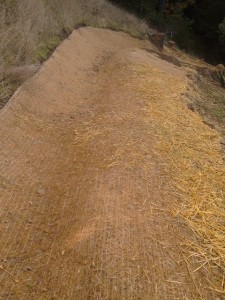
3. Create ditches and/or swales to slow and redirect water runoff.

Swale, at the top of the hill, redirects runoff, and is also covered with biodegradable fabric that has seed sown in it.

Check out these photographs of  waterfalls in my own garden after 10 inches of rain!

[portfolio_slideshow include=”2104,2109,2110″]


Nov 052012
 
Delicious and nutritious

by Avis Licht

Delicious and nutritious

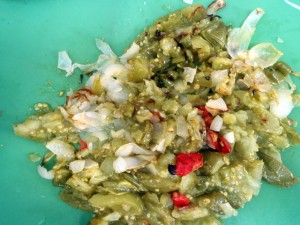
A quick way to use those end of season unripe green tomatoes.


At the end of the summer we’re always left with a bunch of unripe tomatoes.  The nights are cold, it rains, the plants start to rot.  It seems like such a shame to lose those tomatoes.  I was looking around the internet and found a number of yummy recipes for green tomatoes.

This recipe is a combination of several good ones. If you have left over sweet peppers you can use them and then add a little cayenne to the recipe to spice it up or down, just the way you like it.

Follow the pictures for each step and the recipe is written out at the bottom of the post.

Be sure to sign up for my blog in the subscription tab at the left.  Put in your email and you’ll receive a notice of my blogs the day I write them. Here’s one on growing tomatoes.

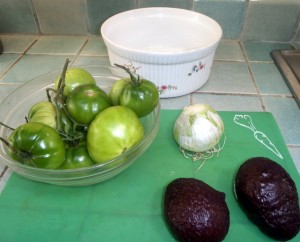
Get your ingredients together to mix with olive oil, salt and a dash of sugar in a medium bowl.


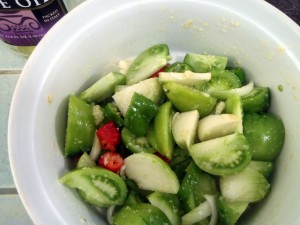
1. Preheat oven to 350 deg F. Chop green tomatoes, onions, peppers and garlic in chunks.

Mix ingredients in bowl before roasting

2. Toss tomatoes, onions, peppers, garlic with olive oil, salt and sugar in a bowl.

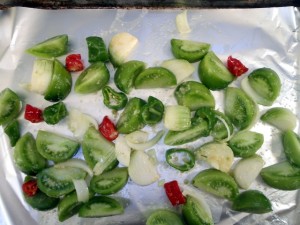
ready for roasting

3. Roast in 350 deg oven for about 30 minutes until soft.

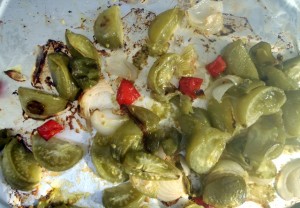
roasted veggies

4. Chop your vegetables into small pieces.

Roasted and chopped

Chopped into small pieces

5.Put these veggies into the bowl with avocados, lime juice, salt, chopped cilantro and cumin. Mix well.

Delicious and nutritious

Combine ingredients and add sprig of parsley or cilantro.

There you have it.  40 minutes and you’ve got yourself an incredible dish. Make it spicy hot or not, as you like it. A great way to use those green tomatoes and you don’t even have to fry them!

Here it is:

  • 4 medium green tomatoes
  • 2 small red peppers (hot or not)
  • 1 onion – peeled and chunked
  • 3 – 4 cloves pressed garlic
  • 1 tablespoon olive oil
  • dash salt
  • sprinkle of sugar
  • 2 avocados
  • juice from a lime
  • a little more salt
  • 1/2 teaspoon  ground cumin
  • chopped cilantro – 1/4 cup

1. Preheat oven to 350 deg. Chop tomatoes, onion and pepper and toss with olive oil, salt and sugar.

2. Spread on lined baking tray. Roast for 30 – 35 minutes until softened.

3. Chop vegetables into small pieces.

4. In bowl, smash the avocados, salt, lime juice and mix with chopped vegetables.  Add the cilantro and cumin. Taste for flavor.

5. Enjoy as dip with chips or raw vegetables. My family took care of that bowl in no time.


Sep 212012
 
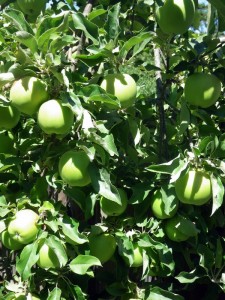
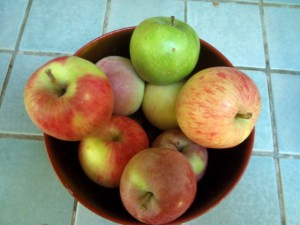
4 varieties from one tree
Lots of apples

We love our apples, but they come in all at once. Here are some ways to preserve those apples.

by Avis Licht

Fruit trees are one of the easiest ways to incorporate edible plants into an ornamental landscape.  They flower, they fruit, they’re relatively easy to take care of, they provide shade and beauty BUT they give all their fruit at one time.  One of the biggest complaints I have from my clients is that they don’t want to deal with all the fruit that falls.  Here are a few really easy ways to preserve your harvest.  It’s so worth it.


4 varieties from one tree

Choose apples carefully for storage: no cuts, bruises or bites.

1. The easiest: Cull your fruit for perfect apples that have no worms, cuts, bruises or bites.  These fruits will last for months in a cool, dark place. It’s important to make sure they are perfect or else they will start to rot and cause other apples to go bad.

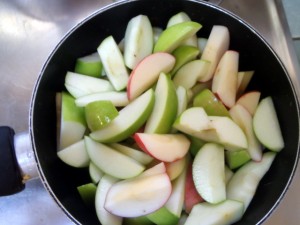
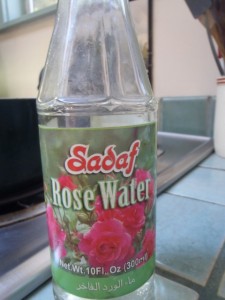
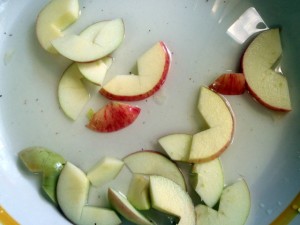
2. Cut your apples and make applesauce: This is a good way to use “imperfect” fruit.  Cut your apples into slices and remove any bad parts.  I leave on the skins. I add a little fresh lemon juice which adds flavor and keeps the apples from turning brown.  In this batch I used a little Rose water for flavor.  Add a couple of tablespoons water and cook on simmer until the apples are chunky.  Store in the refrigerator up to a week. It is divine.

Cut apples for cooking

Use only a few tablespoons of water and put on simmer until cooked into a chunky sauce. Put in the refrigerator and it will last a week.


rose water

You can find this in Mediterranean food markets.


3. Freeze your fruit:  Put a little lemon juice into your bowl of cut fruit and stir it around.  Put fruit into ziploc bags and throw them into the freezer.  They’ll be ready for pie, sauce or smoothies any time. I wrote a post last Fall on freezing. You can read about it here.

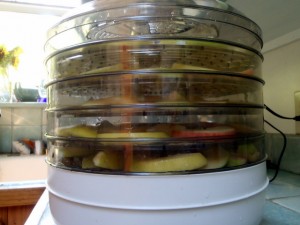
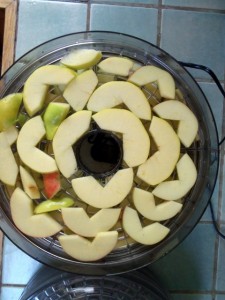
4. Dehydrating fruit: This takes a little more time, but can offer some really tasty treats for later on. This dehydrator is not expensive and is small enough to store when not in use.

Dehydrator

A small scale dehydrator can be used for many fruits and vegetables.

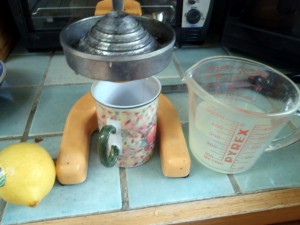
I use fresh lemon juice and mix it with water.  Using a sharp knife I cut the apple in half and remove the core. Slice in 1/4″ layers. Laying the fruit in a shallow dish I put the fruit and lemon juice mixture together.  This keeps the fruit from turning dark and gives it a great flavor.

Juicing lemons

Juice some lemons and mix with a little water.

apples in lemon juice

Cut in 1/4 inch slices and dip in lemon juice


Lay out in trays and let the machine do its thing. Mine took overnight to get most of the moisture out.

Apples in dehydrating tray

Lay out sliced apples.

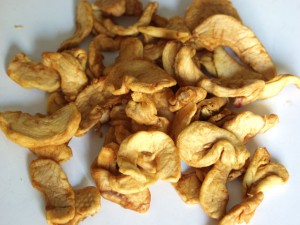
When done they should be flexible and leathery, but not watery.  Let them cool and put them in ziploc bags in the fridge for storage.  They are really sweet and make a delicious snack for kids.

dried apples

Check your dehydrator periodically to make sure the apples are drying evenly.

5. Share, share and share some more.  Bring your extra fruit and veggies to your local food bank.  They’ll love you and love the food.


Aug 282012
 

by Avis Licht

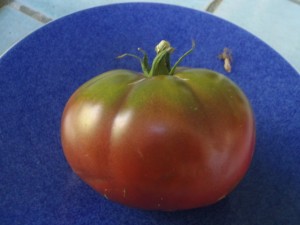
A ripe Brandywine tomato

There is something very interesting about the green shoulder on this tomato.

It’s often hard to find a ripe, delicious tomato in the store. For that reason, tomatoes are one of the most popular plants to grow in the home vegetable garden. Tomatoes for large scale agriculture have been bred to have tough skins and are picked unripe in order to ship them in large containers without getting squished.  These tomatoes have nothing in common with an old fashioned, well grown tomato, picked ripe.

This blog is not about how to grow a tomato, of which there are many varieties and can be grown in many locales. That’s for another day. What I will talk about  is the meaning of the surprise markings on many heirloom tomatoes.

We usually think about ripe tomatoes in terms of red.  Green means not ripe.  WRONG! The green shoulder on a tomato  influences the amount of sugar in the ripe fruit. If green shoulders don’t sound familiar, that’s because most commercial tomatoes don’t have them anymore. The dark green parts have more chloroplasts, which turn sunlight into sugars. Scientists think that increases the amount of sugar in the tomato by about twenty percent. You can read more about it in this article from UC Davis Food and Science Department.

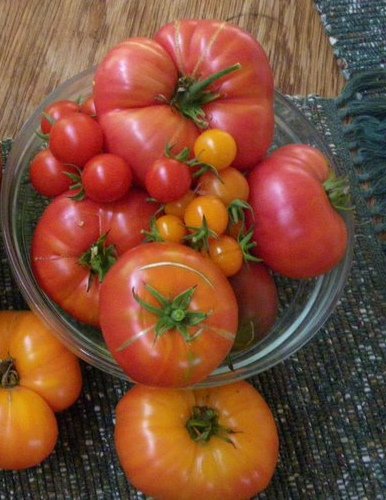
Many colors and kinds of tomatoes

Tomatoes come in many colors and shapes. They have different flavors as well. It’s worth growing your own.


Watch your tomatoes as they grow, and when they start turning color, whatever color they’re supposed to be, pick them while they’re still a little firm.  If possible hold back on the irrigation before harvesting.  It makes them sweeter.


Pick your tomato carefully

There is a little section near the top of the tomato. Pick it at that section and leave the cap on. The tomato will keep better and you won’t be as likely to rip off the whole branch.


There’s so much to learn about growing the healthiest and best tasting fruit and vegetables, but the most important part is to just start! Let me know what your favorite tomato varieties are.

May 242012
 
June in the Northern California Garden

Water, feed and stake up your plants before they fall over.

by Avis Licht

With the warm sun on our backs we can heave a sigh of relief that the winter is over. The Summer Solstice is the longest day of the year and we can expect some spectacular days ahead of us.

Your plants will be growing fast now. Irrigation coupled with warm weather can produce excess growth that is attractive to unwanted critters, like snails and slugs.


• IRRIGATION

In many places early summer is the time to start some serious watering in the garden. If you’re lucky to have summer rains, be sure to check the soil for moisture.  Windy days and hot sun can really take the moisture out of the plants and the soil.

I still recommend checking your soil with a trowel to be sure it is neither too dry nor too wet. Just looking at the surface, does NOT tell you what ‘s going on underneath.

For those of you who would like to learn more about putting in an excellent irrigation system I recommend Robert Kourik’s book, Drip Irrigation for Every Landscape and All Climates. You can find this book and others he has written on his website:

www.Robert-Kourik.com

• CRITTER CONTROL

Snails and slugs are in abundance due to all the moisture and spring growth. Controlling these guys organically can be tricky. They come out at night when it’s cool and moist. You can go out with a flashlight and see exactly who’s doing what to whom. At this point you can hand pick them off the plants. (This is not the most frequently chosen method around these parts.) You can also collect your eggshells in a can, and then crumble them around your plants. The snails don’t like the sharp edges of the shells and won’t crawl over them. You can also use Slug Magic, a product found in nurseries that has the main ingredient of Iron Phosphate which kills them. This is considered a safe and organic method of getting rid of snails and slugs. You can find this from Gardener’s Supply.

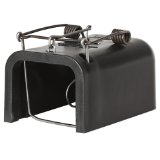
gopher trap

Effective and safe for handling. It will kill your gopher quickly

Another pesky critter is the gopher. You will notice their presence by raised mounds of soil. Gophers tunnel underground and push the soil up. They can and will eat roots and stems, killing your plants quickly and easily. I’ve had entire broccoli plants pulled under into the tunnels. Traps, either metal or wood can be set into the tunnels. It means digging into the soil and putting a trap facing in both directions of the tunnel. Only those not afraid of pulling out a dead gopher should try this. this trap is called a Victor Box trap.  You can get it through Amazon.

A preventive measure is to put mesh wire, called hardware clothe, in the soil. It can go under a bed of vegetables or in the hole where you are putting a bush or shrub. This is an initial investment of time and money, but lasts for years and protects your plants.

Of course, there are many more pesky critters, but to keep this post short and readable, I’ll save them for another day. Stay tuned for how to cope with aphids, deer, raccoons and more.
•TIP OF THE DAY

A wilting plant may be just that, not because the soil dry but because a mole or gopher may have tunneled near the roots and exposed them to the air, which dries the plant. Check for these critters and fill the holes around the roots.

Be sure to add fresh mulch to the garden. This will preserve moisture and help the soil. It will help keep your plants happy and healthy.

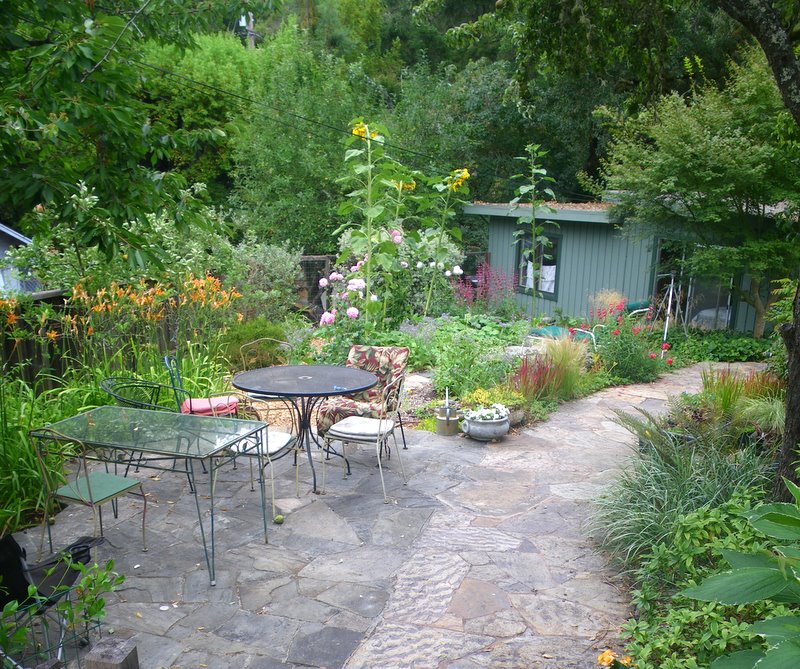
Edible Patio

The edible landscape is ready for summer entertaining


May 212012
 
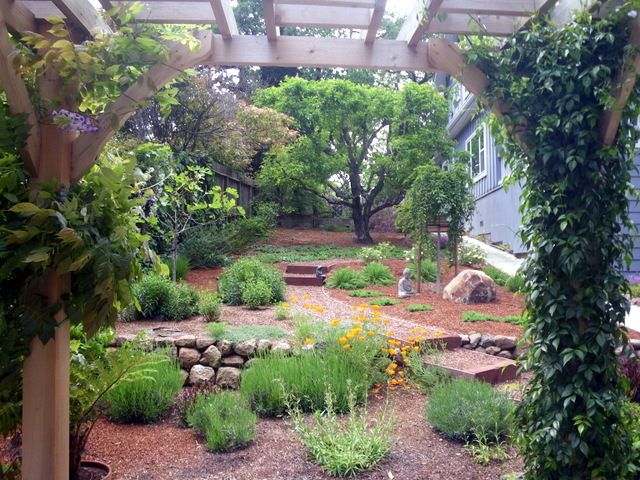
Edible landscaping at its finest

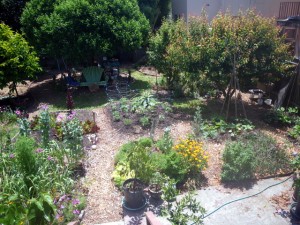
Take out the lawn and put in fruit trees, vegetables, flowers, bees and rabbits and you may just have the garden of eden.

By Avis Licht – What do you imagine when you hear the term “urban farm” ?  To me it sounds big with rows of vegetables and possibly a barn with animals. But that’s not the reality of urban farms that I visited in Berkeley, California last week.  Over the next few weeks I’ll be high lighting a variety of gardens/farms in the city.  Some are backyards, some are vacant properties on loan to non profit organizations and some are community gardens.

Today I want to show you how one woman, Ruby Blume turned her backyard into a fully functioning mini farm, providing her with most of her food needs, including meat, honey, fruits and vegetables, mushrooms and plenty of beauty.

She co wrote the book Urban Homesteading with Rachel Kaplan and runs the Institute of Urban Homesteading in Oakland, California. They offer many classes in gardening, animal husbandry, kitchen skills, food preparation, handcrafts, permaculture and much more.

On Saturday, June 9th, 2012, they will be hosting an Urban Farm Tour from 11am – 5 pm in Oakland and  Berkeley. Details and descriptions at iuhoakland.com

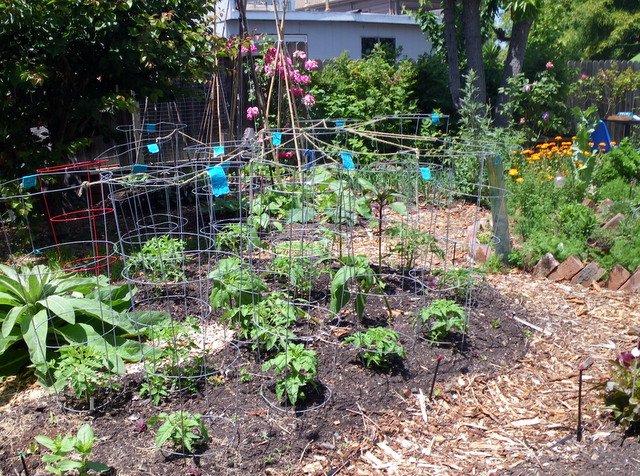
vegetables in the backyard

A small backyard can produce a lot of food. Grow what you love to eat.

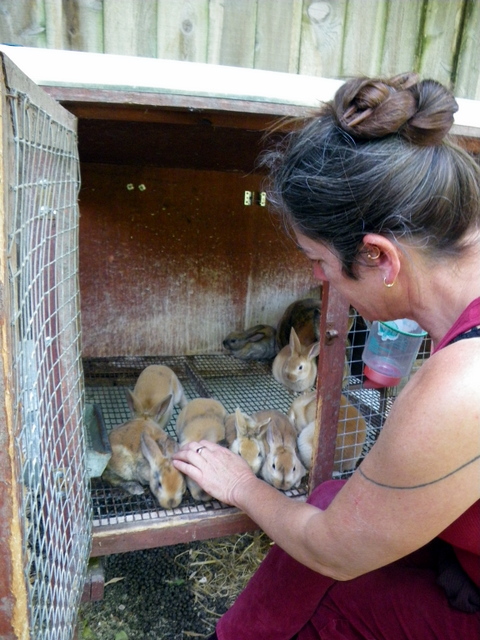
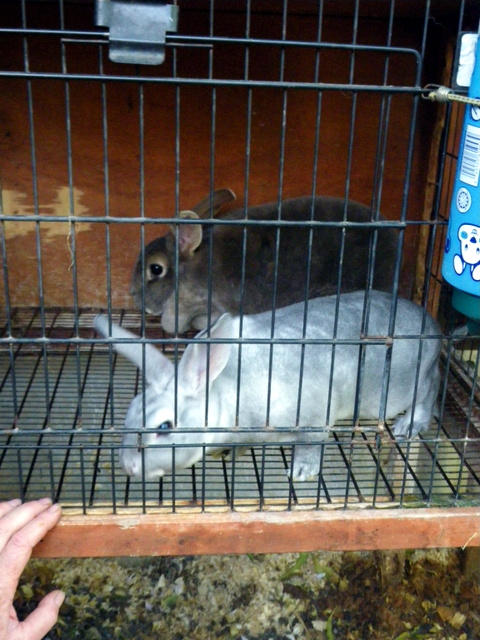
rabbits

When you raise your own animals, you know how they've been treated

Rabbits - 8 weeks old
Rabbits are ready to eat after 8 weeks
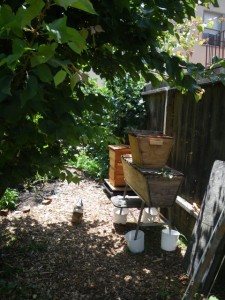
Honey Bees

A few hives can be safely put in a backyard for honey and pollination


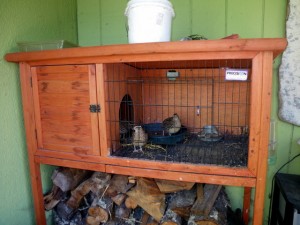
Quails for eggs

Quails -They don't take up much room, are beautiful to look at and apparently lay good eggs for eating. Lovely quail house.


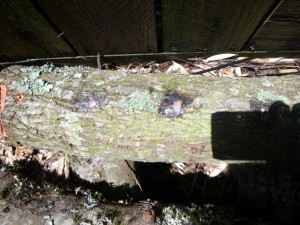
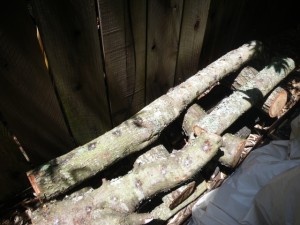
Oak logs for growing mushrooms

You can grow mushrooms at home by buying spores and inserting them into the logs


Oak logs for mushroom growing

Ruby had her logs at the side of the house where nothing else would grow


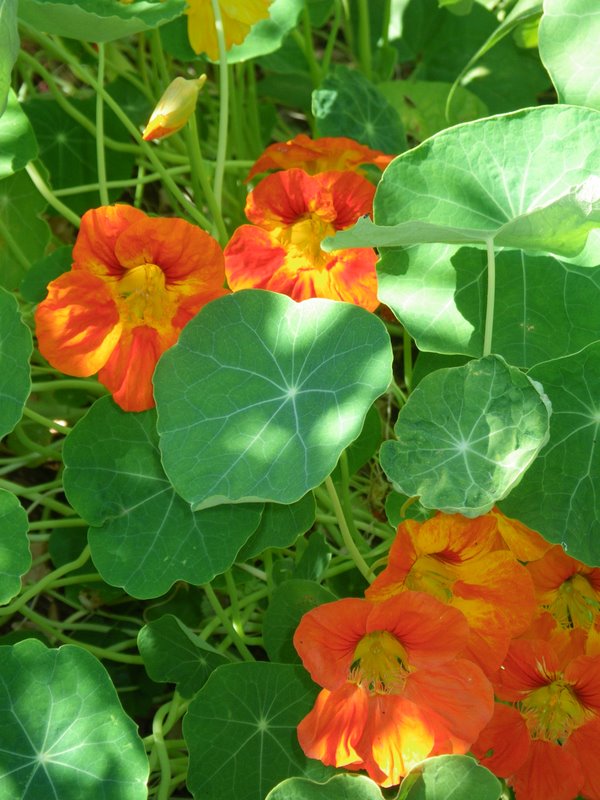
Flowers for beauty and food

Edible flowers add to the diversity and beauty of the garden


May 042012
 
Path into the Garden


by Avis Licht – Designing your edible landscape can seem formidable. Here are a few ideas to help you move forward on your own yard.

1. Simplify your garden.  Remove any unwanted fences, structures, and unhealthy plants.  Open up your yard before you decide what you want to add.

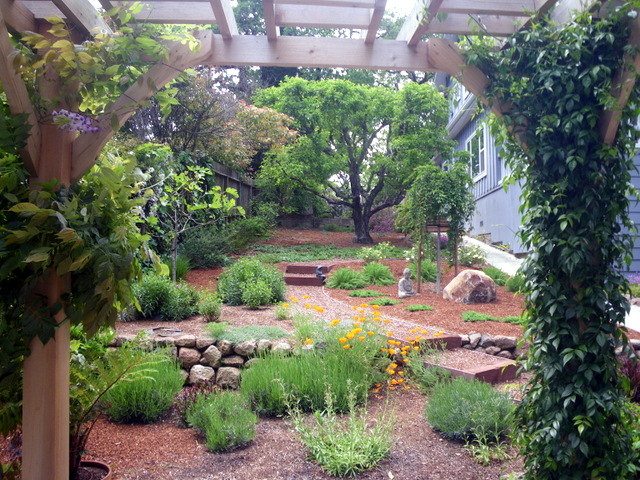
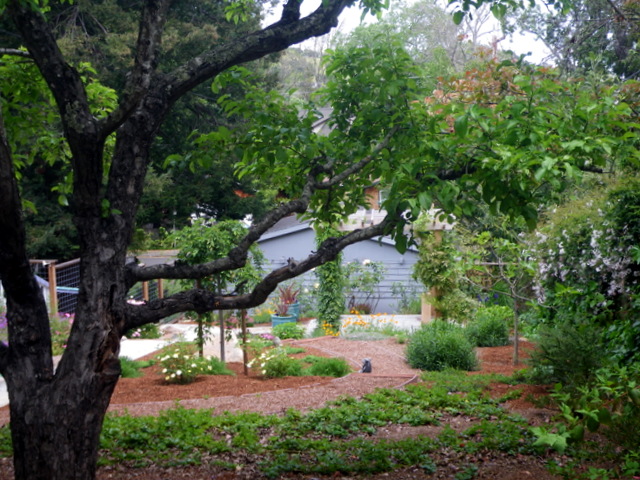
Apple tree as the centerpiece of new landscaping

3.Here is the yard, fully landscaped. You can see the beautiful apple tree and you can stroll up the garden path.

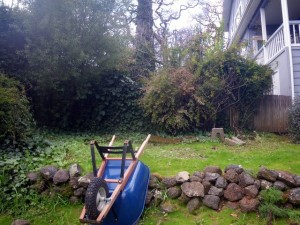
Old fence, tree and lots of ivy

1.This is the side yard before we cleaned it up. You can’t see the apple tree behind the fence and old shrubs.


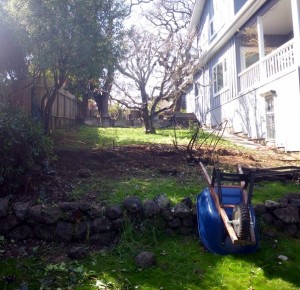
Fence and old shrubs removed


After removing the fence and old shrubs, we realized there was an open view to the old apple tree. It was previously  hidden, and now is the centerpiece of the garden. By clearing out the old, it will help you see what you want to keep and open up new vistas.

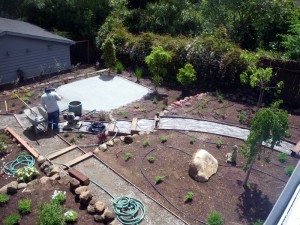
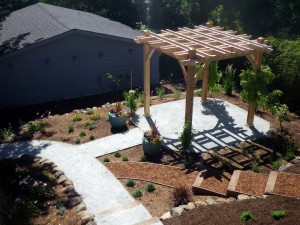
2. Once you’ve cleaned the place up, you can decide where to put your paths, retaining walls and any structures.Next decision: where to put paths.  It is important to be able to walk through the garden, to enjoy it and also to take care of it. The path on the right side of the house existed and we left it as is to access the house.  The path through the garden is a winding, informal path that encourages you to slow down and enjoy the view.

siting paths, sitting area and retaining walls

Lay out your paths, retaining walls and sitting area


View from gazebo

Sitting under the gazebo you have a fine view of the yard.

Gazebo and paths

Structures create outdoor rooms for eating, reading and relaxing in the garden

3. Finally, you can choose what plants you want to use. In this yard, there are a lot of low maintenance plants like herbs and California native plants.  You can see lavender, rosemary, Salvia, penstemon, thyme, oregano and California poppies.  Along the fence and for ground covers we used Manzanita, Ceanothus, Osmanthus and cotoneaster. At the top of the garden is a small vegetable and herb garden near the kitchen, where it is easily accessible.

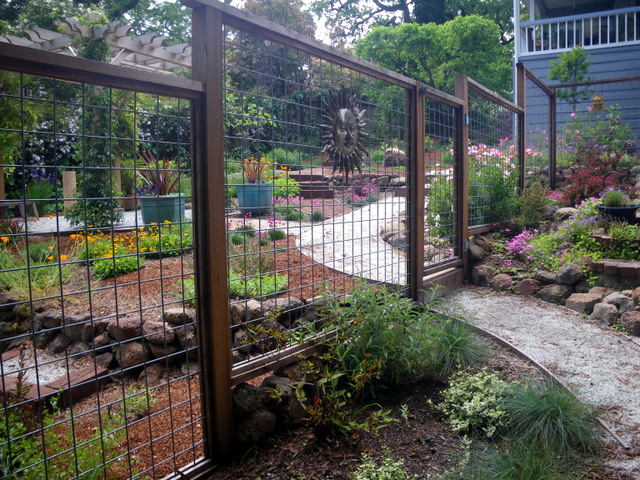
An open fence invites you into the garden

An open deer fence lets you look into the garden.

I’m available by phone, skype or in person for hourly consultations.  Send me a note via this blog and we can arrange it.


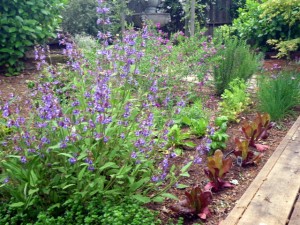
Herbs and vegetables

Outside the kitchen are the herbs and vegetables

Looking down the garden towards the carport

From the vegetable garden you can look down the garden to the sitting area.


Use these three simple ideas to help you get started.  You’ll be surprised how they can open up your eyes to new possibilities.

To help you get started on your vegetable garden there is plenty of information in my ebook, The Spring Garden Made Easy.  It’s on sale for $4.99

Spring Garden Made Easy


Apr 242012
 
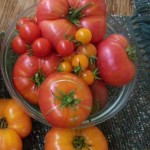
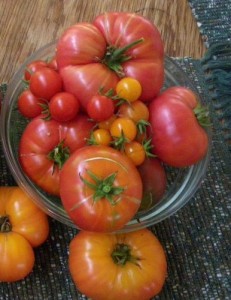
Delicious homegrown tomatoes

We love a salad of different kinds of tomatoes

by Avis Licht – A fresh picked, ripe, delicious tomato is one of the best foods in the garden. They are soooo much better than store bought and so easy to grow, that they are one of the most widely grown vegetables. Here are a few tips that will help insure you get the best, tastiest and healthiest tomatoes.

1. Pick a sunny site. You can’t make up for lack of sun.  Look for at least 7 hours of sun per day.

2. Tomatoes prefer well drained, neutral  to slightly acid soil.  Add lime to acid soil and sulfur to alkaline soil. Make sure your soil drains well. They don’t like sitting in water.

3. Pick several varieties that are suitable to your climate.  For instance, if you live near the coast and fog, it’s better to grow cherry tomatoes that don’t need a long, hot season.  The larger the tomato, the longer the season. There are plants known as determinate and indeterminate.  Determinate types are bushier, need little or no staking and tend to bear all their crop at once.  They do well in pots or containers. Indeterminate grow taller and need staking.  They bear their crop over a longer period of time.  If you plant some of each you will have tomatoes over a longer period. Check out this site for varieties of heirloom tomatoes.

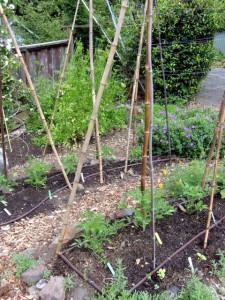
Young tomatoes

Stake your tomatoes early and keep them off the ground to reduce rot and pests

4. Set out your plants after all danger of frost has passed.  The biggest mistake people make is putting out their tomatoes too early, during a warm period in early spring. They get whacked by a late frost, or just cold weather.  Tomatoes like warm soil.  Put the plants in and after the weather warms up a little, then mulch them.

5. Give tomatoes well aged manure or compost.  They don’t need a lot of nitrogen, but do need the micronutrients in the compost for good flavor.

6. HERE’S AN IMPORTANT TIP: Give your tomatoes regular water.  If the roots dry out, they don’t take up the calcium in the soil, which results in cracked fruits and end rot.  However: when the plants are getting ripe, you can cut back on the amount of water. Mealy, watery tomatoes are usually a result of OVER WATERING!


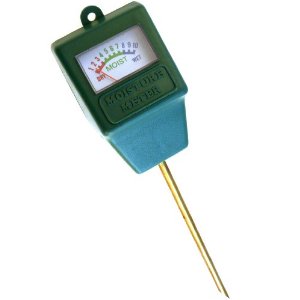
moisture meter

Best tool ever. This will save you time, water and money. Click on the picture to buy it!

I use this simple, inexpensive gauge to let me know how moist the soil is.  You can’t tell by looking at the surface if you need to water.  The top of the soil can be dry and the soil at a few inches below may be wet.  Check first before you water. Believe me, this is one of my most used tools.


7. When you finally get your delicious tomatoes – DON’T put them in the refrigerator.  It ruins their flavor. Keep them out on the counter out of the sun. Hardly anyone knows this. But you know it now.

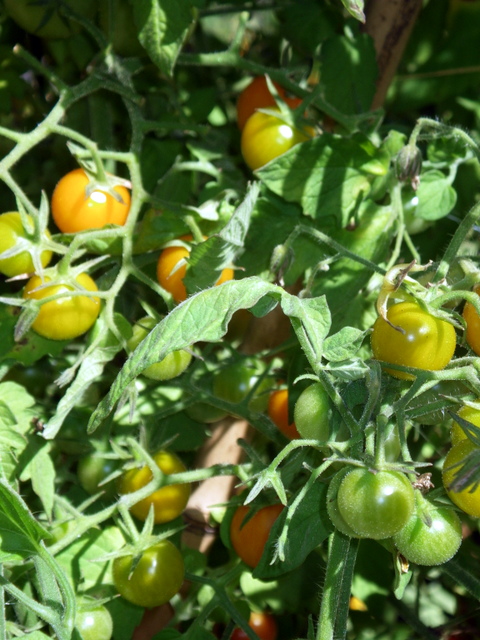
Cherry tomato

These cherry tomatoes start bearing early, give a lot and last until the first frost.


Apr 192012
 

If you find useful information in my blog, please be sure to sign up for an RSS feed or email subscription.

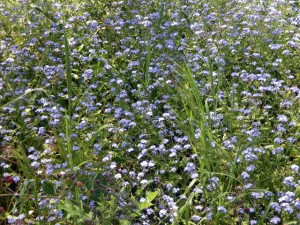
Blue Forget Me Nots

Weeds come in many disguises like this invasive Forget me Not

This always happens every Spring. I think I’m on top of the jobs I need to do in the garden, and then boom, I look out the window and the weeds have grown overnight like the bean in Jack and the Beanstalk. Although some of them actually look kind of pretty, like these Forget-me-Nots. This innocuous looking plant is actually an aggressive, invasive plant. Have you ever tried pulling out these “innocuous” plants when they’ve gone to seed? Their seeds stick to you like glue and it can take hours to get them off your clothes and socks.

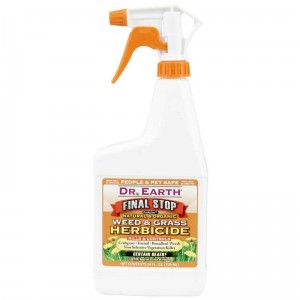
In general we mean a plant is a weed when we don’t want it in the garden at all, or at least not where it has shown up.  Certain plants are always unwanted.  These are the category of pernicious weeds such as poison oak, creeping morning glory, bermuda grass and the plants that are harmful to you or impossible to get rid of. Let me  say right off the bat, that I never use chemical poisons. Weeds in my yard need to be removed by hand, digging them out, or by barriers to cover them and keep them from getting sunlight, or by spraying them with nontoxic potions, such as, Dr Earth Weed and Grass Herbicide or vinegar/soap/ solutions. (Use white vinegar: Add 2 tablespoons of dish soap to vinegar. Pour this mixture in a spray bottle. Spray your weeds!)

In his book, On Good Land: Autobiography of an Urban Farm, Michael Abelman wrote this great bit on weeds.  “When dealing with “weeds,” timing is especially critical.  Remember that “weeds” are merely plants out of place and that weed competition is primarily a problem in the early stages of crop development.

“Three things resolve weed competition easily: early cultivation, the right tool and attitude.  The goal is to never weed but to cultivate.  Cultivation aerates the soil around the plants, and cuts off or buries young tender weeds.  If you have to actually weed, your are too late and will have created far more work for yourself.”

Don’t be too late – start weeding now!

If you want to find some great tasting heirloom tomatoes, Burpee is having a sale. You can get them on special just through this site:$10 off orders of $40 or more with code AFFTOFF thru 4/23 at Burpee.com!

TOOLS  I RECOMMEND.

My favorite tools for cultivating weeds out of your garden:

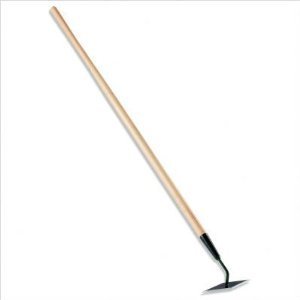
Long handled hoe

Best use of time and energy - use this hoe early and often

The Hoe : This long handled, double edge weeder, lets you go back and forth for most efficient use.  When the weeds are young and the blade is sharp, you just put it lightly below the soil surface and it cuts them off cleanly, leaving them in the ground.  You don’t have to bend over and it is easy on the back.

Corona Clipper SH61000 Diamond Hoe

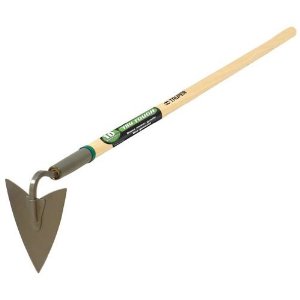
The Triangle Hoe: I use this hoe to go between plants that are close together, especially good in vegetable beds and flower beds. Like all other cutting tools, you should keep the blade sharp.


Truper 30002 Tru Tough 54-Inch Welded Warren Hoe, 4-3/4-Inch Head, Wood Handle

Long handled triangle hoe

Great for tight places: vegetables and flowers. The Triangle Hoe $22.99

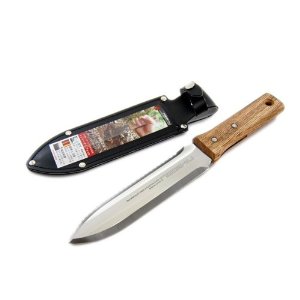
Hori Hori Japanese Weeding Tool

The Hori Hori: This strong tool is useful for many tasks $27.95

Japanese Hori Hori Garden Landscaping Digging Tool With Stainless Steel Blade & Sheath

Hand Weeding: The Japanese Weeding Knife: Hori Hori Tool

I love this tool and use it all the time. It’s good for weeding, planting, and scarifying the soil. I have a confession, though. I put it down in the garden about 6 months ago and can’t find it. I know it’s there and am sure each day that it will turn up. I’m afraid I’ll have to get another one.  Is there a GPS tracking app for lost hand tools?

SPRAYS: Usually a last resort, sometimes we have to go there.  For particularly pernicious weeds like poison oak, bindweed and bermuda grass I use Dr Earth Weed and Grass Herbicide.  Ingredients include Citric Acid, Cinnamon Oil, Clove Oil, Soybean Oil, Rosemary Oil, Sesame Oil, and Thyme Oil. You can buy this from Organic Green Roots, which donates a portion of every sale to school gardens.

Safe weed spray

Apr 092012
 
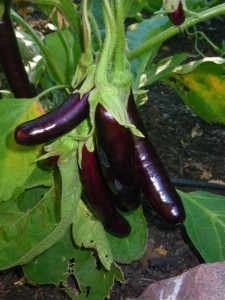
Japanese eggplant

Eggplant with basil and tofu anyone?

by Avis Licht

When deciding what to plant in your garden, in addition to the obvious parameters of site and climate, you can have fun with ideas based on what kind of food you like to eat.  Are you Italian/pizza lovers? Is your favorite dinner a Mexican style salsa/burrito/tomale? Why not plant a theme garden based on your favorite meals?  To make that homemade pizza sauce you could plant different heirloom varieties of paste tomatoes, with 3 different types of peppers and quantities of flavorful herbs.

When deciding on the vegetables for your style of garden, you can also look up recipes and find out the best herbs for your dishes.  Instead of  going from store to store trying to find the right herb, you could just go out and pick it fresh.

Asian herbs include: Chinese chives, coriander, cilantro, ginger, Thai basil, lemongrass, peppermint, sorrel  and dill. Asian cuisine is vast and covers many countries, but there are some herbs like the lemongrass that have a very particular flavor which can be hard to find in stores.  Although it is a tropical herb and doesn’t live in climates below 30 deg F. you can treat it as an annual and it will give you plenty of leaves.
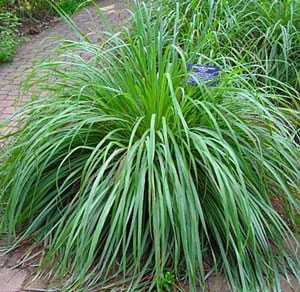
Lemon grass

Beautiful in the edible landscape, Lemongrass is an unusual and wonderful herb for Thai food.

Herbs that are common to many types of cuisine and easy to grow include: onions, cilantro, garlic and basil. Mediterranean herbs like rosemary, marjoram, oregano, parsley, sage, thyme and bay leaves are easy to grow and should be in everyone’s garden.  It’s hard to describe the difference between fresh and dried herbs to those who don’t use fresh herbs.  I guess it’s like the difference between breathing in the fresh air at the ocean and using an oxygen tank with tubes up your nose. Well, that may be a little extreme, but you get my drift.
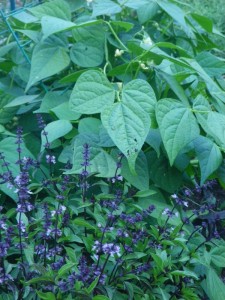
Thai Basil

Thai Basil has a unique flavor- grown with beans in this photo

Some unusual vegetables that you would use in Chinese and Japanese cuisines include bok choy, Napa cabbage, daikon radish, green onions, snow peas and soybeans. You can find seeds for these plants in any of the catalogs in my Resource page.

For a Mediterranean garden you would plant all of the following:  tomatoes, eggplant, and peppers,asparagus, Tuscan kale, Savoy cabbage, radicchio, endive, artichokes, zucchini, fennel, bell peppers.

For Mexican cooking, legumes (black beans, pinto beans), corn, and a variety of peppers (poblano, jalapeno, ancho, serrano) are key. And don’t forget the squashes. They’re easy to grow, taste great and keep well, (that would be winter squash).
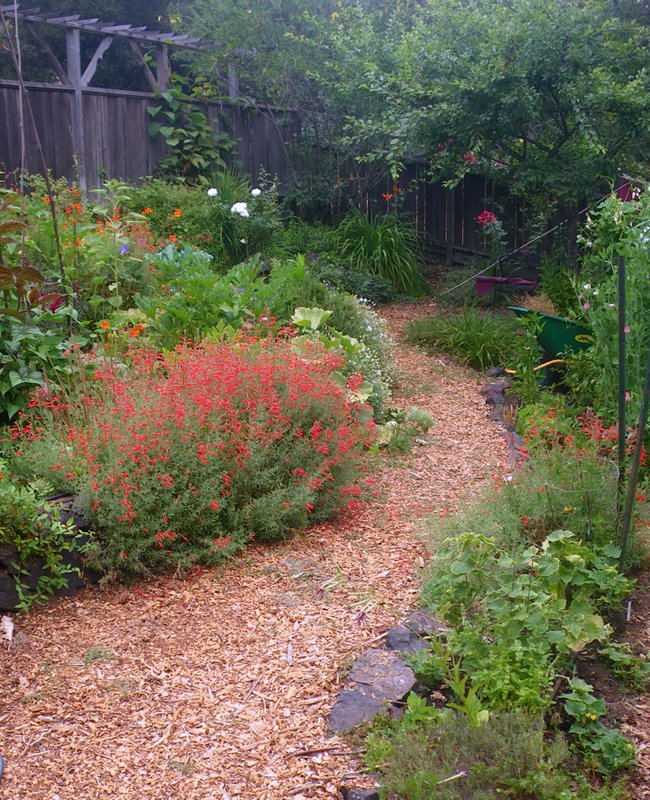
beauty in the vegetable garden

Themed gardens are beautiful as well as productive

Stay tuned for landscape plans for theme gardens. Subscribe to my blog and you won’t miss any of the information you need to keep your garden healthy, beautiful and bountiful.

Here’s a great recipe I found for Homegrown Pizza Sauce – all ingredients from the garden:

How to make Homegrown Pizza Sauce

.

Ingredients

“I’ve always made pizza sauce based on my mother’s recipe, starting with a can of tomato sauce. This year, I started with paste tomatoes from my garden with great success. You’ll notice that the amounts in the ingredient table below are rough; please add veggies and herbs according to your taste

  • 3 pounds very ripe tomatoes, washed, stemmed, quartered, and seeded
  • 1 yellow onion, very small dice
  • 4 garlic cloves, minced
  • 2 tbl. dried oregano
  • 1 tbl dried thyme
  • 2 bay leaves
  • 1 tbl. olive oil
  • sea salt, black pepper, and sugar to taste.
  1. Place quartered tomatoes in large saucepan over medium heat. Cook, stirring frequently. The tomatoes will let go of a surprising amount of juice.
  2. Remove from heat and strain off solids. Set solids aside and return juice to the stove.
  3. Simmer juices, uncovered, until reduced.
  4. Add tomato solids back into the saucepan and stir in all remaining ingredients except sugar.
  5. Bring sauce back to a simmer and cook, stirring regularly, until the onions are translucent and the sauce has reduced to the desired consistency.
  6. Taste.
  7. Add a small amount of sugar, mix thoroughly, and taste again. Repeat until you achieve an acidity that tastes good to you.
  8. Sauce should keep in the refrigerator for about a week, in the freezer for a few months, or may be canned.” From www.opensourcefood.com.

Don’t forget, it’s not too late to start your Spring Garden. To help you I’ve put together a handbook on the steps you can take to be successful in your garden. Included is information on soil, sites, annuals, perennials, fruits and much more. This is a 20 page guide to get you started on your edible landscape. Forty years of gardening has given me plenty to share. If you have enjoyed my blog, be sure to get my booklet.
$4.99 – such a deal

Spring Garden Made Easy

Mar 282012
 
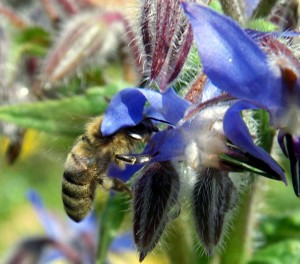
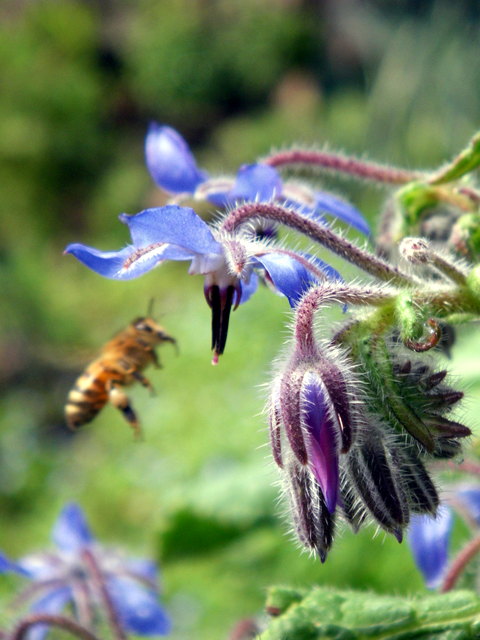
Honey bee in borage


Honey bee in borage

Borage blooms early and long - the bees love it (click to enlarge)

by Avis Licht

Often, when I design a garden people ask me if it will bring bees.  Usually, it’s because they are afraid of having bees in the garden. Bees, who are gentle creatures, are more interested in finding nectar and pollen than stinging you. Often people mistake yellow jackets, who come in late summer to eat your sweet fruit or meat at the outdoor barbeque, for bees.  They are not the same at all.
Bees are absolutely necessary to the health and productivity of your garden. We need them to pollinate our fruits and vegetables.  35%  of our food worldwide is pollinated by bees. Imagine a world without honey. Well, please don’t do that.

Recently there has been a disappearance of bees called Colony Collapse Disorder. Entire hives die without apparent cause.  By planting bee friendly plants you can personally aid in their resurgence.

The best plants are ones that are native to your locale or grow well in your climate. Herbs, flowers, and flowering trees all contribute to their food source.

Using only organic controls in the garden is another way of protecting your bees.


Don’t forget to buy my ebook on The Spring Garden Made Easy 

Spring Garden Made Easy


There are many wonderful bee plants.  These are a few of my favorites.

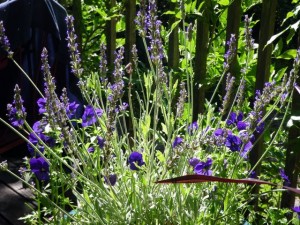
Lavender and violas

Lavender can be planted in the ground or in containers. Beautiful everywhere.

1. Lavender: For millenium lavender has been used in soaps, balms and sachets as well as medicinally for its calming effect. My local ice cream shop makes the best honey lavender ice cream.  Grow it in full sun, well drained soil, in climates that don’t go below 20 deg F.
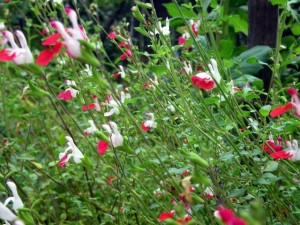
2. Salvias: In the sage family there are many herbal and ornamental varieties of Salvias.  Bees and hummingbirds love them and they come in many colors.

Salvia Hot Lips

This bi colored Salvia, Hot Lips, is just one of many varieties. (click to enlarge)


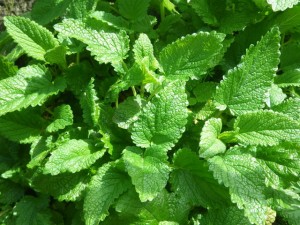
3. Lemon Balm, Melissa officinale – In the mint family, Lemon Balm has a wonderfully lemony flavor for tea. It is considered one of the premier bee plants. Melissa is a Greek word meaning honeybee.

Lemon balm

In the mint family, Lemon Balm has a wonderful lemon flavor and is easy to grow


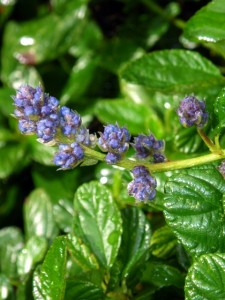
4. Ceanothus– California lilac (many varieties). Many native plants are helpful to the bees. The California Lilac grows on the hills in California and as its name suggests is wonderfully fragrant. It flowers in the blue, purple and whites and  can be a very low growing shrub or up to 15 ft. Well drained, sunny sites are what it needs to thrive. It requires very little care.
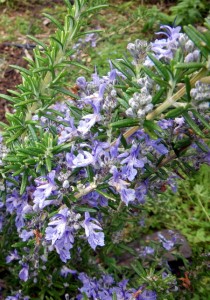
Rosemarinus officinalis

This rosemary is planted next to my Apple tree. It brings the bees to pollinate the tree.

5. Rosemary – One of the most loved herbs for cooking, rosemary is easy to grow and long lived.  The bees love it. In my garden it starts to bloom early in Spring and is under the apple trees which are just starting to bloom.  This companion planting encourages the bees to pollinate my fruit trees.

In the herb family you can plant Basil, Catnip, Dill, Fennel, Hyssop, Lavender, Parsley, Rosemary, Thyme, and Sage to encourage your friendly bees.

In the ornamental flowers, try Agastache, Salvia, Bachelor Button, Black Eyed Susan, Clematis, Coreopsis, Lantana, Larkspur, Sweet William , Yarrow, and Zinnias.

In shrubs, Ceanothus, Manzanita, Arbutus, Mahonia and Philadelphus are beautiful and useful.

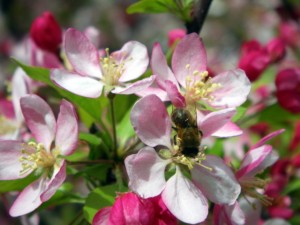
The Crab Apple tree blooms early and is absolutely buzzing with activity.

California lilac

The buds on this Ceanothus are just getting ready to open. (click to enlarge)


Crab Apple Blossom with bee

The bees adore this Crab Apple which blooms in early spring

Coming in for a landing

Coming in for a landing


© 2011-2024 Edible Landscaping Made Easy With Avis Licht All Rights Reserved