Jan 162014
 

by Avis Licht

Mulch

Good soil preparation and mulching are essential for holding moisture in the soil

In Northern California we’re experiencing a record breaking drought this winter. The rainy season isn’t over – yet, but there is no rain forecast for the rest of January, and reservoirs and streams are very low.

There are a few simple and easy steps you can take to prepare your garden for  drought conditions. And you should start as soon as possible.

1. Cover your exposed soil with mulch or compost. By covering your soil, you allow rain, when and if it comes, to penetrate into the soil and not run off.  There are many kinds of mulch for different conditions.  Please read this post to find out more about which mulch is the right one for your garden.


Sheet mulching is an excellent method to turn water hungry lawn into efficient, beautiful and water conserving plantings.  Please read my description of sheet mulching here.


Sheet mulching

Layers for sheet mulching


2. Check your irrigation system for leaks. Every year your system needs to be checked.  Digging in the beds, gophers, raccoons, plants, freezing weather: all can break or loosen your irrigation pipes and cause leaks.  Those leaks can lose LOTS of water.  Please read this great article by Robert Kourik – drip irrigation expert.

Lettuce planted for winter harvest

In line emitter irrigation pipe


3. Container planting produces great crops with very little water. You might want to consider planting in pots and containers for certain crops. You can control water use easily and get your food and flowers easily. Read here for more about container planting.

the water at the top drips down to the plants at the bottom.  Great use of space and water.

The water at the top drips down to the plants at the bottom. Great use of space and water.

A good harvest in a small place, with very little water.

A good harvest in a small place, with very little water.

Ornamental containers can grow herbs and food.

Colorful pots mixed with herbs, lettuce and flowers are easy to harvest


4.Convert high water use plants to native plants. There are many beautiful native plants that can serve the same purpose as your water hungry plants. Winter is a good time to do that planting. Here are a few ideas for native plants in this post: California Native Plants

Manzanita and Ceanothus are easy to grow and use very little water

Manzanita and Ceanothus are easy to grow and use very little water

Jun 252013
 

by Avis Licht

It’s two days after the Summer Solstice and the garden is coming into fruition. I am feeling so grateful to have a garden, to spend time in it, and to have so much wonderful food come out of it.  We also have  flowers everywhere, to bring color and joy. And to invite our friends the birds, butterflies and bees. It’s a regular gathering place for the multitudes. This unusual June rain is a gift beyond compare. Those of you in other parts may get summer rains. Maybe even too many.  But here in California a summer rain is what we call a gift from heaven. Thank you to the Powers that Be.

Here are some photos I took this morning in the rain.

We will have a bumper crop of apples this year.

We will have a bumper crop of apples this year.


Daylily

Daylily buds are edible and highly prized in Chinese cooking


Grapes

Thin the grapes early to make room for them to grow full size


Cherry Belle Radish

Radishes – Harvest early and often

Harvesting raspberries

In an unusual June rain, we adore picking raspberries.

Basil

Growing basil in pots is easy. In the ground sometimes basil gets eaten by earwigs and slugs. In the pots not so much.

Delicata squash

My seedlings of the squash have germinated beautifully and will start growing rapidly after this rain. The white flower is nicotiana, a fragrant night blooming flower.

Miniature rose

These roses have been blooming for months. After cutting them back a few weeks ago, they are starting all over again. I put these small roses all over the garden for beauty and delight. Rose petals are used in many culinary ways.

IMGP0058Variegated thyme

Variegated thyme provides a wonderful leaf contrast and I use it in cooking. I grow it near the strawberries as a companion plant.

Kale

Even though my kale has a few munching holes in it, it’s still great to eat. I don’t worry about a few pecks here and there.

Raspberries

Raspberries are easy to grow and I feel rich when we eat them. They’re expensive to buy, and cheap to grow! Watch out though, they like to spread themselves around the garden. Read about them in this post:

Squash blossom

Your plants will have many blossoms, and we often get way too many zuchinnis. So why not eat the blossoms? They’re delicious. Here are some ways to cook them: Squash blossom with ricotta.

Cucumber blossom

Once they start blossoming you can expect to get cucumbers soon and often. I plant 4 or 5 varieties, including lemon, Persian, Armenian,Thai and pickling. We love our cucumbers.

Blueberries starting to ripen

Given plenty of water, the blueberries are growing large and plump and we will harvest them over a long period of time. One of the best shrubs for the edible landscape. Read more on blueberries in this post.


Jun 032013
 
Morning dew on poppies

Morning dew on poppies

Guest blog by Charlene Burgi from Marin Municipal Water District

I enjoyed Charlene’s post so much that I asked her if I could use it in my own blog and it turns out she and MMWD are happy to share her writings.  I hope you  enjoy it also.

Early this morning, Jack and I observed the prairie dogs scampering across the donkey’s pasture. The morning sun found the droplets of last night’s rainfall sparkling like diamonds clinging to the plants surrounding the deck. I was at peace as our two darling golden retriever puppies, Sassy and Misty, slept at our feet.Golden retriever puppies

During those quiet moments, my mind drifted to a conversation recently shared with Wendy, who I used to work with at MMWD. She had come up for a visit and driven off minutes before, but her words about what a healing place the ranch was for her reverberated in my mind. I have heard these words before from other visiting friends and wondered what healing elements found here might be captured in other gardens.

It is quiet here. In fact, I was once told it was “too quiet.” Nonetheless, as we savored the morning I found peace with the chirping birds flitting to the feeding stations set within the trees. Fragrance wafted through the air from the peonies in bloom. The spires of deep purple, sunshine yellow and pure white iris captured my attention as they gently swayed in the breeze. Below were shades of lavender and purple flowers from the sage and catmint. It was these elements that set the stage for the peace found here.

I thought back to meditation gardens I had designed in the past. What were the commonalities within those plans? Serenity was the primary thought. A quiet sitting area was essential, as well as exposure to the sun and shade to meet the varying needs of the garden visitor. The focal point of a bird bath, small fountain, or garden art always found its way into the design.

A simple bird bath can be an important design element as well as good for your birds.

A simple bird bath can be an important design element as well as good for your birds.

Plants in these gardens were chosen to offer year-around interest. Spring, summer and fall color and fragrance provided a sense of peace, attracted beneficial insects, and offered a place for our feathered friends. Winter elements included an Acer palmatum ‘Sango-kaku,’ better known as coral bark Japanese maple, which impressed the winter visitor with its magnificent red bark; or a Corylus avellana ‘Contorta,’ better known as a Henry Lauder’s walkingstick, whose growth twists and contorts to capture the attention of anyone viewing this uncommon aberration.

Sassy and Misty soon broke my thought process as they ran in a “ring around the rosy” chase through the lavender and flopped down on the daffodils that once added to the grace of the garden. The pups seemed to know those bulbs had completed their cycle for the year, as they avoided the daylilies planted amongst the daffodils.

Are you in need of a quiet place to recharge your batteries at the end of the day, but hate the thought of another work pill of maintenance? Consider finding a quiet place in your garden. For ease, choose a native plant palette that offers low maintenance, beauty, fragrance and color. You will be one step ahead if a large tree exists. If not, consider planting a cercis redbud. Add drifts of Pacific Coast iris, various heights and shades of blues found in ceanothus, or the diversity and subtle pinks of arctostaphylos. Include mimulus, cistus rock rose, salvias, ribes, poppies and Carpenteria californica. While it is from Chile, consider adding Berberis darwinii to provide winter berries for the birds and a thicket for their protection. Include a few well-chosen boulders, garden art, or a simple shallow garden bowl for a water feature. And don’t forget that bench or seat to provide a place to unwind.

You, too, can find that healing place right in your backyard—and a native garden can help heal a strained summer water bill from an otherwise thirsty landscape. Give it a try—you won’t regret it!

spring flowers

Bearded iris in Spring

May 212013
 
Edible landscaping

by Avis Licht

Bamboo poles for climbing plants

For a front yard, make sure your structures are ornamental as well as useful.


Edible landscaping has become more popular than I ever thought it would or could. Every day we hear about some new project in cities all over the world. We’re seeing gardens that are both beautiful and have delicious, healthy produce. I mean, it only makes sense.

In Marin County the municipal water district has been encouraging people to conserve water by planting low water use plants as well as food gardens.  In May they have a tour of the best gardens that use principals that they call “Bay Friendly”:  organic, drought resistant, permeable surfaces, habitat friendly for beneficial birds and insects, and lovely to look at.

On the tour last weekend I took some photos from a few of the gardens that incorporated some good edible landscaping ideas.  See if anything inspires you for your garden. (Click on the photos to enlarge them.)

Artichoke, plum, alstroemaria

Raised vegetable box

Raised vegetable boxes define an area and let you put good growing soil into a small area. It’s also easy to maintain.

California native plants

These California native plants look good, are low maintenance, provide flowers and habitat. They go beautifully in an edible landscape.

Native California plants

Another view of the same yard. This shows that the native plants create a small patio area and the vegetables are at the far end of the yard near the fence.

To read more about designing your edible landscape, read this post. 


Be sure to leave a comment or shoot me a question by going to the Ask Avis page.

Container Gardening

This suburban backyard is all raised beds and container plantings. Easy to maintain and very productive.

Chicken coop

This tiny chicken coop in an unused side yard provides fresh eggs for the owners.

Fruit trees in containers

I’ve never seen this many fruit trees in containers. Lots of varieties but also a smaller harvest from the containers. When growing in pots, be sure to give plenty of water and nutrients. It is easier to find the right growing conditions when you can move the pots to the right micro climate. Since they will be dwarf simply by being in pots you can grow more trees in a smaller area.


To find out more about growing in containers read my post on self watering planters.

Cauliflower

This huge cauliflower was in a raised planter. You can get huge results when you have the best soil and perfect growing conditions.


tower of strawberries

This tower of strawberry pots is fun to look at and certainly easier to harvest the strawberries.


To find out more about growing strawberries read this post.


Back yard garden

Path, flowers and bird bath highlight the backyard garden. This yard has many fruits and vegetables, yet is entirely enchanting. At least I think so.


The Entry Patio

Entering the garden, you are led by a curving path, under fruit trees, by flowers, herbs and native plants.

Vegetable Garden

I love that this vegetable garden looks like a garden garden. It’s not just utilitarian.


[portfolio_slideshow id=2575]

May 032013
 
lettuce

Mixed lettuce varieties

by Avis Licht

I’m starting a new feature on my blog as a result of popular demand. Whatever your reason, it’s going to be easy to send me your gardening questions and get a quick answer.  If I don’t know the answer, I’ll direct you to a good source.

ASK TODAY!

Honey bee in borage

Honey bee in the borage.

Here’s chance for all of you far flung fans to ask me questions about gardening. No question is too simple. Gardening is a wonderful, yet perplexing activity.  Why something works once and then the next time it’s a total bust can be frustrating.

Nature will have her way, but there are methods that work to ensure  success in the garden.  After 40 years with my hands in the dirt, I’ve probably made as many mistakes as you could imagine, but trust me, I haven’t given up yet.  And you can be the beneficiary of my experience.

Ask a question in the comment section below and I’ll get back to you pronto.


I look forward to hearing from you.

Yours in the joy of gardening,

Avis

I love answering your questions, and you can help me to keep doing it when you buy your tools, books and garden stuff through my site. Thanks! Great Gardening Tools

Jun 062012
 
rolling self watering planters


tomato in self watering container

Plants thrive with good moisture in planters


by Avis Licht – When I gave a talk recently on edible landscaping, many people had questions about container planting.  For gardeners with decks, small gardens, or special climate conditions, containers are a simple and easy solution.  However, there are a few tips for helping you grow your plants more successfully. People don’t realize how fast pots dry out and how hard it is to get them moist again.  Once soil has dried out, if you water the pot with a hose, it just runs on through.

Keeping your soil moist is a trick that requires some practice.  Using drip irrigation in your pots, for 3 or 4 minutes 2  or 3 times a day often works.  If you don’t have your pots on an irrigation system try these self watering planters.  They really work!

1. Make sure there’s enough room in the container for root growth of your plants. 

Here are some suggestions for what plants to grow in different size pots.

  •   6″ depth is the minimum – chives, lettuce, radishes, other salad greens, basil, coriander, Asian greens, mint, thyme
  •    12″ for larger veggies – pole beans, carrots, chard, cucumber, eggplant, fennel, leeks, peppers, spinach, parsley, rosemary,beets, broccoli, okra, potatoes, sweet corn, summer squash, dill, lemongrass, bush beans, garlic, kohlrabi, onions,  peas,
  • 18″ -24″  for miniature trees like lemons or limes.
organic tomato fertilizer

From your local nursery or online, find organic fertilizers

2. Use the right soil mix. For self watering planters I suggest you use the mix from Gardener’s Supply formulated just for that.  You’ll need to add nutrition in the form of compost, aged manure, blood meal and other organic fertilizers. The plants rely on you 100% for their nutrition. Be sure to feed them.  Read up on what your plants need and add it to the potting soil. Using foliar feeding or a liquid fertilizer like seaweed solution works well.Don’t just put soil from the garden into your pots.  It will be too heavy and dry out easily.


3. Place the planters where they will get the best light and be protected from wind or blasting hot sun. Gardener’s Supply even has self watering planters that have castors on them so you can move them around to catch the changing light and heat conditions.

rolling self watering planters

Pots can look good and be easy to move

May 212012
 
Edible landscaping at its finest

Take out the lawn and put in fruit trees, vegetables, flowers, bees and rabbits and you may just have the garden of eden.

By Avis Licht – What do you imagine when you hear the term “urban farm” ?  To me it sounds big with rows of vegetables and possibly a barn with animals. But that’s not the reality of urban farms that I visited in Berkeley, California last week.  Over the next few weeks I’ll be high lighting a variety of gardens/farms in the city.  Some are backyards, some are vacant properties on loan to non profit organizations and some are community gardens.

Today I want to show you how one woman, Ruby Blume turned her backyard into a fully functioning mini farm, providing her with most of her food needs, including meat, honey, fruits and vegetables, mushrooms and plenty of beauty.

She co wrote the book Urban Homesteading with Rachel Kaplan and runs the Institute of Urban Homesteading in Oakland, California. They offer many classes in gardening, animal husbandry, kitchen skills, food preparation, handcrafts, permaculture and much more.

On Saturday, June 9th, 2012, they will be hosting an Urban Farm Tour from 11am – 5 pm in Oakland and  Berkeley. Details and descriptions at iuhoakland.com

vegetables in the backyard

A small backyard can produce a lot of food. Grow what you love to eat.

rabbits

When you raise your own animals, you know how they've been treated

Rabbits - 8 weeks old
Rabbits are ready to eat after 8 weeks
Honey Bees

A few hives can be safely put in a backyard for honey and pollination


Quails for eggs

Quails -They don't take up much room, are beautiful to look at and apparently lay good eggs for eating. Lovely quail house.


Oak logs for growing mushrooms

You can grow mushrooms at home by buying spores and inserting them into the logs


Oak logs for mushroom growing

Ruby had her logs at the side of the house where nothing else would grow


Flowers for beauty and food

Edible flowers add to the diversity and beauty of the garden


May 162012
 
edible landscape
edible landscape

A peek at the edible front yard

by Avis Licht – Saturday, May 19th, 2012 is a day to tour beautiful Bay friendly Gardens in Marin County, California. The host gardens represent diverse microclimates and demonstrate the many different styles of Bay-Friendly gardens. You will find urban homesteads with orchards, chickens and bees, greywater installations and drought tolerant replacements for water thirsty lawns. Touring existing gardens is a great way to get new ideas for your own garden.

I’ll be giving a talk on Edible Landscaping Made Easy at 11 am in Larkspur at one of the gardens we’ve transformed from ornamental to beautifully edible. I’ll talk about design ideas, existing conditions, setting priorities and answering questions.

If you’re in the area be sure to come by. The garden tour is $10 for all the gardens.  To find out more visit http://bayfriendlycoalition.org/GardenTour.shtml.


Just getting started on the spring garden

Set out beds and paths and start planting!


edible landscape

A small front yard turning into and edible landscape

May 042012
 
Path into the Garden


by Avis Licht – Designing your edible landscape can seem formidable. Here are a few ideas to help you move forward on your own yard.

1. Simplify your garden.  Remove any unwanted fences, structures, and unhealthy plants.  Open up your yard before you decide what you want to add.

Apple tree as the centerpiece of new landscaping

3.Here is the yard, fully landscaped. You can see the beautiful apple tree and you can stroll up the garden path.

Old fence, tree and lots of ivy

1.This is the side yard before we cleaned it up. You can’t see the apple tree behind the fence and old shrubs.


Fence and old shrubs removed


After removing the fence and old shrubs, we realized there was an open view to the old apple tree. It was previously  hidden, and now is the centerpiece of the garden. By clearing out the old, it will help you see what you want to keep and open up new vistas.

2. Once you’ve cleaned the place up, you can decide where to put your paths, retaining walls and any structures.Next decision: where to put paths.  It is important to be able to walk through the garden, to enjoy it and also to take care of it. The path on the right side of the house existed and we left it as is to access the house.  The path through the garden is a winding, informal path that encourages you to slow down and enjoy the view.

siting paths, sitting area and retaining walls

Lay out your paths, retaining walls and sitting area


View from gazebo

Sitting under the gazebo you have a fine view of the yard.

Gazebo and paths

Structures create outdoor rooms for eating, reading and relaxing in the garden

3. Finally, you can choose what plants you want to use. In this yard, there are a lot of low maintenance plants like herbs and California native plants.  You can see lavender, rosemary, Salvia, penstemon, thyme, oregano and California poppies.  Along the fence and for ground covers we used Manzanita, Ceanothus, Osmanthus and cotoneaster. At the top of the garden is a small vegetable and herb garden near the kitchen, where it is easily accessible.

An open fence invites you into the garden

An open deer fence lets you look into the garden.

I’m available by phone, skype or in person for hourly consultations.  Send me a note via this blog and we can arrange it.


Herbs and vegetables

Outside the kitchen are the herbs and vegetables

Looking down the garden towards the carport

From the vegetable garden you can look down the garden to the sitting area.


Use these three simple ideas to help you get started.  You’ll be surprised how they can open up your eyes to new possibilities.

To help you get started on your vegetable garden there is plenty of information in my ebook, The Spring Garden Made Easy.  It’s on sale for $4.99

Spring Garden Made Easy


Apr 302012
 

by Avis Licht – Growing food in containers is easy and straightforward. Here are some tips that will give you greater success.

Ornamental containers can grow herbs and food.

Colorful pots mixed with herbs, lettuce and flowers are easy to harvest

1. Site your pots so they get enough sun for the type of plant you are growing. Lettuce doesn’t need to be in full sun, but most of your herbs prefer it sunny. If you’re planting on a deck with an overhang be sure to watch what the sun does during the day. If you have a choice, morning sun is better for plants than afternoon sun, which can be really hot.

2. Choose plants that you like to eat and will be sure to harvest. Herbs are a great choice for containers, as you can cut a little bit off regularly and the plant still looks good and grows well. Herbs suitable for containers are: Rosemary, parsley, thyme, chives, basil, cilantro, lemon verbena, oregano, lavender, tarragon, sage and mint.

Blue violas

These violas have been blooming for 5 months

3. Edible flowers, of course are a great plant for containers. They are ornamental as well as edible. You can decorate your meals with them. Some of the easiest to grow include, nasturtiums, dianthus, calendula, Lemon Gem marigold, Citrus Mixed marigold and Tangerine Gem marigold. Scented geraniums have leaves and flowers that you can use to garnish food. Pansies are well known, can grow in shade and are easy to find. Pansy and violet leaves and flowers are edible and nutritious.

Nasturtiums


Pansy and lavender in pot

Pansy and lavender combine nicely in pots


4. IMPORTANT TIP! Plants in containers dry out quickly. Sun on the pots heats up the sides and causes them to dry out.  It is important to keep them moist.  When soil dries out water goes through the soil without being absorbed. People think they’re watering when they put the hose to the pots, but in fact, if the soil is dry, the water goes through the pot and out the bottom.

There are a couple of ways to deal with this.  If you have a drip system, put the pots on their own schedule and water them 5 minutes, 2 or 3 times a day. This allows the water to soak in and not drip out the bottom.

One of the best solutions to container planting that I’ve found are self watering pots.  They have a reservoir at the bottom and the moisture wicks up into the soil.  Some of these pots only need watering once a week or even once every two weeks and your plants stay healthy and strong.  It is a great solution.

I’ve been using these containers for years with huge success. You can get them from Gardener’s Supply along with a light weight soil medium for growing your plants. They have a special container and mix just for tomatoes

tomato in self watering container

Self watering containers keep plants from drying out.

.

self watering  pots

Keep plants moist and healthy with self watering containers

Gardener's Supply Company

Let me know what are your favorite plants to grow in containers.

Apr 092012
 
Japanese eggplant

Eggplant with basil and tofu anyone?

by Avis Licht

When deciding what to plant in your garden, in addition to the obvious parameters of site and climate, you can have fun with ideas based on what kind of food you like to eat.  Are you Italian/pizza lovers? Is your favorite dinner a Mexican style salsa/burrito/tomale? Why not plant a theme garden based on your favorite meals?  To make that homemade pizza sauce you could plant different heirloom varieties of paste tomatoes, with 3 different types of peppers and quantities of flavorful herbs.

When deciding on the vegetables for your style of garden, you can also look up recipes and find out the best herbs for your dishes.  Instead of  going from store to store trying to find the right herb, you could just go out and pick it fresh.

Asian herbs include: Chinese chives, coriander, cilantro, ginger, Thai basil, lemongrass, peppermint, sorrel  and dill. Asian cuisine is vast and covers many countries, but there are some herbs like the lemongrass that have a very particular flavor which can be hard to find in stores.  Although it is a tropical herb and doesn’t live in climates below 30 deg F. you can treat it as an annual and it will give you plenty of leaves.

Lemon grass

Beautiful in the edible landscape, Lemongrass is an unusual and wonderful herb for Thai food.

Herbs that are common to many types of cuisine and easy to grow include: onions, cilantro, garlic and basil. Mediterranean herbs like rosemary, marjoram, oregano, parsley, sage, thyme and bay leaves are easy to grow and should be in everyone’s garden.  It’s hard to describe the difference between fresh and dried herbs to those who don’t use fresh herbs.  I guess it’s like the difference between breathing in the fresh air at the ocean and using an oxygen tank with tubes up your nose. Well, that may be a little extreme, but you get my drift.

Thai Basil

Thai Basil has a unique flavor- grown with beans in this photo

Some unusual vegetables that you would use in Chinese and Japanese cuisines include bok choy, Napa cabbage, daikon radish, green onions, snow peas and soybeans. You can find seeds for these plants in any of the catalogs in my Resource page.

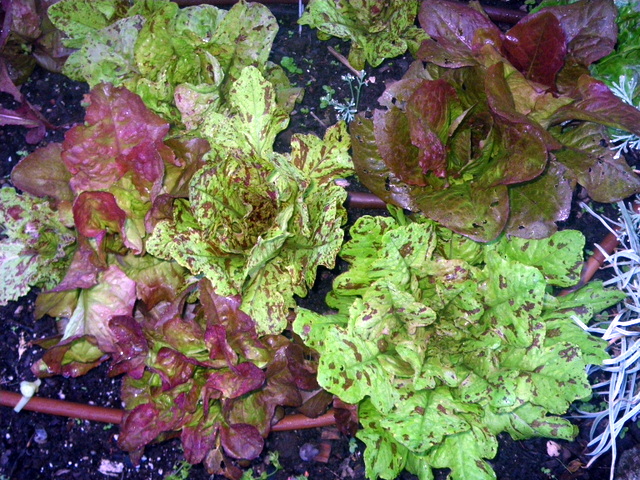
For a Mediterranean garden you would plant all of the following:  tomatoes, eggplant, and peppers,asparagus, Tuscan kale, Savoy cabbage, radicchio, endive, artichokes, zucchini, fennel, bell peppers.

For Mexican cooking, legumes (black beans, pinto beans), corn, and a variety of peppers (poblano, jalapeno, ancho, serrano) are key. And don’t forget the squashes. They’re easy to grow, taste great and keep well, (that would be winter squash).

beauty in the vegetable garden

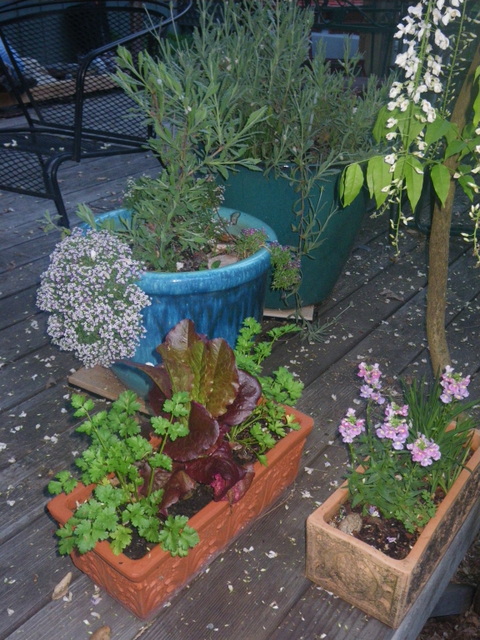
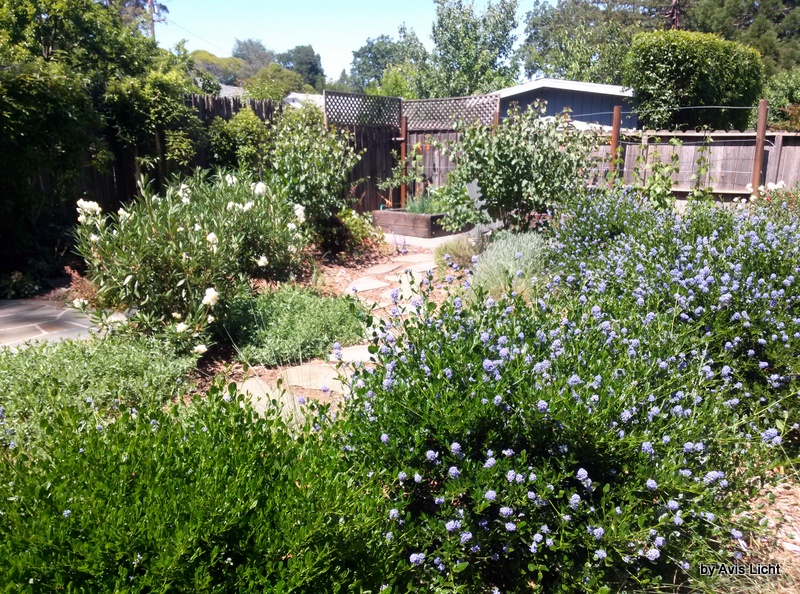
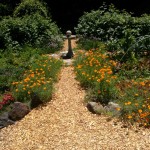
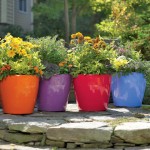
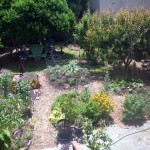
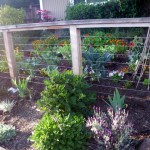
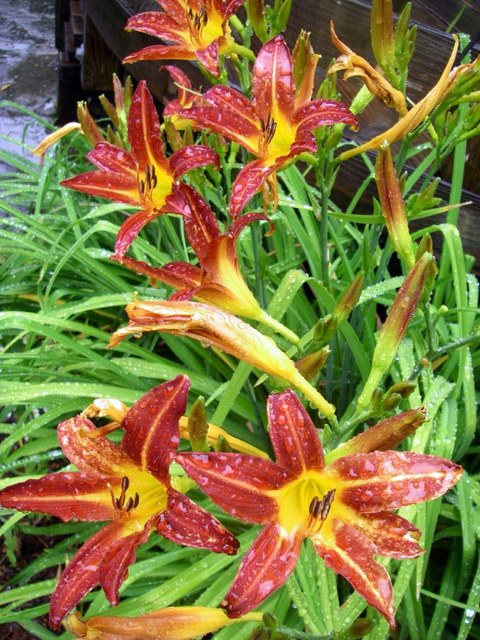
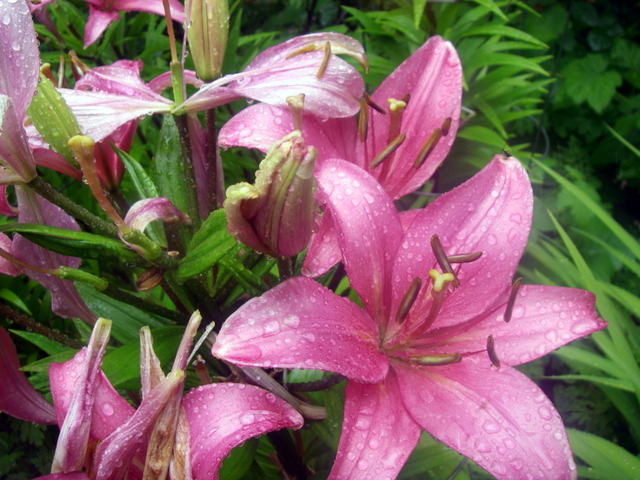
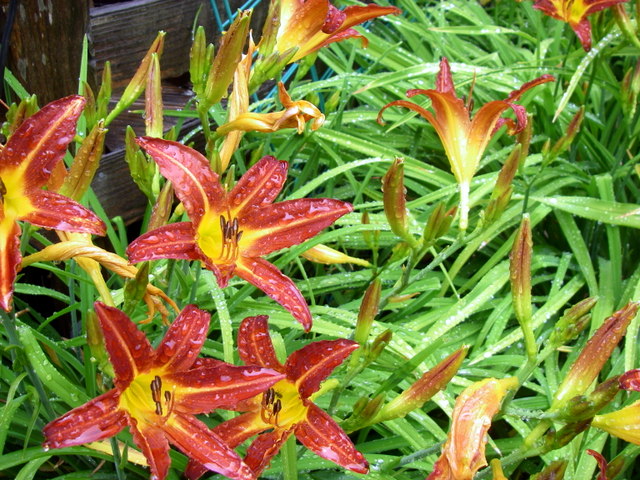
Themed gardens are beautiful as well as productive

Stay tuned for landscape plans for theme gardens. Subscribe to my blog and you won’t miss any of the information you need to keep your garden healthy, beautiful and bountiful.

Here’s a great recipe I found for Homegrown Pizza Sauce – all ingredients from the garden:

How to make Homegrown Pizza Sauce

.

Ingredients

“I’ve always made pizza sauce based on my mother’s recipe, starting with a can of tomato sauce. This year, I started with paste tomatoes from my garden with great success. You’ll notice that the amounts in the ingredient table below are rough; please add veggies and herbs according to your taste

  • 3 pounds very ripe tomatoes, washed, stemmed, quartered, and seeded
  • 1 yellow onion, very small dice
  • 4 garlic cloves, minced
  • 2 tbl. dried oregano
  • 1 tbl dried thyme
  • 2 bay leaves
  • 1 tbl. olive oil
  • sea salt, black pepper, and sugar to taste.
  1. Place quartered tomatoes in large saucepan over medium heat. Cook, stirring frequently. The tomatoes will let go of a surprising amount of juice.
  2. Remove from heat and strain off solids. Set solids aside and return juice to the stove.
  3. Simmer juices, uncovered, until reduced.
  4. Add tomato solids back into the saucepan and stir in all remaining ingredients except sugar.
  5. Bring sauce back to a simmer and cook, stirring regularly, until the onions are translucent and the sauce has reduced to the desired consistency.
  6. Taste.
  7. Add a small amount of sugar, mix thoroughly, and taste again. Repeat until you achieve an acidity that tastes good to you.
  8. Sauce should keep in the refrigerator for about a week, in the freezer for a few months, or may be canned.” From www.opensourcefood.com.

Don’t forget, it’s not too late to start your Spring Garden. To help you I’ve put together a handbook on the steps you can take to be successful in your garden. Included is information on soil, sites, annuals, perennials, fruits and much more. This is a 20 page guide to get you started on your edible landscape. Forty years of gardening has given me plenty to share. If you have enjoyed my blog, be sure to get my booklet.

$4.99 – such a deal

Spring Garden Made Easy

Mar 282012
 
Honey bee in borage


Honey bee in borage

Borage blooms early and long - the bees love it (click to enlarge)

by Avis Licht

Often, when I design a garden people ask me if it will bring bees.  Usually, it’s because they are afraid of having bees in the garden. Bees, who are gentle creatures, are more interested in finding nectar and pollen than stinging you. Often people mistake yellow jackets, who come in late summer to eat your sweet fruit or meat at the outdoor barbeque, for bees.  They are not the same at all.

Bees are absolutely necessary to the health and productivity of your garden. We need them to pollinate our fruits and vegetables.  35%  of our food worldwide is pollinated by bees. Imagine a world without honey. Well, please don’t do that.

Recently there has been a disappearance of bees called Colony Collapse Disorder. Entire hives die without apparent cause.  By planting bee friendly plants you can personally aid in their resurgence.

The best plants are ones that are native to your locale or grow well in your climate. Herbs, flowers, and flowering trees all contribute to their food source.

Using only organic controls in the garden is another way of protecting your bees.


Don’t forget to buy my ebook on The Spring Garden Made Easy 

Spring Garden Made Easy


There are many wonderful bee plants.  These are a few of my favorites.

Lavender and violas

Lavender can be planted in the ground or in containers. Beautiful everywhere.

1. Lavender: For millenium lavender has been used in soaps, balms and sachets as well as medicinally for its calming effect. My local ice cream shop makes the best honey lavender ice cream.  Grow it in full sun, well drained soil, in climates that don’t go below 20 deg F.

2. Salvias: In the sage family there are many herbal and ornamental varieties of Salvias.  Bees and hummingbirds love them and they come in many colors.

Salvia Hot Lips

This bi colored Salvia, Hot Lips, is just one of many varieties. (click to enlarge)


3. Lemon Balm, Melissa officinale – In the mint family, Lemon Balm has a wonderfully lemony flavor for tea. It is considered one of the premier bee plants. Melissa is a Greek word meaning honeybee.

Lemon balm

In the mint family, Lemon Balm has a wonderful lemon flavor and is easy to grow


4. Ceanothus– California lilac (many varieties). Many native plants are helpful to the bees. The California Lilac grows on the hills in California and as its name suggests is wonderfully fragrant. It flowers in the blue, purple and whites and  can be a very low growing shrub or up to 15 ft. Well drained, sunny sites are what it needs to thrive. It requires very little care.

Rosemarinus officinalis

This rosemary is planted next to my Apple tree. It brings the bees to pollinate the tree.

5. Rosemary – One of the most loved herbs for cooking, rosemary is easy to grow and long lived.  The bees love it. In my garden it starts to bloom early in Spring and is under the apple trees which are just starting to bloom.  This companion planting encourages the bees to pollinate my fruit trees.

In the herb family you can plant Basil, Catnip, Dill, Fennel, Hyssop, Lavender, Parsley, Rosemary, Thyme, and Sage to encourage your friendly bees.

In the ornamental flowers, try Agastache, Salvia, Bachelor Button, Black Eyed Susan, Clematis, Coreopsis, Lantana, Larkspur, Sweet William , Yarrow, and Zinnias.

In shrubs, Ceanothus, Manzanita, Arbutus, Mahonia and Philadelphus are beautiful and useful.

The Crab Apple tree blooms early and is absolutely buzzing with activity.

California lilac

The buds on this Ceanothus are just getting ready to open. (click to enlarge)


Crab Apple Blossom with bee

The bees adore this Crab Apple which blooms in early spring

Coming in for a landing

Coming in for a landing


Mar 232012
 
Deer fence with copper art


Deer fence with copper art

A beautiful open fence keeps out the deer and lets in the sunlight

by Avis Licht – Designing a front yard can be a little tricky. Designing it so that it is also a productive food garden makes it even more challenging. What makes an edible landscape work, is that not only does one get food from it, but it must also be lovely to look at in all seasons.  Using a few basic  design tenants and some good gardening sense will help you get started.

1. Always note your sun/shadow in all seasons.  This can change drastically between summer and winter. Be sure to place your shade plants in shady spots, and your sun loving plants where they will find the light. In the garden in these photos, the house casts a large shadow – almost completely in winter, but only partially in summer.

Since this was the only open area for my client’s vegetables, we noted the best sun areas during the main growing season between April and October.

Finding the sun/shadow line

Note your sun/shadow in the main growing season. This photo is the new garden. (click to enlarge)

The old garden fence and site.

This is what the front yard looked like before we renewed it. (click to enlarge)


Don’t forget to look at my book on The Spring Garden Made Easy.

2.If you need a fence, be sure it looks good, lets the light into the garden and keeps the deer and other critters out. Wood fences can look good, but can also create shadows that prevent plants from getting enough light.

A simple post and wire fence that looks good

A good looking wire fence lets the light in and keeps the neighbor’s dogs out.


We removed the wood fence from this garden, as it cast a heavy shadow in winter when the sun was low in the sky.  Because this is California, there is a long growing season and we wanted to make good use of the little space available. Many neighbors stop by to admire the beautiful vegetables and flowers in the front yard.  Keeping this garden well tended all year makes it a neighborhood delight.  Everyone wants a fresh pea in spring and tomato in summer.There are plenty of flowers to keep it cheerful.


3.Create permanent beds and paths. Permanent beds create pattern and form in a garden even when the beds may be empty. The same is true for paths. They are cleaner, safer and create form in the garden.  Paths also keep people from walking on the beds. Here are a few different solutions.  Stone paths are more expensive, but last longer and are beautiful. Chipped paths look good and are inexpensive.  They also allow the water to seep into the soil for water retention.

raised stone bed

Permanent beds give form and interest even without all the plants. Chipped paths are easy to lay and inexpensive.

Stone paths are safe, beautiful, long lasting and also more expensive.  Choose a material appropriate for you and your budget.

Stone path

A winding path leads you through the garden to the front door.

4. Choose plants the grow well in your climate and in your site.  Choose appropriate sized plants. Meaning, if you have a small front yard, use dwarf or semi dwarf trees, or small shrubs. Fruit trees, blueberries, currants, strawberries mixed with flowering shrubs all make wonderful front yard plants.  They look good in most seasons.  Use perennials in your front yard and keep the annuals to a minimum. When growing vegetables in the front yard, keep them well tended if your yard is open to the neighborhood. It’s all part of being a good neighbor. The more you share the bounty, the  more your neighbors will want to imitate your garden.

Edible front yard

Summer in the edible front yard still looks great. (click to enlarge)

side view of the edible front yard

Herbs, flowers and a simple fence for the edible front yard. (click to enlarge)


These are a few ideas to help you plan your edible front yard. There will be more ideas to come. Sign up for my blog and you won’t miss anything.

Mar 192012
 
Pink flowering currant

by Avis Licht – Native plants in your garden: a very good idea. They are already adapted to your climate and soil, so don’t need a lot of fussing and attention.  In fact, they demand to be left alone.  You will bring in a large diversity of important pollinators and insect controllers naturally. Birds, bees, hummingbirds, butterflies, moths, pollinating insects are all attracted to native plants. The more diversified your garden, the healthier it is. Many people think that native plants aren’t good looking enough for their landscape. Here are some photos I took the last few days, that will show you otherwise.

One of the best sites I’ve found for California native plants is Las Palitis Nursery.  Their website is a treasure trove of information on growing native plants.

Arctostaphylos 'Howard McMinn"

The manzanita graces the dry hillsides of California - Arctostaphylos varieties

Manzanitas are great wildlife plants. Providing nectar for butterflieshummingbirds and native insects. Many of the manzanitas regulate their nectar to attract different insects, butterflies and hummingbirds during the day.

Hounds Tongue, Cynoglossum grande

The deep blue flowers of Hounds tongue are one of the first of spring - Cynoglossum officinale

Indian Warrior - Pedicularis densiflora


Indian Warrior was used medicinally as a muscle relaxant .

Pink flowering currant

Native to the Coast Ranges in California all the way north to British Columbia. Ribes sanguineum, Pink or Red flowering currant.

R. sanguineum is one of the all-time superb early-spring-flowering shrubs. It is easy  to grow, you can prune it or not, and the red or pink flowering currant has showy flower clusters. Time of bloom and flower color vary according to cultivar, but figure on anything from creamy white to crimson, beginning in February and sometimes lasting till May. The blue-black fruits are attractive, but are mainly for birds. They’re not poisonous, but they don’t taste good. They bloom at the same time as the California Lilac, Ceanothus, which is light to dark blue.  They make a very attractive couple.

California lilac

This blue Ceanothus blooms at the same time as the Pink flowering currant. They go well together.

California Columbine

These lovelies easily fit into your own garden. Aquilegia formosa, California Columbine.

Don’t forget  about my ebook on the Spring Garden. There are lots of great pointers for starting your Spring Garden.

Spring Garden Table of Contents

Table of Contents - click to enlarge

Here is the information you need to start your Spring garden. Included is information on soil, sites, annuals, perennials, fruits and much more. This is a 20 page guide to get you started on your edible landscape. Forty years of gardening has given me plenty to share. If you have enjoyed my blog, be sure to get my booklet. $10- such a deal!

Spring Garden Made Easy


Shooting star

Early spring you'll see these tiny but beautiful shooting stars - Dodecatheon clevelandii

Mar 052012
 
Healthy, hardy beets germinating outdoors

by Avis Licht

Help your seeds with grow lights

If you don’t have enough light in your house you can use these simple grow lights

Yesterday I talked about seed starting medium and today I want to talk about light and heat.

When starting seeds early in the season, it is usually too cold to start them outside.  That means, they are either in the house, cold frame or greenhouse.  It’s a rare house that has enough sunlight to start seedlings indoors and not have them get leggy.  It’s an even rarer house that has a greenhouse or cold frame.

Light for starting seeds:

Most seedlings require 14 to 16 hours of direct light to manufacture enough food to produce healthy stems and leaves. The characteristic legginess that often occurs when seedlings are grown on a windowsill indicates that the plants are not receiving enough light intensity, or enough hours of light. If your seedlings are in a south-facing window, you can enhance the incoming light by covering a piece of cardboard with aluminum foil and placing it in back of the seedlings. The light will bounce off the foil and back onto the seedlings.

If you do not have a south-facing window, you will need to use grow lights. When growing seedlings under lights, you can use a combination of cool and warm fluorescents, or full-spectrum fluorescent bulbs. Incandescent bulbs produce too much heat in relation to the light given off. They also lack the blue-spectrum light that keeps seedlings stocky and dark green.

To get excellent pots, potting soil, greenhouses and more, go to my store and you can find what you need easily.

Simple outdoor growing house

Along a protected south facing wall, this little house can provide protection for your seeds

Seedlings need a high intensity of light. The fluorescent bulbs should be placed very close to the plants—no more than three inches away from the foliage—and should be left on 12 to 14 hours per day. If you are growing your seedlings on a windowsill, you may need to supplement with a few hours of artificial light, especially during the winter months.

Temperature for starting seeds:

The temperatures for optimum germination listed on seed packets refer to soil temperature, not air temperature. Although seeds can vary drastically, most vegetable seeds need a warm soil temperature around 78 deg. F.

If the soil is too cold, seeds may take much longer to germinate, or they may not germinate at all. To provide additional warmth, you can use a heat mat or place the containers on top of a warm refrigerator, television, or keep them in a warm room until the seeds germinate. Just be sure to get your seedlings to a sunny window or under lights within 24 hours of seeing little sprouts emerging through the soil surface.

After germination, most seedlings grow best if the air temperature is below 70 degrees F. If temperatures are too warm (over 75), the seedlings will grow too fast and get weak and leggy. Most seedlings grow fine in air temperatures as low as 50 degrees, as long as soil temperature is maintained at about 65 to 70.

Healthy, hardy beets germinating outdoors

Some seeds can be sown directly in the ground like these beets

 Give them light and warmth and keep them moist, and your seeds will work hard on your behalf. At the risk of repeating myself, the best thing you can do in the garden is to observe your plants.  Keep an eye on them and they’ll let you know if they’re happy.


© 2011-2024 Edible Landscaping Made Easy With Avis Licht All Rights Reserved