drip irrigation | Edible Landscaping Made Easy With Avis Licht

May 072012
 
Lettuce with drip irrigation


A bed of lettuce

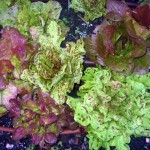
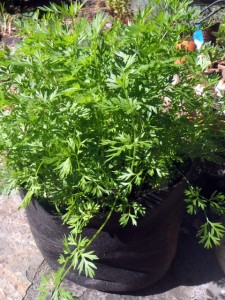
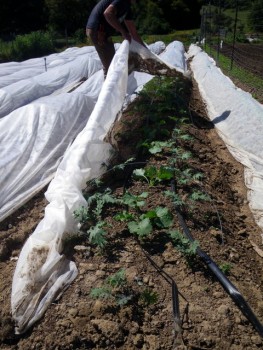
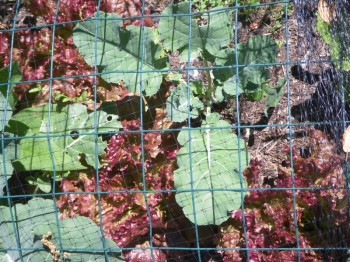
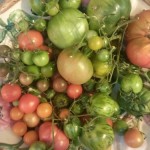
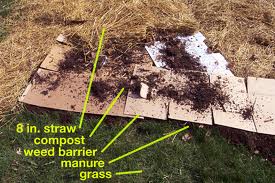
Closely planted lettuce in Spring

by guest blogger extraordinaire: Robert Kourik

Robert Kourik is a guest blogger for this site. He’s definitely got the right credentials. Author of Your Edible Landscape Naturally, and Drip Irrigation for Every Landscape and All Climates, he’s got lots of experience and lots of opinions. In this article he has some radical suggestions for how to use your drip irrigation.  Give it a try and see for yourself if it works in your garden. Let me know what you think. Being conscious of our water use is imperative and drip irrigation is an important tool.

Robert writes:

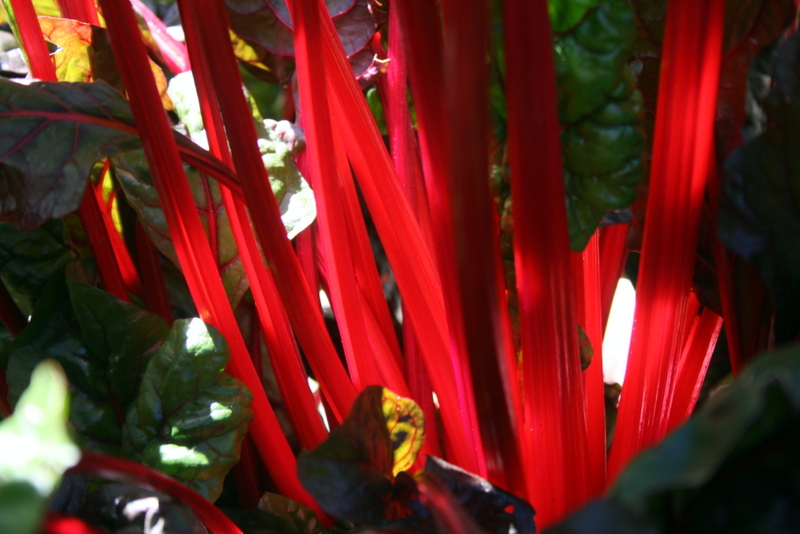
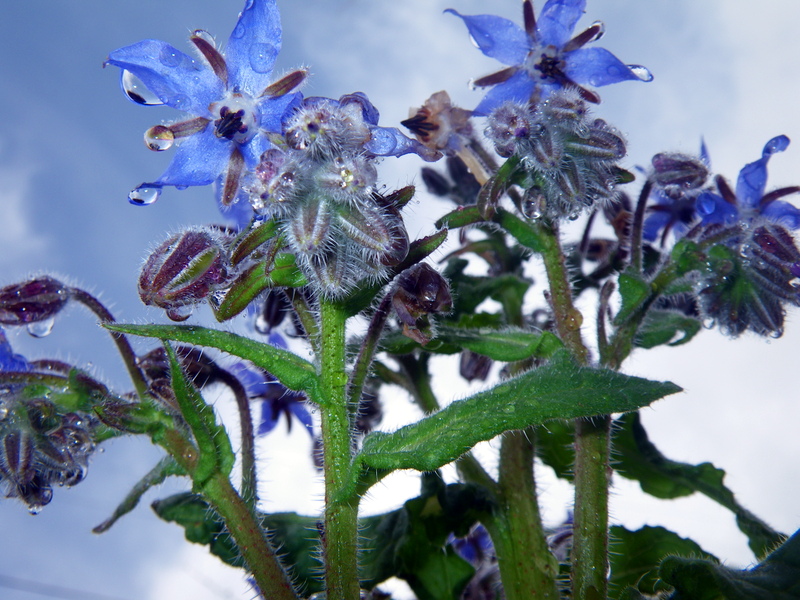
It’s about time to start up drip irrigation systems. No matter how you use drip irrigation, frequently or every once in a while, it will always be more efficient than any sprinkler you’re currently using.

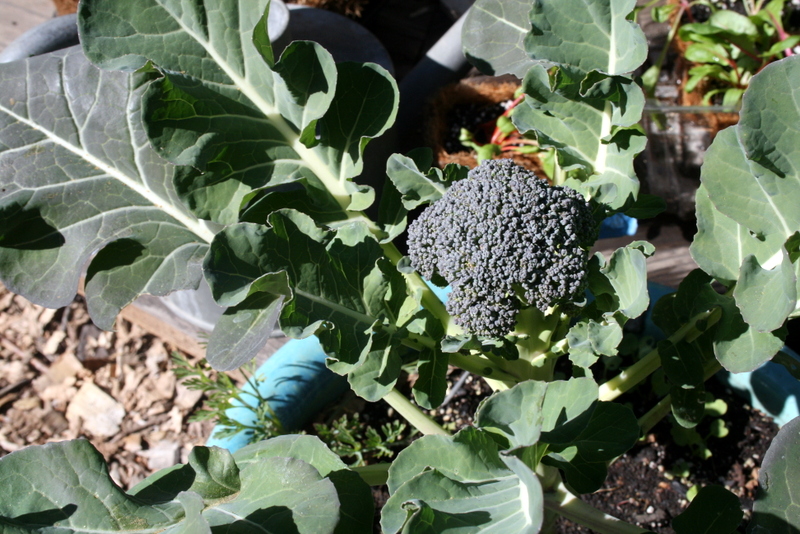
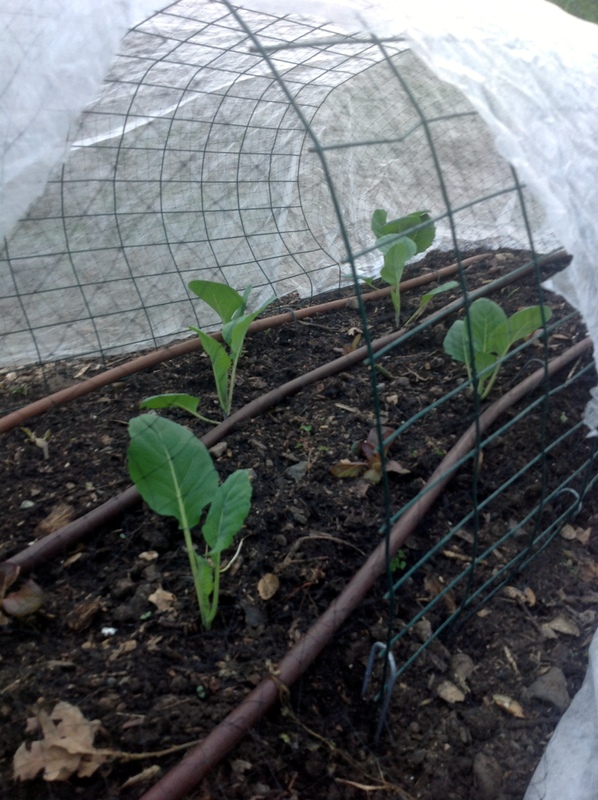
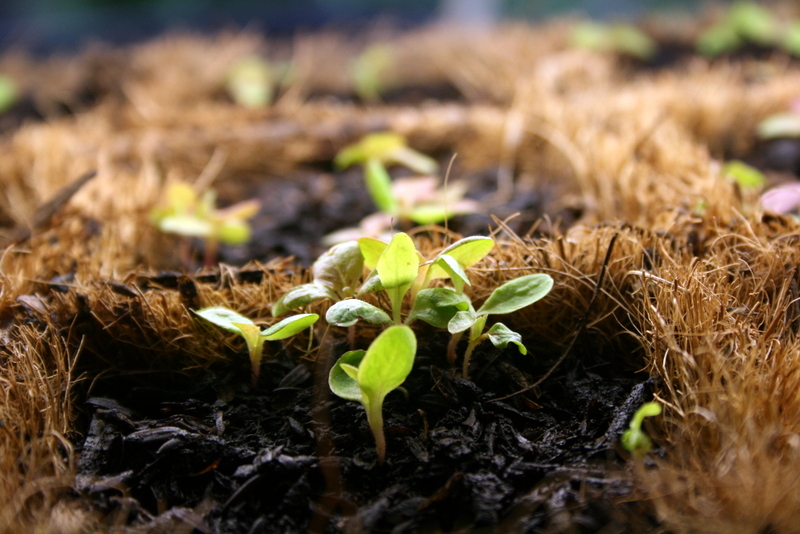
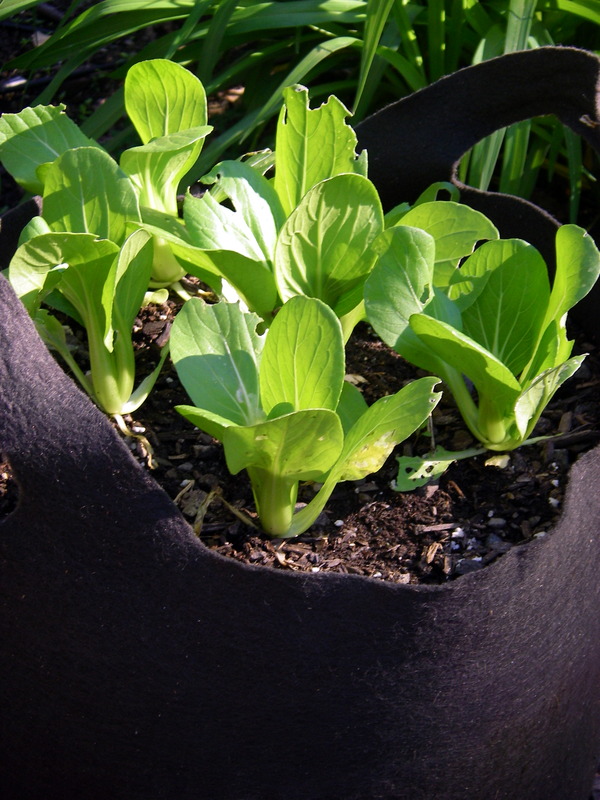
Consider daily irrigation for the best growth and greatest vegetable yields. Daily irrigation doesn’t use gallons of extra water. Oddly enough, infrequent watering may use more water than frequent, even daily, irrigation. If you have young seedlings, their roots are shallow, near the soil surface. They need access to water easily. Infrequent watering can have the effect of deep soil moisture and shallow dryness.

The other main consideration for frequent watering of small amounts is the texture of your soil. If you have a sandy or light loam soil, water will go through quickly and not be held in the soil. A clay soil will hold moisture much longer and should be watered less frequently. As with all the other tips you’ve read, observation of your own plants in your own garden will be the best way to determine what works best for you.

1/4 inch drip with lettuce

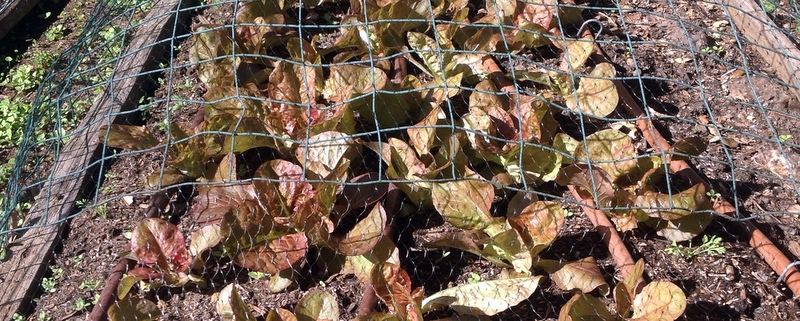
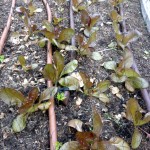
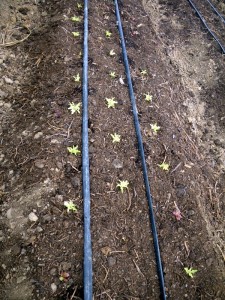
Newly planted baby bibb lettuce with 1/4 in drip

Lettuce grown

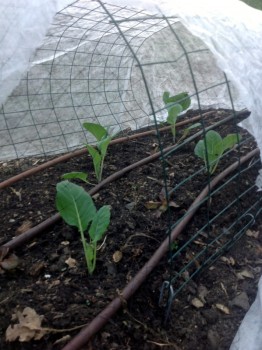
Lettuce fills in with 1/4 in drip

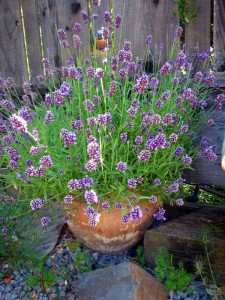
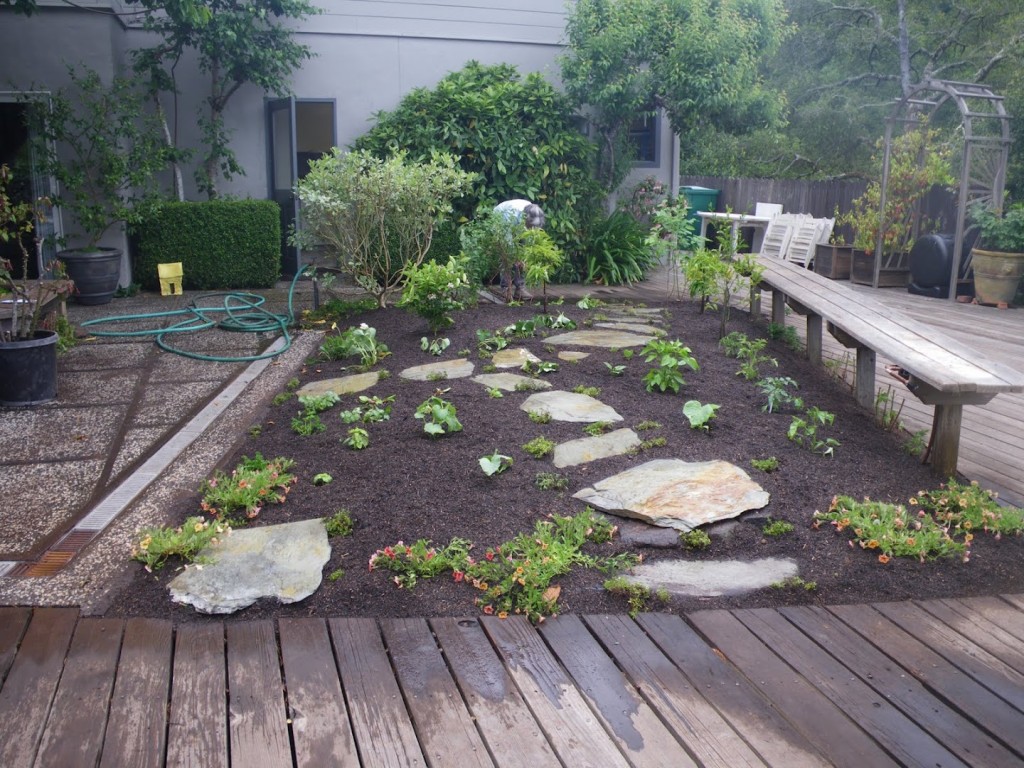
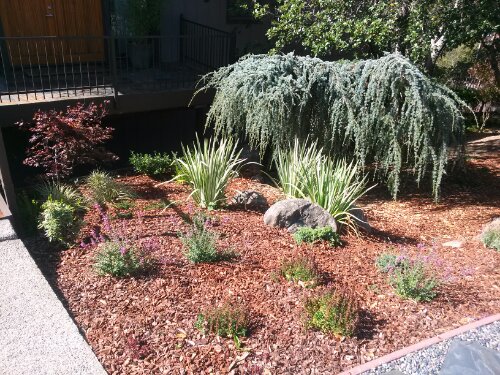
Once I planted a drought-resistant landscape with plants such as lavender, santolina, rockroses and rosemary. The day after planting, the timer was set to irrigate for 15 minutes. After the risk of transplant shock was over, the drip irrigation was turned on each day for only eight minutes to replace the moisture lost each day by transpiration. The plants flourished, even though each one-half-gph emitter was distributing only seven tablespoons of water per emitter each day. Contrast this with a nearby garden with a similar soil and plants arbitrarily watered only twice a month for four hours. This amounts to two gallons per emitter for the two-week period, or just more than 18 tablespoons of water per day—more than twice the water used in the flourishing landscape.

Please visit Robert at his website: RobertKourik.com and find out about all his books.

I would add one more thing to help you decide how much and how often to water. Use a moisture meter. It has a probe that you can put into the soil to see what the moisture is at different levels below the surface. A dry surface does NOT mean the soil is dry. You need to check 2 – 6 inches below to see if your soil is wet or dry.

moisture meter

Best tool ever. This will save you time, water and money.

Mar 202015
 

Rose in the Rain

by Avis Licht

I have many favorite times of the year in the garden. What’s looking beautiful, (Roses in late Spring) what smells great, (Lilacs and Jasmine in early Spring), what’s ripe (everything in every season!), how the ground smells after a rain. Almost every day brings something new to enjoy in the garden. BUT, I have to say the Spring Equinox holds the most promise and excitement for me.

After the dark and cold of winter, (which was not very dark or cold this year), the excitement of Spring, with its promise of buds, new leaves, green hills, even the weeds jumping for joy out of the earth, holds a special place in my heart.  If ever there was a time for Hope, this is it. The sun rises a little earlier each day and sets a little later. There is more light, more growth, more Potential – for the garden and for us. Change happens in spite of us, and sometimes hopefully, because of us.

Here are a few photos from my Equinoxial Garden. HAPPY SPRING.  Let’s get growing!

Douglas Iris

This Douglas Iris is native to the California Coast. I love it.

Lettuce

Marvel of Four Seasons Lettuce – under protection from the birds.

Chard Stalks

Rays of red light are rainbow chard stalks

Broccoli

Broccoli in a pot. Even the smallest patio can have beautiful vegetables.


row cover and drip irrigation

My broccoli babies. In warm weather you can cover your beds with row covers, and irrigate with drip irrigation

Lettuce seedlings under grow lights

Seedlings get started early under grow lights.


Borage in the rain

Borage in the rain


Mar 172015
 
Lettuce and drip irrigation

by Avis Licht

row cover and drip irrigation

In warm weather you can cover your beds with row covers, and irrigate with drip irrigation

California is in its fourth year of devastating drought. All of us need to pay attention to our water use. But this does not mean that we have to give up growing some of our own food. Quite to the contrary, we can grow fruit and vegetables with much less water at home than large scale agriculture.

I have just come back from a road trip that took me to the east side of the Sierra Nevada mountains and then south to the Kern River and across the San Joaquin Valley, the agricultural center of California. It was an eye opener for many reasons.  Owens Lake held significant water until 1924, when much of the Owens River was diverted into the Los Angeles Aqueduct, causing Owens Lake to dry up.[2] Today, some of the flow of the river has been restored, and the lake now contains a little bit of water. Nevertheless, as of 2013, it is the largest single source of dust pollution in the United States.[3] 

To learn more about this read Cadillac Desert by Marc Reisner. Each action we take to conserve water, DOES make a difference.

We saw large reservoirs that were at 5 percent of capacity. Nearly empty. We saw farmers using huge machinery to take out fully grown orange trees and throw them on the ground to die because they don’t have enough water for irrigation. It was unbelievably sad to see.

But there are ways for you to grow food, that are water conserving and healthy for the environment and for you.

Here are 5 easy ways to conserve water for your garden and grow delicious food. Good for you and good for the earth.

1.Prepare the ground by loosening the soil and adding humus, in the form of compost and/or manure. The quality and health of the soil is vitally import to the health of your plants. Compacted soil will not absorb or retain water very well. This is a very underrated activity for water conservation. Building raised beds with wood or stone and then filling with organic topsoil is one way to do this. Another way is to dig the soil and add humus.

Small vegetable garden

Raised beds make for a healthy soil

2. Create paths and walkways through your garden. DO NOT WALK ON YOUR BEDS! I mean it. The fastest way to ruin your soil is to walk on it and compress it. You remove the air pockets and prevent air and water percolation. Try it. Step on the ground and water it. It will puddle and then most of the water will evaporate. Trust me on this.

3. Mulch, mulch, mulch.  Oh, and did I say mulch? Yes, this makes a huge difference in the evaporation rate of water through the soil surface. There are many kinds of mulch. Read about them here.

4. Plant some of your smaller herbs and veggies in pots and containers. When a pot is close to the house, it is easy to remember to water and you can use the left over water from the sink, or the shower.  I have had great success with herbs, carrots, lettuce, and peppers in containers. You can use self watering containers that let you go away for weeks at a time without worrying about your plants drying out.

A good harvest in a small place, with very little water.

A good harvest in a small place, with very little water.

5. Drip irrigation is the easiest and uses the least water of any method of irrigation. Done well, it puts the right amount of water directly to the roots of the plants and has the least evaporation rates. Check out the book by Robert Kourik on Drip Irrigation. It’s great. Combine drip with a water controller and weather station and you will be golden for putting the right amount of water on at the right time. Many water districts give rebates on these controllers.

There are other ways to gather, store and conserve water in the garden. These are five easy ways to start. Don’t worry, I’ll talk about more ways to save water in future blogs. Right now, it’s important to get started from the ground up, so to speak.

the water at the top drips down to the plants at the bottom.  Great use of space and water.

The water at the top drips down to the plants at the bottom. Great use of space and water.

Edible landscaping

Enter the Edible Landscape using a PATH.

Jan 292015
 

Red Poppies

by Avis Licht

The historic drought we are having in California has us thinking deeply about how to use less water in our daily lives, including, or maybe, especially in our gardens.  My passion in the garden is growing food beautifully.  Many of my clients and friends have said they won’t be putting in a vegetable garden due to the drought.  But this is not necessarily the best or only way to reduce our water uses.  Last summer, I was tempted to reduce the size of my veggie garden, but couldn’t bring myself not to plant it.  By careful observation of weather and soil conditions, and excellent use of drip irrigation, I managed to reduce my water use by 30 percent and INCREASE my yield. It’s all about paying attention.

Here are five easy to follow and powerful methods for reducing water use:

1. Soil: Incorporate compost and or manure into your soil and then mulch it.

The more humus you have in your soil, the better water and air retention you have – the healthier your plants will be and you will use LESS water! Read this post to learn more about compost. Here’s information on mulching.

Worms make beautiful, healthy soil

A little kitchen leftovers, a few worms, a small box, and voila – beautiful soil.

2. Sun: Put the right plant in the right place.

This may sound obvious, but many people do not actually notice the path of the sun in different seasons. Put sun loving plants in full sun, and partial sun plants in protected areas.  By watching where the sun is and where shadows fall in different seasons you will find that you are much better prepared in properly plant placement.  In the winter the sun is much lower in the sky than in summer and will cast different shadows.

lavender in the Edible landscape

Lavender

3. Wind: Wind causes plants to transpire more water.

The windier the day, the more water the plants use.  Consider different methods of wind protection including: fences, hedges, buildings, and row covers.

row covers

Row covers protect from wind, frost, sunburn and even insect damage

4.Drip Irrigation: The right irrigation system will make a huge difference in the amount of water used.

Drip irrigation needs to be done correctly to keep the plants healthy.  You need to divide your garden into different zones, so that plants with similar needs are together. Of course, you will then have to set the timer for the right amount of time for the water you need. And yes, this will take some time to figure out.  There seems to be no end to the information necessary to make good choices. Robert Kourik has written a wonderful book on best drip irrigation practices. You can buy it straight from the author.

Drip irrigation, raised beds and intensive planting

Growing food in well prepared beds, with drip irrigation and intensive planting use water wisely

5. Smart Controllers: Weather controlled irrigation timers automatically adjust for temperature and rain.

Not everyone can get a smart controller, but if you live in drought areas, you might really want to think about getting one of these. Some controllers operate from a site based weather station that comes with the timer or from a satellite feed. They read the temperature, the rain fall and automatically adjust the watering amounts.  You need to program your controller by hand for the optimum water needs of each station, then the timer can adjust the times.

This Hunter is what I use most often for my clients.  It is easy to set up and very reliable:

These are the easiest and most effective ways to start saving water and keep your garden healthy and strong.  Of course, there are many more parts to keeping the garden growing sustainably that I’ll talk about in future articles, including the pros and cons of rain water catchment, grey water and container planting.

Stay tuned and keep coming back for more.

May 082014
 

by Avis Licht

Herbs in Containers

Herbs in Containers

Many people have told me they don’t plan on putting in a vegetable garden this year because of drought conditions and wanting to save water. But I tell them, YES! To save water you should plant your own vegetable garden.  Sometimes we confuse water we save at home with water that needs to be saved state wide. A large scale farm uses much more water to grow, harvest, wash and transport to market the vegetable and fruit that you could grow at home using a fraction of that water.

We just need to grow smart.

Here are my top five favorite and easy tips to save water in your garden, and still have a productive and beautiful yard.

1. Use containers and pots for growing herbs and small veggies. You can control the amount of water they use easily. You can use water from the sink or shower that you collect while waiting for it to warm up.

Bok choy in container

Bok choy in container

2. Use raised beds and interplant with a variety of vegetables to make best use of all the area. An example would be broccoli, lettuce and radish. By the time you harvest the radish and lettuce, the broccoli will be big and cover the whole bed.

Interplant fast and slow growing vegetables together.

Interplant fast and slow growing vegetables together.

3. Use drip irrigation. Put water to the roots and not the air. 

Use drip irrigation

Use drip irrigation

4. Mulch the soil to preserve moisture and keep it from getting compacted.

Young plants benefit from compost

Mulching keeps the yard looking good and provides a healthy environment

5. Use a moisture meter, or at the very least, use a trowel to check the moisture of your soil. Just because the soil is dry on top, doesn’t mean it is dry down below. Be sure to check before you irrigate.

To buy this moisture meter go to my store:


moisture meter

Best tool ever. This will save you time, water and money.

Jan 292014
 

By Avis Licht

Mulch

Use mulch, plant drought resistant plants, and drip irrigation

On the west coast of the United States we’re experiencing the worst drought in over 150 years. With more people needing more water, food and goods it is important that all of us do our part to reduce our water use.

Gardeners love their plants and don’t want them to die. I’ll continue writing posts on best gardening practices to help you keep your garden healthy and happy using less water.

Most plants absorb almost all their water through their roots. A well-developed root structure will be your insurance for survival in drought conditions.


The best way to get excellent roots is to have loose, friable soil with plenty of humus and organic matter. By working the soil with a fork or rototiller and incorporating compost and/or manure you create the conditions for the soil to be like a sponge that holds and then releases water. Read more about compost here.

Big Mother earth worm

Worms are important for soil health.

A note on roots. When soil moisture varies widely from wet to dry it damages the delicate root hairs that are responsible for taking up moisture. Using mulch is very important to maintain the moisture in the soil by slowing evaporation.

mulched garden

Protect your roots by protecting the soil with mulch.

A note on leaves on the plants. Leaves don’t absorb much moisture but they do transpire moisture; The hotter and more windy the day, the more water the plants lose through their leaves . Row covers or shade cloth put over the plants in hot weather will reduce transpiration rates. You can find row covers and hoops to put them in your garden at this link: Row Covers for the Garden. You can buy shade fabric here: Shade Fabric.

Be sure to sign up on my subscription or feed burner to get notified when I put up more posts. You won’t want to miss any of this great information. I’ll keep writing about drought conditions and ways to keep your garden healthy and happy.

Jan 162014
 

by Avis Licht

Mulch

Good soil preparation and mulching are essential for holding moisture in the soil

In Northern California we’re experiencing a record breaking drought this winter. The rainy season isn’t over – yet, but there is no rain forecast for the rest of January, and reservoirs and streams are very low.

There are a few simple and easy steps you can take to prepare your garden for  drought conditions. And you should start as soon as possible.

1. Cover your exposed soil with mulch or compost. By covering your soil, you allow rain, when and if it comes, to penetrate into the soil and not run off.  There are many kinds of mulch for different conditions.  Please read this post to find out more about which mulch is the right one for your garden.


Sheet mulching is an excellent method to turn water hungry lawn into efficient, beautiful and water conserving plantings.  Please read my description of sheet mulching here.


Sheet mulching

Layers for sheet mulching


2. Check your irrigation system for leaks. Every year your system needs to be checked.  Digging in the beds, gophers, raccoons, plants, freezing weather: all can break or loosen your irrigation pipes and cause leaks.  Those leaks can lose LOTS of water.  Please read this great article by Robert Kourik – drip irrigation expert.

Lettuce planted for winter harvest

In line emitter irrigation pipe


3. Container planting produces great crops with very little water. You might want to consider planting in pots and containers for certain crops. You can control water use easily and get your food and flowers easily. Read here for more about container planting.

the water at the top drips down to the plants at the bottom.  Great use of space and water.

The water at the top drips down to the plants at the bottom. Great use of space and water.

A good harvest in a small place, with very little water.

A good harvest in a small place, with very little water.

Ornamental containers can grow herbs and food.

Colorful pots mixed with herbs, lettuce and flowers are easy to harvest


4.Convert high water use plants to native plants. There are many beautiful native plants that can serve the same purpose as your water hungry plants. Winter is a good time to do that planting. Here are a few ideas for native plants in this post: California Native Plants

Manzanita and Ceanothus are easy to grow and use very little water

Manzanita and Ceanothus are easy to grow and use very little water

Jun 122013
 

by Avis Licht

Mixed herbs in the landcape

Mixed herbs in the landcape

In the garden my plants are bursting with happiness from the latest rains after some very warm days.  In northern California we rarely get rain in June, and when we do, it’s cause for celebration.  Irrigation from the municipal water that is treated with chemicals, is not the same as rain and the plants truly respond to the difference.  Read about nitrogen and rain in this post.

Father’s Day is coming up soon.  Be sure your favorite Dad has the tools he needs for his garden. Great Garden Tools

A few easy and useful tips for keeping your summer garden growing well:

1.Check your irrigation system for leaks and make sure all the plants are getting watered.  With overhead sprinklers plants can get missed by interfering foliage.  With drips, you need to check that they are working, haven’t popped off and that there are enough for your plants. Drip is good at conserving water, but you still need to check for moisture  around your plants.

I recommend Robert Kourik’s book on drip irrigation. He is the expert and as we say, wrote the book on it.  Read about it here. 

Here is the place to get drip irrigation at excellent prices: Drip Irrigation Products

2. Mulch your plants to keep the soil from compacting, to preserve moisture and reduce weeds.  Read this post about different types of mulch. I talk about how to pick the right mulch for your garden.

3. Keep Your Eyes Open.  By this I mean, walk around the garden regularly and look at the plants, the soil, and the birds and the bees. By noticing changes in your plants early you can rectify things. For example,  if they are being eaten by bugs, snails or birds, if they’re wilting due to lack of water, sun or even too much moisture, or just not thriving, you will be able to keep the garden healthy before it is too  late. Doing this one thing can be the difference be success and not so much success.

4. Enjoy your garden.  Take the time to sit back with a cup of your favorite beverage and enjoy the fruits of your labor.  I’ve placed chairs in various places around the garden so that there’s always the right place to sit no matter what time of day it is.

A  quiet shady place to read

A quiet shady place to read or perhaps catch a few winks

Jun 062012
 
rolling self watering planters


tomato in self watering container

Plants thrive with good moisture in planters


by Avis Licht – When I gave a talk recently on edible landscaping, many people had questions about container planting.  For gardeners with decks, small gardens, or special climate conditions, containers are a simple and easy solution.  However, there are a few tips for helping you grow your plants more successfully. People don’t realize how fast pots dry out and how hard it is to get them moist again.  Once soil has dried out, if you water the pot with a hose, it just runs on through.

Keeping your soil moist is a trick that requires some practice.  Using drip irrigation in your pots, for 3 or 4 minutes 2  or 3 times a day often works.  If you don’t have your pots on an irrigation system try these self watering planters.  They really work!

1. Make sure there’s enough room in the container for root growth of your plants. 

Here are some suggestions for what plants to grow in different size pots.

  •   6″ depth is the minimum – chives, lettuce, radishes, other salad greens, basil, coriander, Asian greens, mint, thyme
  •    12″ for larger veggies – pole beans, carrots, chard, cucumber, eggplant, fennel, leeks, peppers, spinach, parsley, rosemary,beets, broccoli, okra, potatoes, sweet corn, summer squash, dill, lemongrass, bush beans, garlic, kohlrabi, onions,  peas,
  • 18″ -24″  for miniature trees like lemons or limes.
organic tomato fertilizer

From your local nursery or online, find organic fertilizers

2. Use the right soil mix. For self watering planters I suggest you use the mix from Gardener’s Supply formulated just for that.  You’ll need to add nutrition in the form of compost, aged manure, blood meal and other organic fertilizers. The plants rely on you 100% for their nutrition. Be sure to feed them.  Read up on what your plants need and add it to the potting soil. Using foliar feeding or a liquid fertilizer like seaweed solution works well.Don’t just put soil from the garden into your pots.  It will be too heavy and dry out easily.


3. Place the planters where they will get the best light and be protected from wind or blasting hot sun. Gardener’s Supply even has self watering planters that have castors on them so you can move them around to catch the changing light and heat conditions.

rolling self watering planters

Pots can look good and be easy to move

May 242012
 
June in the Northern California Garden

Water, feed and stake up your plants before they fall over.

by Avis Licht

With the warm sun on our backs we can heave a sigh of relief that the winter is over. The Summer Solstice is the longest day of the year and we can expect some spectacular days ahead of us.

Your plants will be growing fast now. Irrigation coupled with warm weather can produce excess growth that is attractive to unwanted critters, like snails and slugs.


• IRRIGATION

In many places early summer is the time to start some serious watering in the garden. If you’re lucky to have summer rains, be sure to check the soil for moisture.  Windy days and hot sun can really take the moisture out of the plants and the soil.

I still recommend checking your soil with a trowel to be sure it is neither too dry nor too wet. Just looking at the surface, does NOT tell you what ‘s going on underneath.

For those of you who would like to learn more about putting in an excellent irrigation system I recommend Robert Kourik’s book, Drip Irrigation for Every Landscape and All Climates. You can find this book and others he has written on his website:

www.Robert-Kourik.com

• CRITTER CONTROL

Snails and slugs are in abundance due to all the moisture and spring growth. Controlling these guys organically can be tricky. They come out at night when it’s cool and moist. You can go out with a flashlight and see exactly who’s doing what to whom. At this point you can hand pick them off the plants. (This is not the most frequently chosen method around these parts.) You can also collect your eggshells in a can, and then crumble them around your plants. The snails don’t like the sharp edges of the shells and won’t crawl over them. You can also use Slug Magic, a product found in nurseries that has the main ingredient of Iron Phosphate which kills them. This is considered a safe and organic method of getting rid of snails and slugs. You can find this from Gardener’s Supply.

gopher trap

Effective and safe for handling. It will kill your gopher quickly

Another pesky critter is the gopher. You will notice their presence by raised mounds of soil. Gophers tunnel underground and push the soil up. They can and will eat roots and stems, killing your plants quickly and easily. I’ve had entire broccoli plants pulled under into the tunnels. Traps, either metal or wood can be set into the tunnels. It means digging into the soil and putting a trap facing in both directions of the tunnel. Only those not afraid of pulling out a dead gopher should try this. this trap is called a Victor Box trap.  You can get it through Amazon.

A preventive measure is to put mesh wire, called hardware clothe, in the soil. It can go under a bed of vegetables or in the hole where you are putting a bush or shrub. This is an initial investment of time and money, but lasts for years and protects your plants.

Of course, there are many more pesky critters, but to keep this post short and readable, I’ll save them for another day. Stay tuned for how to cope with aphids, deer, raccoons and more.
•TIP OF THE DAY

A wilting plant may be just that, not because the soil dry but because a mole or gopher may have tunneled near the roots and exposed them to the air, which dries the plant. Check for these critters and fill the holes around the roots.

Be sure to add fresh mulch to the garden. This will preserve moisture and help the soil. It will help keep your plants happy and healthy.

Edible Patio

The edible landscape is ready for summer entertaining


Jan 262012
 
Strawberry

by Avis Licht

Strawberry

Who can resist a ripe strawberry?

I recently wrote about fruits that you can grow in small yards. At the top of the list was strawberries. Here are some easy tips to get the best fruit from your plants.

There are many varieties of strawberries. June bearing produce one large crop a year in late spring or early summer. Pick the varieties best suited to your climate. Everbearing strawberries have smaller crops in early summer and fall. Day neutral bear intermittently through the summer.  Since you’re planting for your own use I think it’s best to have several varieties that bear throughout the whole growing season.

CLIMATE

You can find a strawberry for almost any climate. In very hot areas they should have mid day shade. Plants won’t flower over 85 deg F/29 deg C. If you live in extremely cold climates there is even a strawberry that can grow in -30 deg F/-24 deg C without mulch. During blossoming the weather shouldn’t go below 30 deg. F.

Everbearing strawberry

White flowering, red fruiting, beautiful in the edible landscape

SOIL

Topsoil of turf/loam amended with compost and well rotted manure is best.  Be sure not to get the manure near the crown of the plant.  Dress the bed with bone meal and wood ash. It should be well drained and slightly acidic.

WATER

Water the bed when the soil starts to dry out.  Keep the soil moist, but not over wet. When the berries start to ripen cut the watering in half.  Stop watering when they are ripe. If you give strawberries too much water they will get big, but not taste as sweet. Drip irrigation is best to avoid disease problems and fruit rot.

SITE

Full sun for standard strawberries and partial shade for alpine strawberries.

PLANTING

Dig a bed that is loose and friable with good drainage.  Make a hole for your plant and mound the center. Lay the roots around the pyramid of dirt in the hole.  Be sure to keep the crown above soil level or the plant will rot. Water your plant in well. Mulch to keep moisture in. I don’t recommend straw as a mulch because it will promote mildew and be a home for insects.

Description on strawberry planting

Spread their roots and keep the crown above soil level

HARVEST

Wait until the fruit is very red and harvest with the stem. Don’t wash the fruit until you’re ready to eat it.  Homegrown strawberries are like a completely different species than what you will find in the store.  Because you can harvest them ripe and eat them right away.  They will not last long off the plant.

Strawberry fields forever

Strawberries planted in the edible landscape


Store


GREAT GRAPHIC DESIGNER!: Stacy Hsu a wonderful graphic artist, designed the header to my blog. Be sure to visit her site to see more of her work. StacyHsu. com

GREAT CATALOGS:
For seeds, plants, tools, and  supplies:

GREAT BOOKS: How to and Reference Books:

Edible Landscaping BooksDesigning and Maintaining Your Edible Landscape Naturally, by Robert Kourik
Drip Irrigation for Every Landscape and All Climates, by Robert Kourik
The Complete Book of Edible Landscaping, by Rosalind Creasy
Performance in the Garden, by Alan Chadwick
Sunset Western Garden Book, by the Editors of Sunset Gardening Magazine
Topsoil and Civilization, by Vernon Gill Carter and Tom Dale
Plowman’s Folly, by Edward Faulkner
Growing California Native Plants, by Marjorie Schmidt
Rainwater Harvesting for Drylands, Vol. 1
Rainwater Harvesting for Drylands, Vol. 2

INSPIRATIONAL GARDENING BOOKS:

            • Gardening at the Dragon’s Gate by Wendy Johnson
            • Green Thoughts by Eleanor Perenyi
Feb 152012


by Avis Licht

Wire fencing covered with bird netting

To completely protect plants, cover with bird netting


We love the birds in our garden, but we don’t love how they eat the young seedlings. Here is the best way I’ve found to keep the little rascals from wrecking your garden.

1. Plant the seedlings, like lettuce, beets or broccoli in a raised bed. When you plant intensively in a bed it is easier to protect more plants than if they are in single rows.

2. Place wire  fencing over the bed in a hoop like fashion.  You can also use heavy gauge wire, flexible plastic tubing or bender board.


Hoop shape over bed with netting

Keep your netting off the plants to allow room for growing

3. Pin the edges down with wire staples that are used for holding down irrigation tubing.

4. Lay bird netting over the wire. Pin it down carefully along the edge of the bed.  If you leave any openings the birds will sneak in.

Seedlings under protection


One little thing. You need to be sure that it’s birds eating your seedlings and not some other pests, like snails or slugs. Bird netting will NOT keep the snails out. A bird will bite the plant and leave a v shaped mark like this > .  Snails and slugs eat both the edges and the middle of the leaf in curves.

snail damage to leaf

Snails and slugs will chew the edges and center of a leaf


Jan 032012
 
Deer fence with copper sculpture

by Avis Licht

Deer fence with copper sculpture

A front yard fence that is beautiful and functional

Yesterday I talked about the steps involved in making a landscape plan.  Today I want to share with you a small front yard garden that used those guidelines.

The first parameters you need to look at are your climate, sun/shade, slope, access, existing structures and plantings.  Don’t forget that the sun moves not only east and west, but north and south. The sun is high in the sky in summer and low on the horizon in winter.  Be sure to locate north and watch the sun/shade patterns in your garden over time.  You will be amazed how little sun you have in the winter compared to summer if you have any tall trees or structures.

Path divides garden into shade and sun microclimate

The path divides the garden into edibles and ornamentals based on the sun

In the photo above you can see a 2 story house that creates a lot of shade on the garden. The garden is on the north side of the house.  This means that in winter almost the entire garden is in shade.  In summer the garden has plenty of sun from the path to the fence. Using this information, I created vegetable beds in the sunny part of the garden for Spring to Fall crops.  The beds closest to the house are landscaped with shade loving ornamental shrubs and flowers.

Raised stone bed and bird bath

Using beds with stone to create form and structure keeps the garden looking good all year

The yard is curved to use as much of the available ground the gets sun in the early Spring.  The fence is 6 feet high and keeps the deer out.  The fence is also used to grow climbing vegetables such as peas, beans, cucumbers and tomatoes. Because it is on the north side of the garden it doesn’t shade the other beds.

Once you’ve determined your site functions, based on climate and position, it’s time to start looking at your desires and finances. In this case the owner was a single person with a limited income as a teacher, but who hopes to live here the rest of her life and wanted to make it a special place to come home to every day.  She wanted something beautiful as well as functional.   The vegetable garden is big enough to supply plenty of veggies for her and her rabbits, as well as strawberries, blueberries and apple and pear trees. Once the garden was installed, it is easy to maintain.  The initial investment will pay off many times over in the joy of coming home to a beautiful garden, in addition to the healthy food.

I always recommend that my clients balance their desires, with their budget and their long term goals. If you plan on living in your home for a long time, it is worth spending more money on a strong and safe infrastructure like paths, fences and retaining walls. If you think you may be leaving soon, or are a renter, consider simple beds, containers and annual plantings.

Baby lettuce in raised bed

Vegetables in the raised bed

The raised bed has several functions.  Not only is it a beautiful form that looks good in all seasons, it is strong enough for the owner to sit on while gardening.  For someone with a bad back  this allows for  much easier access to the beds.  We lined the bottom of the bed with hardware cloth, which is a 1/2 inch wire mesh that keeps the gophers out of the bed, which were a huge problem. We also brought in some excellent organic topsoil to fill the raised beds, which produced a wonderful, bountiful harvest.

In considering the “sustainability” factor, we looked at two levels of sustainability.  On a personal level, the garden had to be small enough that she could maintain it in an ongoing basis and that she could afford it. We definitely feel that we accomplished that goal.

On the north side of the house: shade loving plants

Observe your site and put the right plant in the right place

On a “global” level we kept the materials as simple as possible.  The paths are permeable, and covered with old sheets and towels that keep the weeds down, but eventually decompose.  They are covered with free chips from the local tree service.  The beds are built with locally sourced stone.  The irrigation is drip, using a controller that is connected to a local weather station that determines how much to irrigate based on evapotranspiration rates.  And finally, we installed a 2,000 gallon rain water harvesting tank, that stores winter rain from her roof runoff.  This water can be used as back up in times of drought or for fire  safety. In California we are faced with drought, fire and earthquakes.

There’s a lot of information in this post, but it will give you some ideas that you can use in your own garden.  Take time, don’t rush it. The more observation you do in your garden at the front end, the less changes you’ll have to make at the back end.  Your edible landscape is worth the effort.

A welcoming entry into the garden

Copper gate invites you into the garden


© 2011-2024 Edible Landscaping Made Easy With Avis Licht All Rights Reserved